Meta Humans
How to Create MetaHuman DNA Expressions from Scratch with Mesh Morpher Graph and Studio
By Admin ·
Every expression a MetaHuman face can make is a raw control in its DNA - CTRL_expressions.jawOpen, CTRL_expressions.browRaiseIn_L and a few hundred more - driven by a slider on the face board and driving, in turn, joints, blendshapes and animated maps. Editing those is one thing. Adding one that Epic never shipped is another, and it is what the video does: a brand-new CTRL_expressions.ElfEars, sculpted by hand, written into the DNA, given a slider and posed alongside the stock controls. It runs in Mesh Morpher Graph inside Unreal Engine; every node here exists in Mesh Morpher Studio as well.
What we need
- Mesh Morpher Graph inside the Unreal Editor, or Mesh Morpher Studio on its own
- A MetaHuman head DNA - read out of the face skeletal mesh in Graph, or from a .dna file in Studio
- A name for the new expression. Keep the
CTRL_expressions.prefix so it sits with the rest of the family
Load the DNA and get a mesh to sculpt
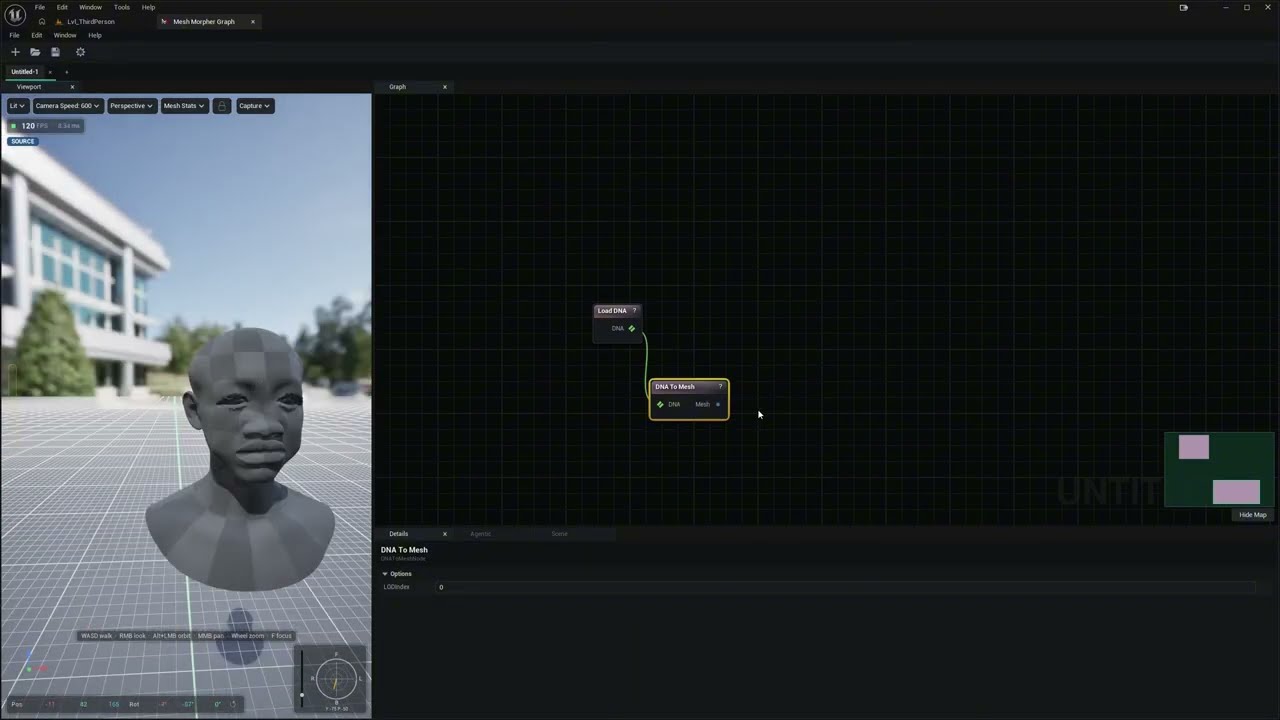
Start with Load DNA pointed at the face skeletal mesh (in Studio, Load DNA File), then DNA To Mesh at LOD 0. That gives you the head in its neutral shape, carrying the DNA's own skeleton and skin weights. Everything below is measured against this mesh, so it stays wired in as the reference for the whole graph.
Add the expression
A DNA does not accept a blendshape or a slider for a control it has never heard of, so the raw control comes first. Edit DNA Expression takes an ordered list of operations; one Add entry with the new name is all this needs. By default the Add also creates a GUI control of the same name with an identity mapping - slider at 0 means the control at 0, slider at 1 means the control at 1 - so the face board learns about the expression in the same step. Press Apply Expressions. The batch is atomic: if anything in it is refused, nothing is written, so you never end up with a half-registered control.
Sculpt the shape
Wire the DNA To Mesh output into Sculpt Mesh, and wire the same unsculpted mesh into Original, its rest-pose input, as well. Select the node, pick a brush, and pull the ears out to points in the viewport; that second input is what the Restore brush paints back toward, and what the node's Delta output is measured against. Press Accept when the shape is right.
One rule governs everything that follows: sculpt on this mesh, never on a retopologised or decimated copy. The DNA identifies vertices by index, so the sculpted mesh has to keep the exact vertex count and order of the mesh DNA To Mesh produced, at the same LOD.
Write it into the DNA
The sculpt becomes a blendshape through Set DNA Blendshape: the unsculpted mesh goes into Mesh, the sculpted one into Target, and whatever moved between the two becomes the shape. For a name the DNA does not have yet, turn on Create Missing Channel, and the node adds the blendshape channel itself; Apply To LODs projects the shape down the LOD chain so the ears do not vanish when the character is far from the camera.
A channel created this way sits inert - it has a shape but nothing drives it. Edit DNA Blendshape Channel closes that gap with a Wire Expression entry naming the channel and the raw control you added. You can equally do it the other way round, adding and wiring the channel in Edit DNA Blendshape Channel first and filling it with Set DNA Blendshape afterwards; the graph in the video runs the channel editing ahead of the writes.
If the expression should move bones too
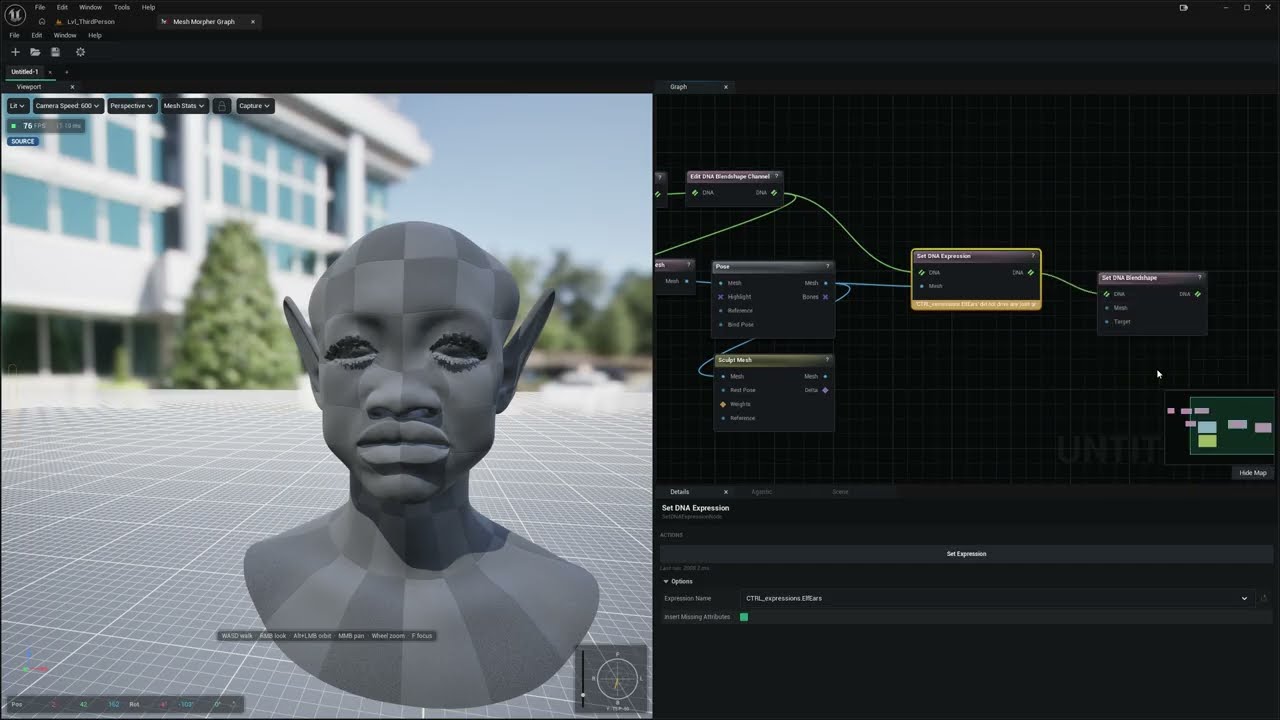
Blendshapes move vertices; joints move whatever is skinned to them, which is what you want for a shape that has to survive animation on top of it. Pose opens the skeleton in the viewport - rotate the ear joints to where the expression should put them - and Set DNA Expression records the result as per-joint deltas under the expression you pick. For a control that drives no joint group yet, the node creates its input column in the joint groups that hold the joints you posed, and says so in its report; that is the yellow line under the node in the video, and it is information rather than an error. Leave Insert Missing Attributes on so a rotation on an axis the expression was not already using gets recorded instead of silently dropped.
Give it a slider
If you let Edit DNA Expression create the GUI control, the slider already exists. Edit DNA GUI Control is where you shape it: an Edit Rows entry loads the control's current mapping rows from the DNA, each one a [From, To] interval and a Slope and Cut, the same line RigLogic evaluates. Widen the interval to make the slider go both ways, lower the slope to soften it, or add a second row so one slider drives two raw controls. Apply GUI Control commits the batch, atomically again.
Test it before you export
Wire the finished DNA into Pose DNA Controls and open its board in the details panel. The new slider is there with the stock ones; move it and the ears grow through the DNA's own RigLogic evaluation, blendshape and joints together. Because it is a real control now, it combines with everything else - in the video the mouth opens on the same head with the ears at full strength - and Pose Summary lists exactly what moved.
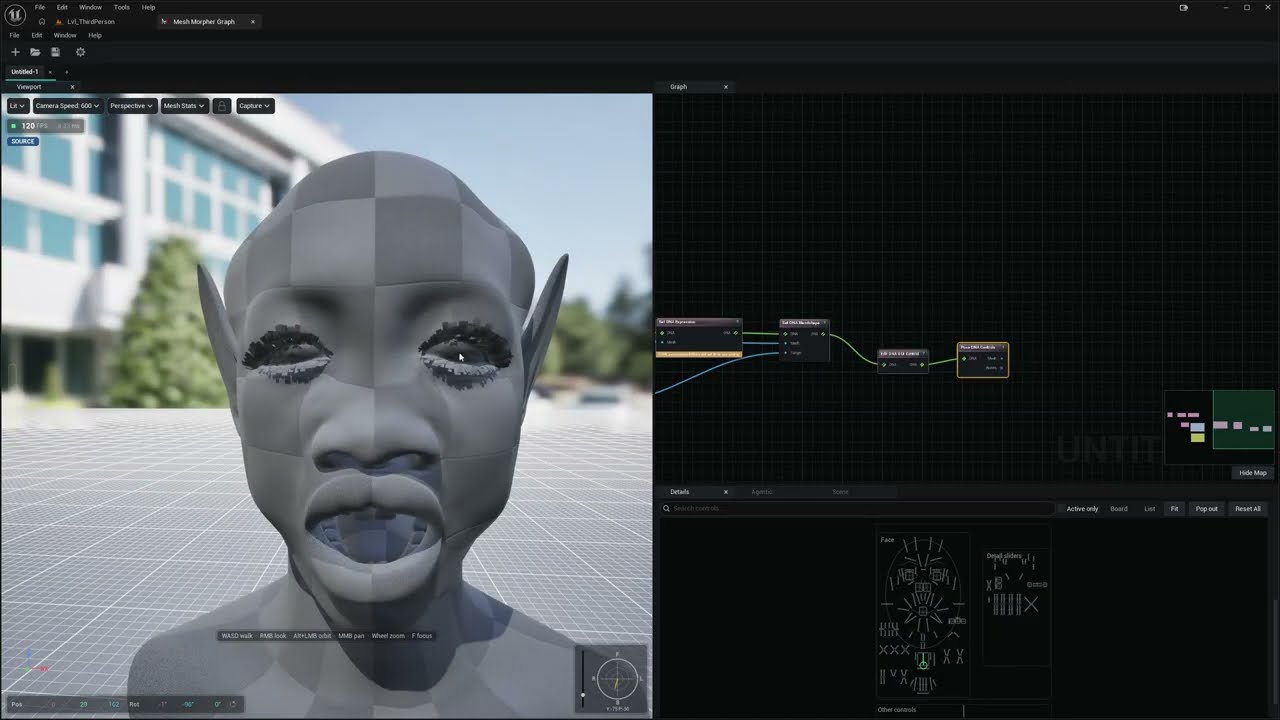
Run Validate DNA once it looks right; a DNA that accepted every write can still be structurally wrong in ways only the validator names. Then get it out the same way as any other DNA: Write DNA for a .dna file, or in Graph Set DNA On Skeletal Mesh to put it back on the face asset, or Export DNA To Skeletal Mesh for a fresh one.
Practical tips
- Same mesh, same LOD, same vertex order. Every DNA write pairs your mesh with the DNA's own by index. Sculpt on DNA To Mesh at LOD 0 and let Apply To LODs handle the rest.
- Register the control first. Blendshape channels and GUI rows point at raw controls by name; add the expression before anything that refers to it, or the batch that refers to it is refused.
- Read the reports. Each authoring node preflights its batch and explains a refusal. A batch that publishes nothing did so on purpose.
- Keep skinning settings consistent. If you read a shape with dual quaternion skinning, write it back the same way, or the delta is measured against a different baseline.
- Prefix new controls with
CTRL_expressions.so tools that filter the family - and anyone reading the DNA after you - find them where they expect.
Conclusion
An expression from scratch is five nodes: Edit DNA Expression to register the control, Sculpt Mesh for the shape, Set DNA Blendshape and Edit DNA Blendshape Channel to store and wire it, Edit DNA GUI Control for the slider - plus Set DNA Expression when joints should move too. Pose DNA Controls proves it works, Validate DNA proves it is sound, and Write DNA or an export puts it in the pipeline. All of it runs in Mesh Morpher Graph inside Unreal Engine and in the standalone Mesh Morpher Studio app.
Related reading: modifying MetaHuman RBF poses, merging MetaHuman body and head DNA, and modifying DNA bone expressions in Mesh Morpher Classic.
#metahuman#dna#expressions#blendshapes#graph#studio#tutorial#unreal-engine
Related posts
- How to Edit MetaHuman DNA PSDs to Fix a Mix of Expressions
- How to Merge MetaHuman Body and Head DNA with Mesh Morpher Graph and Studio
- How to Modify MetaHuman DNA RBF Poses with Mesh Morpher Classic
- How to Modify MetaHuman RBF Poses with Mesh Morpher Graph and Mesh Morpher Studio
Looking for reference material? Read the Mesh Morpher documentation or see pricing & licenses.