Animation
Delta Mush in Mesh Morpher Graph
By Admin ·
How to use Delta Mush in Unreal Engine to automatically correct Animation Sequences
Overview
Delta Mush is a powerful smoothing algorithm that helps fix undesirable mesh deformations caused by extreme joint rotations or problematic poses. When used inside Unreal Engine with a Mesh Morpher Graph workflow, Delta Mush can both correct single-frame poses and automatically generate animation-wide corrections that trigger only when needed - see the Delta Mush node and Delta Mush Animation node reference.
In this guide we walk through a practical workflow: identify a problematic pose, apply Delta Mush to produce a stable correction, create a morph target from that correction, and then automate the correction across an animation sequence so it blends in and out only where necessary.
What we need
- Unreal Engine with access to Mesh Morpher Graph
- A skeletal mesh or MetaHuman with an animation sequence that contains problematic frames
- Basic familiarity with morph targets and animation curves
Spotting the problem pose
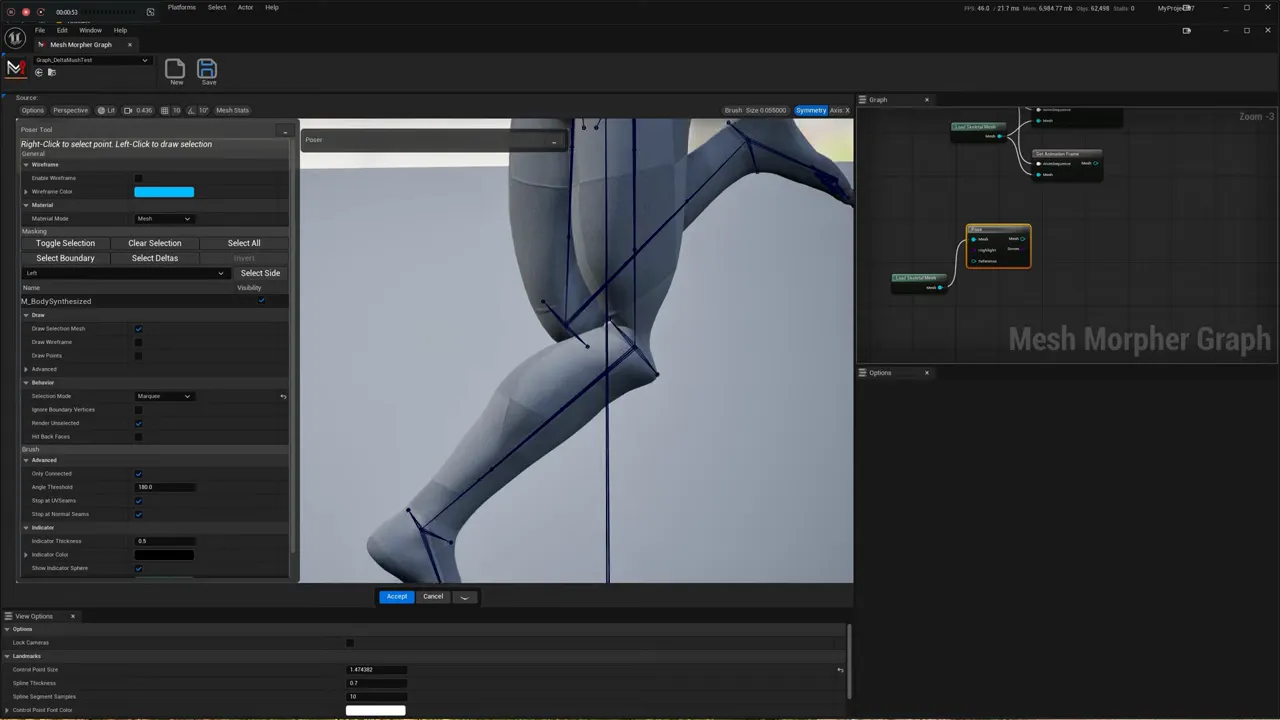
Start by locating the pose where the mesh is clearly deforming incorrectly. Common cases include knees or elbows twisting past their comfortable range, or thin surfaces like fingers collapsing when rotated aggressively.
Here we have a pose with an extreme knee rotation that causes obvious mesh distortion. The goal is to lock or smooth the knee region so the rest of the mesh remains intact.
Applying Delta Mush to a single pose
There are two typical entry points for corrections inside the Mesh Morpher Graph workflow:
- Delta Mush node — applies the smoothing algorithm directly as a node-based correction.
- Sculpt workflow — uses the original mesh and a response target to sculpt corrections with Delta Mush as part of the sculpt toolchain.
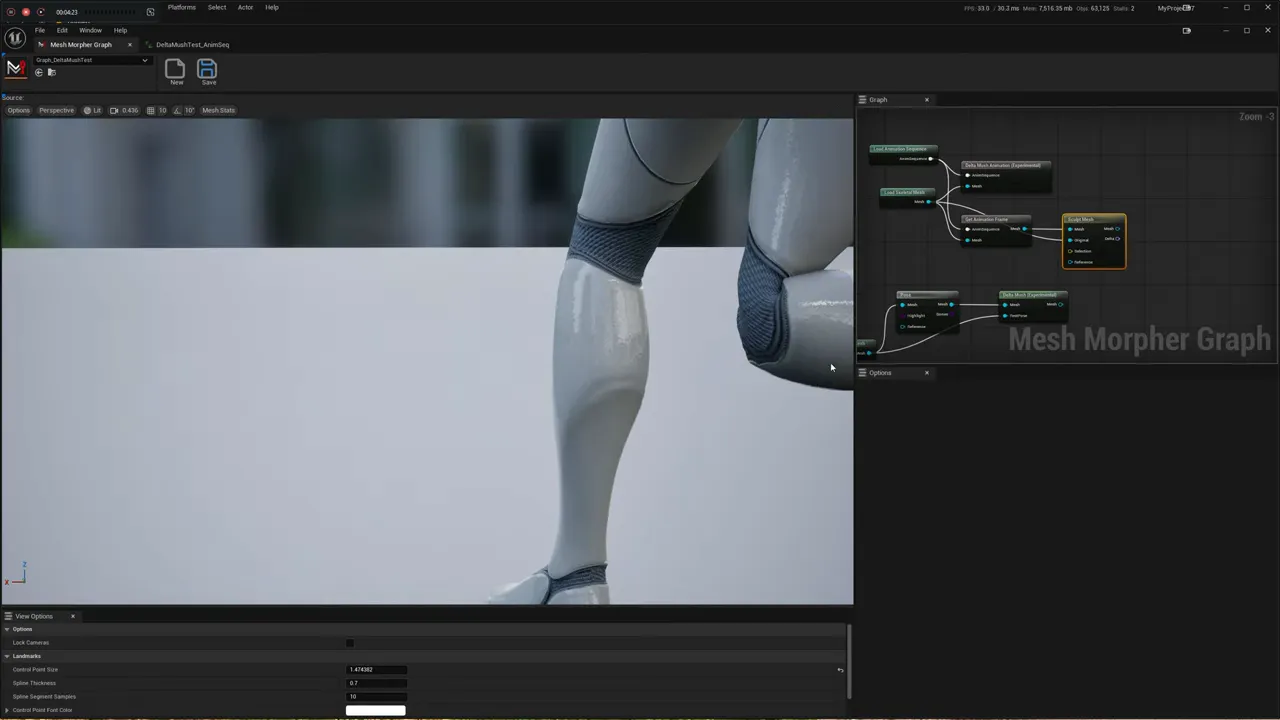
For quick experimentation we often use the default Delta Mush settings. Those defaults are intentionally aggressive for smoothing thin surfaces like fingers and flat areas such as knees and the abdomen. Tooltips for each parameter explain their effects, so we can iterate quickly to find the setting that works best for each mesh.
After supplying the necessary response/input, the algorithm will attempt to keep the knee region as stable as possible relative to the surrounding geometry. In many cases the default setup produces a strong improvement immediately.
Turning a corrected pose into a morph target
Once the pose correction looks good, we create a morph target from the corrected frame. This converts the Delta Mush correction into a reusable blendshape that can be applied manually or driven by animation curves.
Drag the corrected pose (for example, frame 27) into a morph creation workflow and choose a clear name for the target. We recommend a naming convention that includes the mesh prefix and a short descriptor so it is easily identifiable later.
The target can originate from the sculpt correction or directly from the Delta Mush node. Either approach produces a morph we can trigger at runtime or bake into animation data.
Automating corrections across an animation sequence
Manually applying morphs for every problematic frame is tedious. Instead, we can use the Delta Mush animation node to process the entire animation sequence and generate curves that drive morph targets automatically.
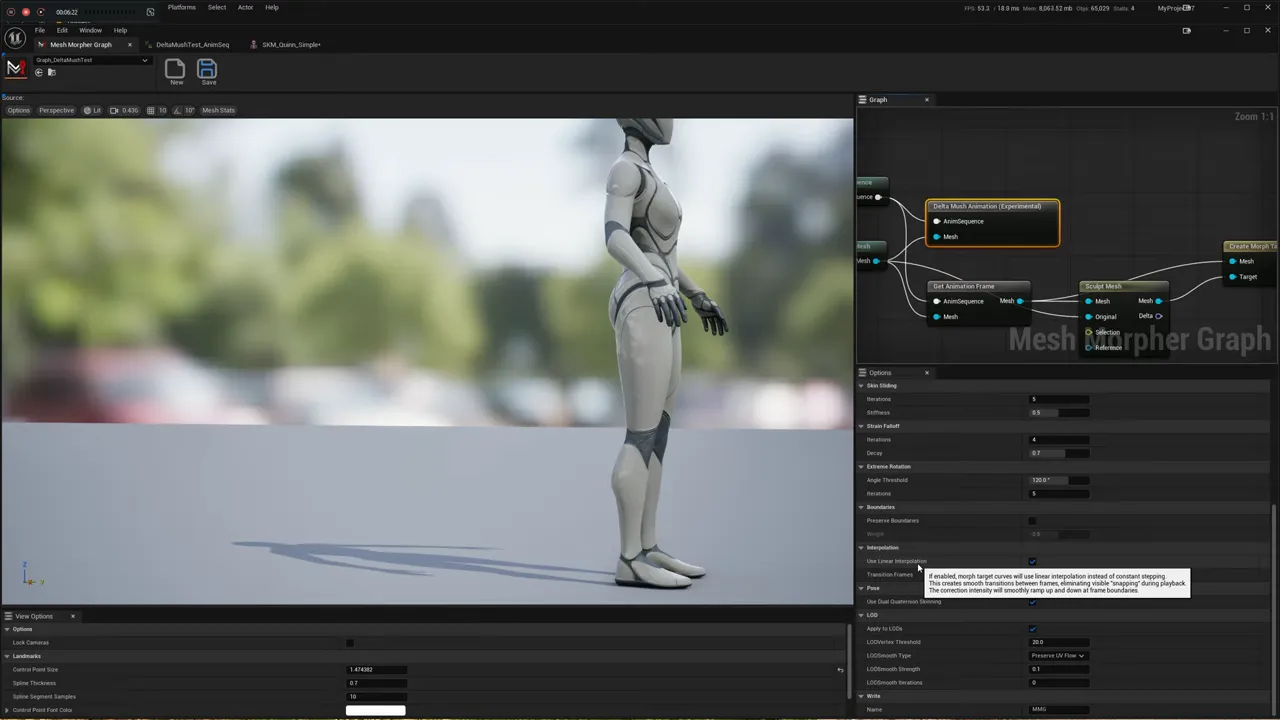
- Interpolation: Linear
- Transition frames: 1 (this yields a quick smooth in and out)
- Other parameters: left at default for initial testing
The benefit of this approach is that corrections are not forcibly applied across all frames. With a short transition, the correction smoothly blends on only for the offending poses, then fades back out as the rig returns to normal.
Verifying results and edge cases
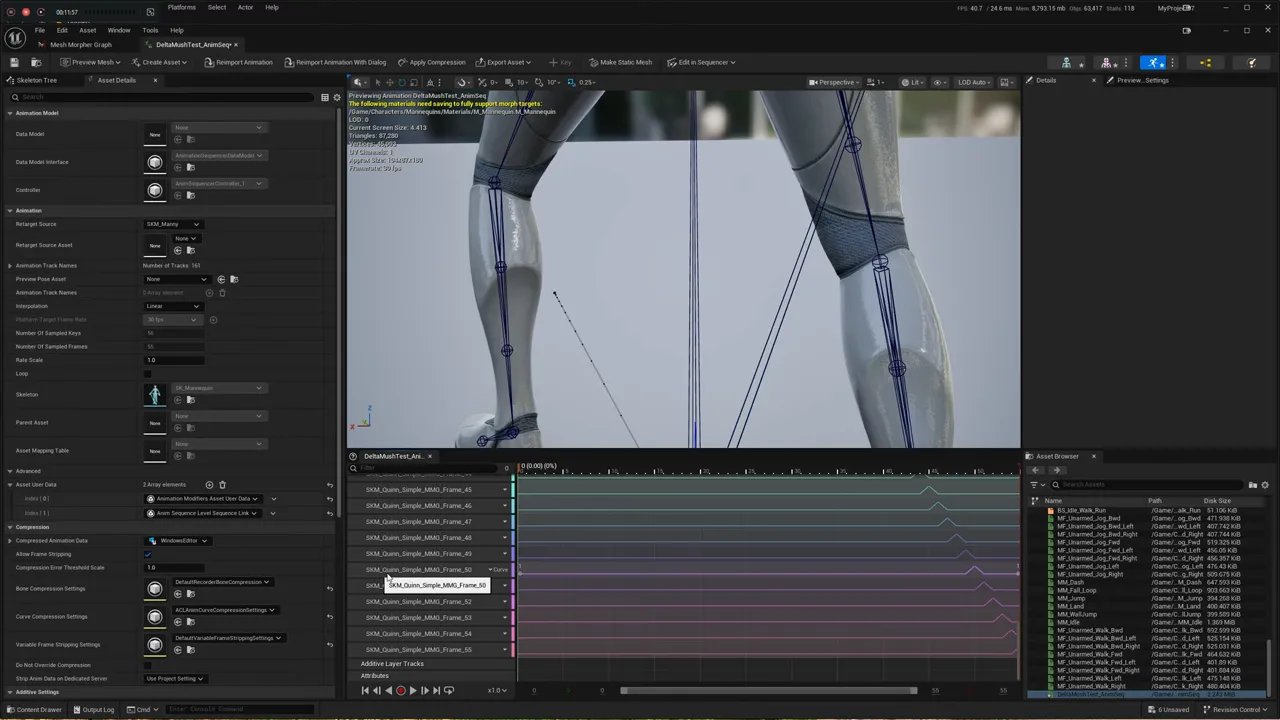
With correction curves applied, scrub through the sequence and check the former problem frames. The morph targets should trigger precisely where needed and eliminate the extreme deformation.
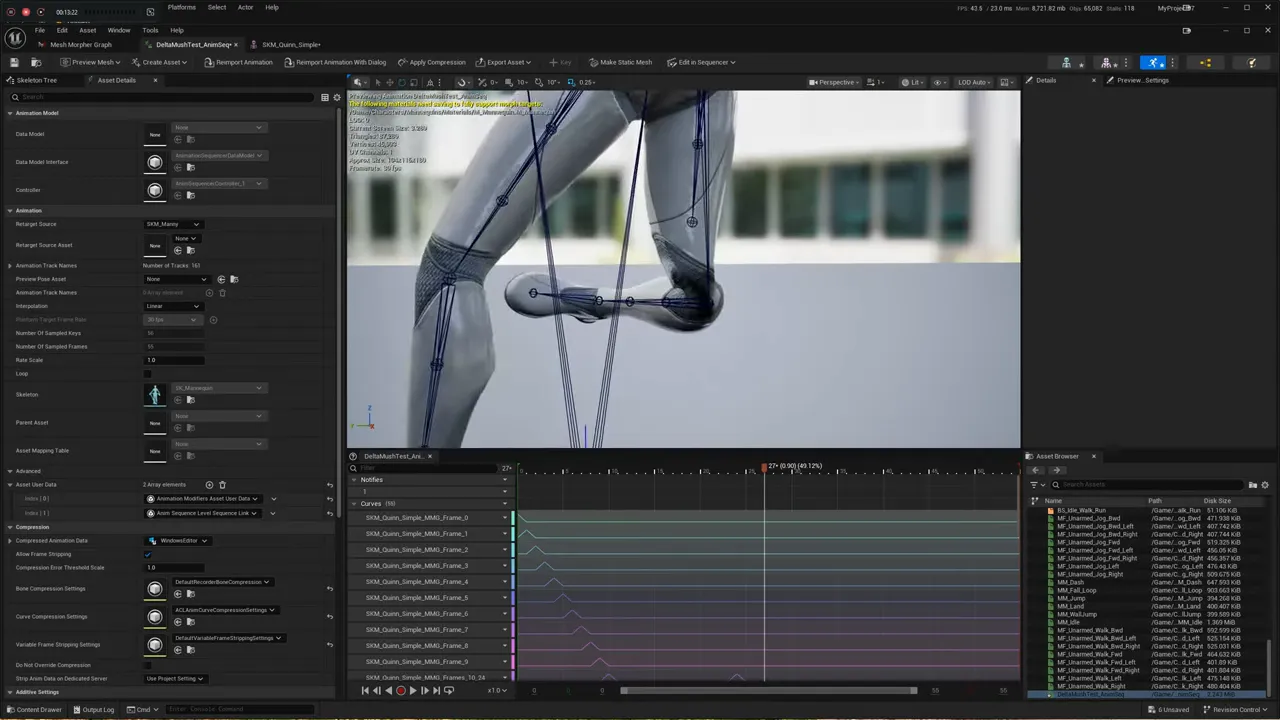
These changes are normally very small and pose-specific. Some captured corrections may be present in nearby frames as the algorithm builds a smooth transition, but overall the animation retains its original motion while avoiding the visual artifacts.
Practical tips and best practices
- Use descriptive naming for morph targets and curve prefixes, especially when multiple skeletal meshes share the same animation sequence.
- Start with defaults to see baseline behavior, then tweak smoothing strength for thin or flat surfaces. Fingers and knuckles often need different smoothing than large muscle areas.
- Inspect tooltips — parameter descriptions in the graph are useful and can prevent guesswork.
- Use sculpt mode when you want more manual control; use the node-based Delta Mush when you prefer automated, reproducible corrections.
- Test across animation ranges to ensure corrections do not introduce pops or unwanted blending artifacts.
When to choose sculpt over node and vice versa
Choose node-based Delta Mush when you want a fast, repeatable pipeline that can be applied to multiple frames and baked into curves. Choose the sculpt path when you need more artistic control over the correction or want to add additional localized fixes such as manual smoothing and sculpting on top of Delta Mush.
Conclusion
Delta Mush combined with Mesh Morpher Graph tools gives us a robust way to fix problematic deformations without compromising the original animation. By turning single-frame corrections into morph targets and automating their application across a sequence, we keep animations clean while preserving motion intent.
Try the defaults first, observe how the algorithm handles thin and flat regions, then refine parameters or switch to sculpt mode for fine control. With a short transition and clear naming, Delta Mush becomes a predictable, scalable part of our animation cleanup toolkit.
For pose-driven corrections that blend at runtime rather than baked curves, pair this with Pose Drivers; for extreme shape changes that stress the skinning in the first place, see extreme MetaHuman deformations. Delta Mush ships in Mesh Morpher Graph and the standalone Mesh Morpher Studio app.
#delta-mush#graph#animation#tutorial
Related posts
- Mesh Morpher and Pose Drivers
- How to Edit MetaHuman DNA PSDs to Fix a Mix of Expressions
- How to Create MetaHuman DNA Expressions from Scratch with Mesh Morpher Graph and Studio
- How to Merge MetaHuman Body and Head DNA with Mesh Morpher Graph and Studio
Looking for reference material? Read the Mesh Morpher documentation or see pricing & licenses.