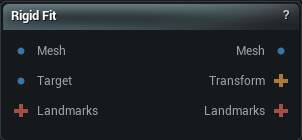
Rigid Fit: Moves, rotates and scales one mesh onto another without bending it. Run it before any wrap so the two meshes start out roughly on top of each other.
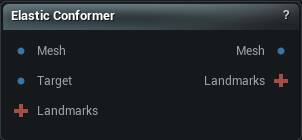
Elastic Conformer: Stretches one mesh onto the shape of another while keeping its own vertex count and layout. Built for getting a garment to sit on a body without crumpling it.
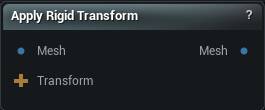
Apply Rigid Transform: Bakes a move, a rotation and a scale into a mesh's vertex positions. Normally fed by the Transform pin of a Rigid Fit so a second mesh follows the first.
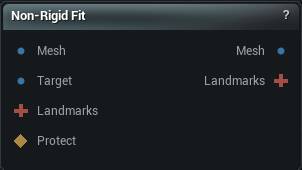
Non-Rigid Fit: Bends one mesh until it matches another's shape, keeping its own vertex count and layout. Rigid Fit first, then this.
Texture Flow Landmarks: Works out where the same patch of colour sits on two meshes and hands the answer to Non-Rigid Fit as landmark pairs.
Studio and Graph › Wrapper
Rigid Fit
Aligns one mesh to another using nothing but a move, a turn and a scale. No vertex moves relative to any other, so the shape is exactly what it was - it is just somewhere else.
The Rigid Fit node
When to use it
Aligns one mesh to another using nothing but a move, a turn and a scale. No vertex moves relative to any other, so the shape is exactly what it was - it is just somewhere else.
This is the first step of every wrap. Non-Rigid Fit and Elastic Conformer both work by looking for the nearest bit of target surface, and that only means anything once the two meshes already sit on top of each other. Feed them two shapes standing in different places and the very first pass matches the wrong things.
The Transform output is the move it worked out. Send it through Apply Rigid Transform to put that same move on the clothing, the landmarks mesh, anything that has to travel with the body. Solving each part separately is what makes the parts drift apart.
How to use it
1
Connect the mesh to move and the target to align it to
2
Decide whether rotation and scale are allowed
3
Click Apply
Pins
Pin
Type
Description
Mesh
Mesh
The mesh being moved.
Target
Mesh
The mesh being aligned to. It stays where it is.
Landmarks
Landmarks
Optional. Landmarks wired in here ride along with the move so they still sit on the surface afterwards. They do not steer the alignment itself.
Pin
Type
Description
Mesh
Mesh
The moved mesh.
Transform
Transform
The move it worked out. Send it to Apply Rigid Transform to put the same move on other meshes.
Landmarks
Landmarks
The landmarks you wired in, shifted onto the moved mesh.
Settings
Setting
Type
Description
Use Rotation
True/False
Let the fit turn the mesh as well as move and scale it. Off leaves the orientation exactly as you had it.
Preserve Up Axis
True/False
Keep the mesh upright and let it only spin around the vertical. Turn this off and the fit is free to pick any orientation, which on a roughly symmetric body means it can come back lying on its side or upside down.
Use Scale
True/False
Resize the mesh so it matches the target's size.
Non-Uniform Scale
True/False
Allow a different amount of scale on each axis, matching the target's bounding box rather than its overall size. Useful for a body that is the right height but the wrong width. Leave it on by accident and it will squash a head to fit.
Align Floor Level
True/False
After aligning, slide the result up or down so its lowest point sits at the target's lowest point. For anything that stands on a floor, matching the feet beats matching the middle.
Wraps a source mesh onto a target surface by stretching it elastically, so it takes the target's shape while keeping its own topology: same vertex count, same order, same UVs, same skin weights.
The Elastic Conformer node
When to use it
Wraps a source mesh onto a target surface by stretching it elastically, so it takes the target's shape while keeping its own topology: same vertex count, same order, same UVs, same skin weights.
That is what makes it a garment tool rather than a remesher. A jacket conformed onto a new body is still the same jacket underneath - everything already rigged and textured against those vertices survives the wrap. Non-Rigid Fit does the same job with a stiffness schedule and a much larger set of controls; this one is the faster, simpler route when the two shapes already sit close together.
Landmarks are optional but they are what keeps a collar on the collar. Without them the wrap only knows about nearest surface, and a sleeve near a ribcage will happily grab the ribcage.
How to use it
1
Connect the source mesh, the target, and landmarks if you have them
2
Set the iterations, stiffness and search range
3
Click Apply
Pins
Pin
Type
Description
Mesh
Mesh
The mesh that gets pulled onto the target. Its vertex count and layout survive.
Target
Mesh
The surface being wrapped onto. It does not move.
Landmarks
Landmarks
Optional. Point and curve pairs that pin parts of the source to known places on the target.
Pin
Type
Description
Mesh
Mesh
The wrapped mesh, same vertex count and layout as it went in.
Landmarks
Landmarks
The landmarks you wired in, moved onto the wrapped mesh.
Settings
Setting
Type
Description
Iterations
Whole number
How many passes to make. More gets closer to the target and takes longer.
Setting
Type
Description
Stiffness
Number
How much the mesh holds together as it travels. High and it moves as one piece. Low and each vertex goes its own way, which is where the crumpling and the jagged spikes come from.
Smoothing Iterations
Whole number
How many smoothing passes run after each main pass.
Adaptive Smoothing Iterations
True/False
Taper those smoothing passes off as the run goes on, so it tidies hard early and leaves the detail alone at the end.
Smoothing Neighbors
Whole number
How many nearby vertices each vertex is smoothed against.
Neighbor Radius
Number
How far the smoothing reaches, measured against typical vertex spacing. Higher lets distant neighbours have a say and rounds the result off. Lower keeps it local.
Setting
Type
Description
Vertex Range
Number
How far a vertex will look for somewhere to land on the target. Too small and patches of the mesh never find the surface and just sit where they started. Too large and a sleeve grabs the ribcage underneath it.
Projection: Max Displacement Scale
Number
How far a single vertex is allowed to travel in one pass, counted in average edge lengths. Lower reins in the spikes; higher lets the mesh cross a bigger gap in fewer passes.
Projection Type
Choice
How a vertex travels to its match. Point to Point heads straight for the nearest point on the target. Point to Plane slides along the target surface instead, which settles far more calmly once you are close.
Setting
Type
Description
Landmark Weight
Number
How hard the landmarks pull. Higher pins them tighter and lets the surface around them distort more to obey.
Adaptive Landmark Weight
True/False
Fade the landmark pull out as the run goes on, so they place the mesh early and then let the surface settle onto the target on its own.
Influence Decay
Number
How far a landmark's grip reaches into the vertices around it. Higher freezes a wider patch of surface around each one.
Propagation Duration
Number
What share of the run that grip keeps spreading for. Higher reaches further and costs more.
Mobility Dampening
Number
How stubbornly the area near a landmark resists being smoothed. Higher keeps it rigid.
Influence Falloff
Number
How abruptly that grip stops. Higher gives a tighter frozen patch with a harder edge to it.
Setting
Type
Description
Use GPU Acceleration
True/False
Do the hunting for matches on the GPU. Much faster once the mesh passes a few thousand vertices, and it falls back to the CPU on its own when the GPU cannot take it.
Setting
Type
Description
Visualization Mode
Choice
What gets painted on the mesh in the diagnostic window that opens beside the app while the wrap runs. Displacement colours by how far each vertex has come, Iteration Delta by how far it moved this pass, Correspondence Weight by how much the fit trusts its match. It is a tuning aid for watching the solver work, not a preview. Disabled opens no window and is the quickest.
Preview Update Interval
Whole number
How many passes go by between redraws of that window. Higher redraws less often and steals less time from the wrap. 1 redraws every pass.
Preview: Max Displacement Scale
Number
Has no effect at present. The colours in that window are scaled from the Max Displacement Scale setting under Projection instead.
Applies a rigid transform that Rigid Fit Mesh already solved.
The Apply Rigid Transform node
When to use it
Applies a rigid transform that Rigid Fit Mesh already solved.
The point is reuse. Solve the alignment once against the geometry you trust, then move everything else with that same motion: the body, its clothing, the mesh its landmarks were placed on. Solving separately for each part is what makes the parts drift apart.
Points move and nothing else does. Vertex count, order, weights and attributes come through untouched.
How to use it
1
Connect the mesh and the rigid transform
2
The output is that mesh, moved
Pins
Pin
Type
Description
Mesh
Mesh
The mesh to move.
Transform
Transform
The move, rotation and scale to apply. Comes straight off a Rigid Fit node's Transform pin.
Pin
Type
Description
Mesh
Mesh
The mesh with that move baked into its vertex positions.
Performs non-rigid mesh fitting using icp and ARAP.
The Non-Rigid Fit node
Performs non-rigid mesh fitting using icp and a stiff-to-soft wrap.
Deforms a source mesh to match a target mesh using landmark correspondences and iterative closest point algorithms.
How to use it
1
Connect source mesh, target mesh, and landmarks
2
Configure fitting parameters
3
Click Apply to deform source to match target
Pins
Pin
Type
Description
Mesh
Mesh
The mesh that gets bent. Its vertex count and layout survive.
Target
Mesh
The shape to match. It does not move.
Landmarks
Landmarks
Optional. Point and curve pairs pinning parts of the source to known places on the target. This is what keeps an eye corner on the eye corner instead of near it.
Protect
Weight Map
Optional. Paint the parts that should stay free - a mouth bag, an eye socket, anything with no match on the target. Painted areas are not pulled onto the target; they keep their shape and ride along with the surface around them. Unpainted areas fit normally.
Pin
Type
Description
Mesh
Mesh
The fitted mesh, same vertex count and layout as it went in.
Landmarks
Landmarks
The landmarks you wired in, moved onto the fitted mesh.
Diagnostic Weights
Weight Map
Selected diagnostic scaled to its threshold. Read the diagnostic summary for missing or unevaluated correspondence.
Settings
Setting
Type
Description
Stiffness Steps
Whole number
How many stages the fit works through on its way from stiff to floppy. The mesh is allowed to settle at each one before the next. Too few and it lurches between stages, picking up creases it never irons back out.
Landmark Strength
Whole number
How hard the landmarks pull compared to the general surface matching. Too low and a landmark drifts off the feature you put it on. Too high and the surface puckers into a dimple around each one.
Decay Landmark Strength
True/False
Fade the landmark pull out as the fit progresses, so they steer the early rough alignment and then hand over to the surface matching.
Point-to-Plane Weight
Number
How much a vertex may slide along the target surface instead of being pulled straight at its match. Sliding closes gaps faster across broad flat areas. 0 pulls every vertex straight at the nearest point.
Setting
Type
Description
Starting Stiffness
Number
How rigid the mesh is at the start. High values keep it moving as one piece while it finds the target's overall shape.
Ending Stiffness
Number
How loose the mesh is by the last stage. Lower lets it press into fine detail, and past a point it starts following the target's lumps and noise as well.
Decay Power
Number
The shape of the curve between the starting and ending stiffness. 1 is a steady run. Higher goes soft early and spends most of the fit loose.
Setting
Type
Description
Max Search Distance
Number
How far a vertex will look for its match on the target. Too small and whole patches find nothing and sit unmoved. Too large and a vertex grabs across a gap onto the wrong side of a fold, so lips get pulled into teeth.
Use Bi-Directional
True/False
Check every match from both meshes before trusting it. This is what stops the inside of a mouth latching onto the lips sitting in front of it.
Use Normal Compatibility
True/False
Only match surfaces that face roughly the same way. Without it the underside of a chin will happily grab the chest below it.
Normal Angle Threshold
Number
How far apart two surfaces can face and still be matched. Matches fade out as they approach this angle and are dropped past it. 55 is the crease-safe default; raise it only when facing surfaces really should match.
Boundary Aware
True/False
Trust matches less around open edges, where the surface simply stops and the nearest point on the target usually means nothing.
Boundary Weight
Number
How much pull the vertices along an open edge keep. 0 leaves the border to follow its neighbours instead of chasing the target, 1 treats it like any other vertex.
Use Spatial Coherence
True/False
Even out how much each vertex trusts its match by looking at the vertices around it. Stops one vertex being yanked at while the surface next to it stays put, which is where puckers come from.
Coherence Blend
Number
How much say a vertex's neighbours get in how far it trusts its own match. 0 leaves every vertex to itself. 1 hands the decision entirely to the neighbourhood.
Max Correspondence Pull
Number
How far a vertex's match may pull it in one solver pass, measured in average rest-edge lengths. 0 leaves the pull unclamped. A crease jump is a short residual the robust kernel trusts; this still caps how far a long wrong pull can move the mesh in one step.
Prevent Self-Intersections
True/False
Stop the mesh from passing through itself while it fits. Parts that meet slide along each other instead of stopping, so the fit still reaches the target; anything that does cross is pushed back until it just touches. Crossings already present in the source mesh are left as they are.
Self-Intersection Clearance
Number
Extra gap held between two parts of the mesh when they meet, in average edge lengths. Leave at 0 to only block crossings without adding any gap. Raise it slightly if surfaces that land exactly on each other cause shading artifacts. Capped at 0.2: every guard distance (stand-off, release, band) scales with this, so a large gap inflates thin features to the gap thickness and holds surfaces visibly apart.
Self-Intersection Neighbor Rings
Whole number
How many rings of connected neighbors around each point are ignored by the self-intersection check. Raise this if a tight crease is wrongly held back; keep it at 1 on thin parts like lips so real contacts are still caught.
Self-Intersection Slide Along Contact
True/False
Keep a held point moving. When a point is stopped by another part of the mesh, aim its match along that surface instead of straight through it, so the area keeps sliding toward the target instead of freezing where it touched. Turn off to only block crossings.
Self-Intersection Heal Crossings
True/False
Remember which side of a contact each point belongs on and push a point found on the wrong side back out over the following iterations. Turn off to only stop new crossings and leave anything that already slipped through where it is.
Setting
Type
Description
Use Geodesic Correspondence
True/False
Measure distance by walking across the surface rather than straight through the air, so two points that nearly touch across a gap are still understood to be far apart. Earns its keep around ears, nostrils, fingers and folds. Does nothing unless you have landmarks wired in.
Landmark Mismatch Weight
Number
How hard to cut a match that disagrees with your landmarks. 0 leaves every match as the surface search found it. 1 fully trusts the landmark test, so a nose cannot keep a grip on an ear. Halfway is the usual setting. A match that agrees with the landmarks is never reduced.
Use Signature Filtering
True/False
Throw out matches where the two points sit differently relative to your landmarks. This is what stops a nose matching an ear, or a left hand matching a right.
Signature Similarity Threshold
Number
How alike two points have to look before a match survives. Raising it throws out more. Push it too high and it starts discarding perfectly good matches, leaving patches of surface that never move.
Setting
Type
Description
Smoothing Strength
Number
How much the mesh is relaxed between solver passes. Enough of it irons out the ripples a hard pull leaves behind. Too much and the fit never gets close enough to pick up the target's detail.
Smoothing Passes
Whole number
How many relaxing passes to run between solver passes.
Adaptive Smoothing
True/False
Relax harder on the passes where the mesh travels a long way, and ease off once it has settled down.
Smooth Landmark Vertices
True/False
Let the relaxing passes touch the vertices your landmarks sit on. Turn it off when landmarks keep getting smoothed away from their marks.
Smooth Boundary Vertices
True/False
Let the relaxing passes touch open edges. Turn it off to stop a border creeping inwards a little more on every pass.
Setting
Type
Description
Use Multi-Resolution
True/False
Fit a coarse copy of the mesh first and work up to the real one. The big travel happens on the cheap copy, so the last pass has only detail left.
Multi-Res Mode
Choice
How the coarser and finer copies get built.
Multi-Res Levels
Whole number
How many extra copies to build. More of them survives a bigger difference between the two shapes, and costs you the time.
Simplification Ratio
Number
How much of the mesh survives at each coarser copy. 0.5 halves it each time.
Subdivision Levels
Whole number
How many copies denser than your own mesh to build. Only worth it when your mesh is too coarse to reach the detail on the target.
Split Stiffness Per Level
True/False
Give each copy its own slice of the stiffness range, so the coarse ones stay rigid and only the finest is allowed to go soft.
Setting
Type
Description
Min Iterations Per Step
Whole number
How many passes each stiffness stage runs before the fit is even allowed to call it settled.
Convergence Threshold
Number
How little the mesh has to move, measured against its own size, before a stage counts as settled and the fit moves on. Raise it to cut the fit short.
Stall Patience
Whole number
How many iterations the solver keeps trying after progress flattens out before it moves on to the next step. Lower ends steps sooner; higher gives a slow fit more room to keep creeping forward.
Stall Threshold (%)
Number
How much the fit error has to drop over that stretch to count as still making progress, as a percent of the current error. Below this the step is considered finished. 0 only stops once the error truly stops falling.
Max Iterations Per Step
Whole number
A hard ceiling on passes per stage, so a fit that will never settle still finishes rather than grinding all afternoon.
Setting
Type
Description
Use GPU Acceleration
True/False
Work out the matches on the graphics card. Much quicker on dense meshes, and it drops back to the processor on its own when the card cannot help.
Use GPU Iterative Solver
True/False
Solve the deformation on the graphics card as well, by closing in on the answer rather than computing it outright. Pays off on heavy meshes.
GPU Solver Max Iterations
Whole number
How many passes that solve gets before it hands back whatever it has reached. Raise it if the fit looks like it stopped short.
GPU Solver Tolerance
Number
How close that solve has to get before it calls it done. Below about 0.0001 the graphics card's solver cannot get any closer on a stiff mesh, so going lower just spends extra passes for no sharper result. The processor's exact solve ignores this.
Setting
Type
Description
Visualization Mode
Choice
What gets painted on the mesh in the diagnostic window that opens beside the app while the fit runs. It is a tuning aid for watching the solver work, not a preview. Disabled opens no window and is the quickest.
Preview Update Interval
Whole number
How many solver passes go by between redraws of that window. Higher redraws less often and steals less time from the fit.
Max Displacement Scale
Number
The distance that reads as full colour in that window. 0 picks a scale from the size of the mesh. Affects the colours only, never the fit.
Diagnostic View
Choice
Which diagnostic paints Diagnostic Weights.
Residual Threshold
Number
Residual above this counts as an issue. Same units as the mesh.
Strain Threshold
Number
Log-strain above this counts as an issue. Default is about 25 percent stretch.
Low Color
Colour
Color at weight 0 (no issue / zero residual).
High Color
Colour
Color at weight 1 (at or above the threshold, or a binary issue).
Matches two meshes by their albedo rather than their shape. Both get rasterised to matching views, dense optical flow finds the pairs, and every confident 2D match is lifted back onto both surfaces.
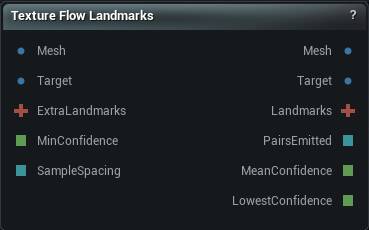
The Texture Flow Landmarks node
When to use it
Matches two meshes by their albedo rather than their shape. Both get rasterised to matching views, dense optical flow finds the pairs, and every confident 2D match is lifted back onto both surfaces.
How to use it
1
Wire the mesh being wrapped into Mesh and the scan into Target
Both need albedo - vertex colours or an embedded base-colour texture.
2
Pick the view that shows the region you care about, then press Find Texture Correspondences
3
Read Pairs Emitted and Albedo Contrast
Zero pairs on a featureless albedo is the correct answer, not a failure.
4
Wire Landmarks into Non-Rigid Fit (or Elastic Conformer)
Chain a second node through Extra Landmarks for another view.
Pins
Pin
Type
Description
Mesh
Mesh
The mesh being wrapped. It supplies the source end of every pair, and it needs colour on it: vertex colours or a base-colour texture. Passes straight through to the Mesh output.
Target
Mesh
The mesh being wrapped onto. It supplies the target end of every pair, and it needs colour too. Rigid Fit the two first: this can follow a feature that moved a few dozen pixels, not a mesh sitting somewhere else entirely.
ExtraLandmarks
Landmarks
Optional. Landmarks the detected pairs merge into, so you can stack a second view or keep a hand-placed set. Whatever is already there wins. For several views, Multi View Fusion beats chaining nodes.
MinConfidence
Number
Overrides the confidence floor. Leave it unwired to use the value in the details panel.
SampleSpacing
Whole Number
Overrides the sample spacing. Leave it unwired to use the value in the details panel.
Pin
Type
Description
Mesh
Mesh
The source mesh, untouched. This node never changes geometry.
Target
Mesh
The target mesh, untouched.
Landmarks
Landmarks
The pairs it found, plus anything wired into Extra Landmarks. Each pair is a point on the Mesh surface and the place on the Target surface where that colour turned up. Wire this into Non-Rigid Fit or Elastic Conformer.
PairsEmitted
Whole Number
How many pairs this node contributed to the Landmarks output after merging with Extra Landmarks. A pair that collides on source position with an inherited one is dropped, so this can read lower than what the matching found. Zero on a mesh with no colour variation is the right answer, not a failure.
MeanConfidence
Number
Average confidence across the pairs that came out. With Multi View Fusion on, this is already discounted for how squarely each view saw the surface.
LowestConfidence
Number
The weakest pair that survived. Branch a batch graph on this rather than the average: one wrong pair drags the fit, and a healthy average will not save you from it.
Settings
Setting
Type
Description
View Preset
Choice
Which side the two meshes are looked at from. One view only sees the surface facing it, so pick the side the region you care about is on. Chain nodes through Extra Landmarks for more angles, or turn on Multi View Fusion to sweep several in one run. With fusion on, this is the middle of the sweep.
Multi View Fusion
True/False
Sweep several views around the model instead of using one, then keep only what they agree on. A pair two views found independently beats a single view's more confident guess, and a region where two views disagree is thrown out rather than guessed at. Costs a full pass per view. The sweep goes around the up axis, so it needs a side-on middle view. Pick Top or Bottom and it refuses.
Num Views
Whole number
How many views on the sweep. 5 across 180 degrees gives you side, three-quarter, front, three-quarter, side, which is the usual wrap camera set. The views sit symmetrically about the middle with one on each end, so an even count skips the middle view itself. Use an odd count when the View Preset direction has to be one of the cameras.
View Arc Degrees
Number
How wide the sweep is, centred on View Preset. 360 spreads the views evenly all the way round instead.
Min View Facing
Number
Throw away a pair where the surface is turned away from the camera at either end. 1 means dead-on, 0 means edge-on. Matches found on a steeply angled surface land in the wrong place, and the confidence score will not warn you: squashed texture looks like sharper texture, so those matches score higher, not lower. On a curved test surface the pairs below 0.5 carried about nine times the error of the face-on ones. 0 turns the check off.
Custom View Direction
Vector
Which way the camera points when View Preset is Custom. This is the direction it looks, not where it sits.
Resolution
Whole number
How big the internal render is. A match can only be as precise as one pixel is wide on the model, so this is the main quality dial: a 30 cm head at 512 lands within roughly 0.6 mm. Doubling it quadruples the cost.
Cull Backfaces
True/False
Ignore triangles facing away from the camera. Right for a closed scan, and the reason the inside of a nostril does not draw over the nose. Turn it off for a single-sided patch whose triangles happen to face the wrong way; the giveaway is a run that reports no coverage at all.
Albedo Source
Choice
Where the colour is read from. The two meshes are handled separately, so a textured scan can be matched against a vertex-coloured template.
UV Layer
Whole number
Which UV layer the textures are read through. Layer 0 unless the asset was authored with its colour on a second channel.
Sample Spacing
Whole number
One candidate every this many pixels, taking the best one in each cell. This is how many pairs you get, not how good they are. Asking for more will not improve a single one of them.
Min Confidence
Number
Matches scoring below this are thrown away. The score asks two things: was there anything here to match, and did the match hold up. A flat cheek scores near zero however tidy the answer looks there, and that is the right answer. The MinConfidence pin overrides this when wired.
Forward Backward Check
True/False
Match again in the opposite direction and drop anything that does not come back to where it started. This is what catches a match that is confident and wrong: a feature hidden behind something else, or the left eye matched to the right. Costs a second pass. Leave it on.
Max Reprojection Error
Number
How far, in pixels, the return trip is allowed to miss where it set off from.
Max Pair Distance Fraction
Number
Drop a pair whose two ends are further apart than this fraction of the two meshes' size. This node exists to remove small sliding errors, so a pair claiming a quarter of a head of movement has matched the wrong feature.
Max Landmarks
Whole number
Ceiling on how many pairs come out; the most confident survive. Every pair is something the fit then has to obey exactly, so more is not better.
Pyramid Levels
Whole number
How many progressively coarser passes the matcher makes. This is what lets it follow a feature that moved further than the feature is wide. Set it to 1 and it can only track about a pixel of movement.
Flow Smoothness
Number
How much the matcher smooths its answer. Higher is tidier but starts inventing movement in areas with no texture; lower is noisier and stays closer to what the colour actually says. Tuned for this app's numbers, so textbook values quoted elsewhere are hundreds of times too big here.
Illumination Robust Matching
True/False
Strip out local brightness and local contrast before matching, so the two meshes are compared on texture rather than on how light or dark they are. A scan usually has shading baked into its texture and a clean template does not. That is not noise you can average out: no answer satisfies the matcher at all, and it drifts towards whichever nearby patch has the weakest texture. On a head with a directional bake, mean error against a known deformation was 113 pixels with this off and 0.44 pixels with it on. It costs nothing when both albedos already match: on the same head with identical colour on both sides it still improved the result. Leave it on.