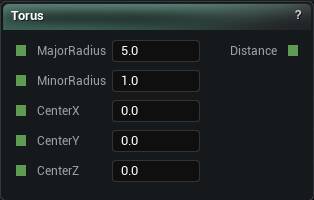
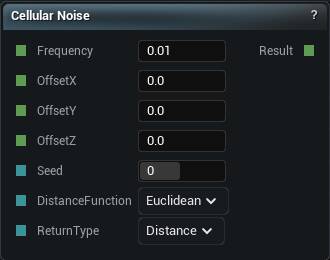
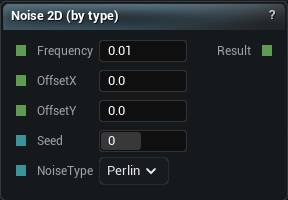
The voxel branch turns meshes into signed-distance fields you can combine, carve, warp and re-mesh, then convert back to geometry. Nodes here build fields (shapes, noise, patterns), combine them (C...
The voxel branch turns meshes into signed-distance fields you can combine, carve, warp and re-mesh, then convert back to geometry. Nodes here build fields (shapes, noise, patterns), combine them (CSG), modify them (domain warps, sculpting) and read them back out.
Every voxel node is available in both Mesh Morpher Graph and Mesh Morpher Studio.
Sources that feed a voxel graph: coordinates, constants, meshes brought into the field, and the values other voxel nodes read from.
Studio and Graph › Voxel › Input
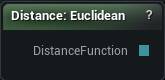
Cellular Distance
Emits a cellular distance metric for Cellular Noise: Euclidean, Manhattan or Chebyshev.
The Cellular Distance node
When to use it
Emits a cellular distance metric for Cellular Noise: Euclidean, Manhattan or Chebyshev.
The metric changes the shape of the cells, not just the numbers in them. Manhattan gives you diamonds and Chebyshev gives you squares, which is how a Voronoi pattern is made to look man-made instead of organic.
Pins
Pin
Type
Description
DistanceFunction
Choice
The way of measuring you picked. Wire it into a Cellular node.
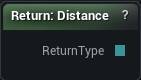
Emits a cellular return type. This is the setting that decides what Cellular Noise's output actually means, so it deserves more attention than most dropdowns.
The Cellular Return node
When to use it
Emits a cellular return type. This is the setting that decides what Cellular Noise's output actually means, so it deserves more attention than most dropdowns.
Pins
Pin
Type
Description
ReturnType
Choice
Which of the two answers you picked. Wire it into a Cellular node.
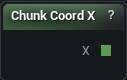
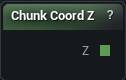
The X index of the chunk being generated. Constant for every sample inside that chunk.
The Chunk Coord X node
When to use it
The X index of the chunk being generated. Constant for every sample inside that chunk.
That constancy is what makes it useful: a per-chunk seed, a per-chunk pattern choice.
It is also what makes it dangerous. A value that jumps at chunk boundaries puts a visible seam exactly there, running the full height of the volume, and nothing downstream will hide it.
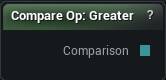
Emits a comparison operator for the Comparison pin on Compare and Branch.
The Compare Op node
When to use it
Emits a comparison operator for the Comparison pin on Compare and Branch.
Placing one instead of an integer literal makes the graph say which test is being made. Greater and GreaterOrEqual look identical as numbers and behave differently right at the boundary.
Pins
Pin
Type
Description
Comparison
Choice
The test you picked. Wire it into a Compare or Branch node.
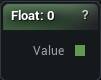
A fixed float fed into other nodes. Radii, thresholds, strengths.
The Float Input node
When to use it
A fixed float fed into other nodes. Radii, thresholds, strengths.
Worth placing instead of typing the same number into three pins. One editable field then drives them all, and the shared value sits on the canvas rather than hidden in three places.
Pins
Pin
Type
Description
Value
Number
The number you typed in the panel.
Settings
Setting
Type
Description
Value
Number
The number this node hands out. It shows on the card, so you can read it without opening the panel.
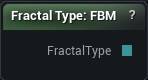
Emits a fractal shape for the generic Fractal Noise nodes: FBM, Ridged, Billow or Turbulence.
The Fractal Type node
When to use it
Emits a fractal shape for the generic Fractal Noise nodes: FBM, Ridged, Billow or Turbulence.
There is a None at the top of the list too. It drops you back to a single octave with no layering at all, and it is where an integer 0 lands, so a hand-typed number is an easy way to lose all your detail without touching the octave count. Pick the shape here instead.
Pins
Pin
Type
Description
FractalType
Choice
The stacking style you picked. Wire it into a by-type fractal node.
A cheap deterministic random built from the sample position and a seed. Same position and seed, same value, every run and every machine.
The Hash node
When to use it
A cheap deterministic random built from the sample position and a seed. Same position and seed, same value, every run and every machine.
Neighbouring voxels are completely uncorrelated, which is why this is no substitute for noise. There is no smoothness in it, so it can never make a surface.
Quantise the position first and it becomes per-cell variation. Feed it raw positions and every voxel inside a cell gets its own answer. The Random Float (Stable) family is the same idea with a named range.
Pins
Pin
Type
Description
Seed
Whole Number
Changes the pattern. The same seed at the same spot always gives the same answer.
Pin
Type
Description
Result
Number
A number between -1 and 1. It never changes for a given spot and seed.
A deterministic random float between 0 and 1, hashed from the sample position and a seed. Same position and seed, same value, every run and every machine.
The Hash Random Float01 node
When to use it
A deterministic random float between 0 and 1, hashed from the sample position and a seed. Same position and seed, same value, every run and every machine.
This is the randomness that is safe to drive density, colour or anything else the mesher sees. The non-stable Random Float exists only for one-shot uses.
Change the seed to get a different pattern. Changing the position changes what you are asking about, not how random the answer is.
Pins
Pin
Type
Description
Seed
Whole Number
Changes the pattern. The same seed at the same spot always gives the same answer.
Pin
Type
Description
Result
Number
A number between 0 and 1 that never changes for a given spot and seed.
A deterministic random integer up to 16777215, hashed from position and seed.
The Hash Random Int node
When to use it
A deterministic random integer up to 16777215, hashed from position and seed.
Good for picking per-cell variants. Quantise the position first, or every voxel inside a cell gets a different answer and the variation turns into static.
Hashed values have no correlation between neighbours, so this is not a smooth signal and never will be.
Pins
Pin
Type
Description
Seed
Whole Number
Changes the pattern. The same seed at the same spot always gives the same answer.
Pin
Type
Description
Result
Whole Number
A whole number up to about 16.7 million that never changes for a given spot and seed.
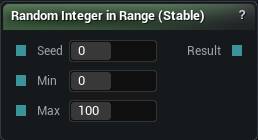
A deterministic random integer between Min and Max, both inclusive, hashed from position and seed. The stable way to choose one of several variants per cell.
The Hash Random Int In Range node
When to use it
A deterministic random integer between Min and Max, both inclusive, hashed from position and seed. The stable way to choose one of several variants per cell.
Quantise the position before hashing. Feed it raw and the choice changes within a single cell, which is not a choice at all.
Pins
Pin
Type
Description
Seed
Whole Number
Changes the pattern. The same seed at the same spot always gives the same answer.
Min
Whole Number
The smallest number you might get.
Max
Whole Number
The largest number you might get.
Pin
Type
Description
Result
Whole Number
A whole number between Min and Max that never changes for a given spot and seed.
Latitude relative to the world XY plane, in radians. 0 at the equator, plus or minus pi/2 at the poles. North-south biome shifts on a spherical world.
The Latitude node
When to use it
Latitude relative to the world XY plane, in radians. 0 at the equator, plus or minus pi/2 at the poles. North-south biome shifts on a spherical world.
Latitude alone says nothing about whether you are inside the planet or out in space above it. Pair it with Radius From Origin, which is the part that decides solid from empty.
Pins
Pin
Type
Description
Result
Number
How far north or south you are, in radians. 0 at the equator, plus or minus pi/2 at the poles.
Emits a noise basis for the Noise Type pin on the generic noise nodes. Three choices: Perlin, Simplex, Value.
The Noise Type node
When to use it
Emits a noise basis for the Noise Type pin on the generic noise nodes. Three choices: Perlin, Simplex, Value.
White and Cellular are not on the list. Those two have their own nodes and cannot be reached through this pin at all.
The numbering behind it is internal and not a promise, so drive that pin from here rather than typing a number into an Int Input. A readable dropdown also tells the next person which basis they are looking at.
Pins
Pin
Type
Description
NoiseType
Choice
The noise you picked. Wire it into a by-type noise or fractal node.
World-space X of the point being evaluated. Every position-dependent pattern starts here or at one of its siblings.
The Position X node
When to use it
World-space X of the point being evaluated. Every position-dependent pattern starts here or at one of its siblings.
To move a whole subgraph, Domain Translate, Rotate and Scale keep the transform in one readable place. Doing the arithmetic on these coordinates by hand works, and then six nodes later nobody can find where the offset came from.
World-space Z, the height, of the point being evaluated. The most used input in terrain work, because heightmap minus Z is what turns a 2D noise into a 3D field.
The Position Z node
When to use it
World-space Z, the height, of the point being evaluated. The most used input in terrain work, because heightmap minus Z is what turns a 2D noise into a 3D field.
It is also the natural control for Select and for a Height Gradient when you are layering biomes by altitude.
On a spherical world it stops being up. Radius From Origin takes over there.
A fresh random float between 0 and 1 on every single evaluation. Non-deterministic by design.
The Random Float01 node
When to use it
A fresh random float between 0 and 1 on every single evaluation. Non-deterministic by design.
Keep it out of density. The same point evaluates differently every time it is sampled, so there is no stable surface: the mesh flickers, re-chunks, and never settles.
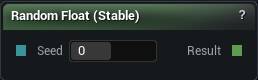
Random Float (Stable) is the one to reach for whenever the value has to come back the same, which for anything shaping geometry is always.
Pins
Pin
Type
Description
Result
Number
A number between 0 and 1, different every pass. Wire it into density and the surface will crawl.
A fresh random integer between Min and Max, both inclusive, on every evaluation. Non-deterministic.
The Random Int In Range node
When to use it
A fresh random integer between Min and Max, both inclusive, on every evaluation. Non-deterministic.
The range is all this adds over Random Integer. The stability problem is unchanged, so the Stable variant is the default choice unless the value really is one-shot.
Pins
Pin
Type
Description
Min
Whole Number
The smallest number you might get.
Max
Whole Number
The largest number you might get.
Pin
Type
Description
Result
Whole Number
A whole number between Min and Max, different every pass. Wire it into density and the surface will crawl.
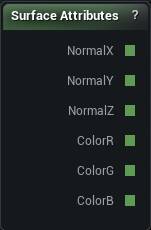
These outputs read zero. All six of them, everywhere in the app.
The Surface Attributes node
When to use it
These outputs read zero. All six of them, everywhere in the app.
The node was built for a mesh spawner that could ask "does this surface face up" before scattering grass. That spawner was removed, and nothing fills in surface normals or painted colour any more. Drop one into a density graph and the compiler posts a warning saying exactly that.
If you came here to vary something by height, Position Z into a Select does the job, and Height Gradient does it for colour.
Pins
Pin
Type
Description
NormalX
Number
How far the surface leans along X.
NormalY
Number
How far the surface leans along Y.
NormalZ
Number
How much the surface faces up. Near 1 is flat ground, near 0 is a cliff face. This is the one you want for slope tests.
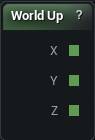
The world-up direction (0, 0, 1) broken out into components. Saves hard-coding a vector for slope masks and alignment maths.
The World Up node
When to use it
The world-up direction (0, 0, 1) broken out into components. Saves hard-coding a vector for slope masks and alignment maths.
Dot a normalised direction against it and you get the slope term every grass-on-the-flat, rock-on-the-cliffs rule is built from. Skip the normalise and you get a height instead.
Where a voxel graph ends: the field is evaluated and handed back as geometry.
Studio and Graph › Voxel › Output
Output
Left over from an older voxel pipeline. Nothing in the app compiles from it any more, so wiring a density into it has no effect on anything you generate.
The Output node
When to use it
Left over from an older voxel pipeline. Nothing in the app compiles from it any more, so wiring a density into it has no effect on anything you generate.
Density to Mesh is the endpoint now. It walks back through its own Density pin and compiles whatever it finds. Voxel Sculpt and Voxel Paint do the same for the live preview. When a branch of your graph seems to do nothing, check that it reaches one of those three rather than this node.
Pins
Pin
Type
Description
Density
Number
The finished shape. Negative means inside the solid, positive means empty air, and zero is exactly where the surface lands.
Named values you set once and reuse across the voxel graph.
Studio and Graph › Voxel › Variables
Declare Value
Saves an intermediate value under a name so you can read it back elsewhere without dragging a wire across the graph.
The Declare Value node
When to use it
Saves an intermediate value under a name so you can read it back elsewhere without dragging a wire across the graph.
Wire it in line the way you normally would; the input passes straight through. Then read it anywhere with a Use Value node carrying the same name.
Worth it for a value that genuinely feeds several branches. For anything local, a wire is easier to follow. Leave the Name empty and it warns you, because nothing can read it.
Pins
Pin
Type
Description
Value
Number
The value to put the name on.
Pin
Type
Description
Value
Number
The same value, untouched. Keep wiring from here as normal.
Settings
Setting
Type
Description
Name
Text
What to call it. A Use Value node with the same name reads it back. Leave it blank and nothing can find it.
This node cannot work. Graph variables have no authoring surface yet, so there is no value anywhere for it to read, and placing one fails the compile with a message saying so.
The Get Variable (disabled) node
When to use it
This node cannot work. Graph variables have no authoring surface yet, so there is no value anywhere for it to read, and placing one fails the compile with a message saying so.
The hard failure is deliberate. Quietly returning 0 would leave you a graph that looks fine and generates the wrong shape.
Declare Value paired with Use Value covers what this node was meant for: name an intermediate value, read it back somewhere else.
Pins
Pin
Type
Description
Value
Number
Nothing comes out of here. There is still no way to create a graph variable, so use Declare Value and Use Value instead.
Settings
Setting
Type
Description
Variable Name
Text
Which variable to read. It does nothing while there is still no way to create one.
Reads a value that a Declare Value node saved earlier.
The Use Value node
When to use it
Reads a value that a Declare Value node saved earlier.
The catch is reachability. The Declare node has to be part of the graph that actually gets compiled, which means it sits somewhere on the path back from Density to Mesh. Declare it on a branch that goes nowhere and the name is never defined, so this node falls back to 0 and posts a warning.
When a Use Value reads zero and you cannot see why, that is the first thing to check.
Pins
Pin
Type
Description
Value
Number
Whatever the matching Declare Value node was holding.
Settings
Setting
Type
Description
Name
Text
Which name to read. It has to match a Declare Value node upstream, spelling and all.
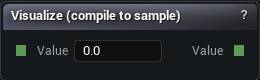
A probe. Drop it in line on any wire and it reads the value passing through at one world position, then prints the number in the node title and the details panel.
The Visualize (compile to sample) node
When to use it
A probe. Drop it in line on any wire and it reads the value passing through at one world position, then prints the number in the node title and the details panel.
Pins
Pin
Type
Description
Value
Number
The wire you want to read.
Pin
Type
Description
Value
Number
The same value, untouched.
Settings
Setting
Type
Description
Sample Point
Vector
Which spot in the world to read the value at. Starts at the origin.
Arithmetic, trigonometry, vector operations and comparisons evaluated per sample across the field.
Studio and Graph › Voxel › Math
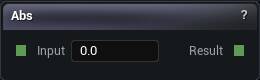
Abs
Strips the sign, and it does two quite different jobs depending on what you feed it.
The Abs node
When to use it
Strips the sign, and it does two quite different jobs depending on what you feed it.
On a coordinate you get free mirror symmetry. Abs of X makes everything symmetric about the YZ plane.
On a distance field you get a shell. The surface now sits wherever the field was plus or minus zero, so a solid ball turns into a hollow skin. Neither of those is obvious from the name.
On a density field, adding a constant moves the whole surface in or out. That is how a noise field becomes solid ground: add enough and the surface swallows everything below it.
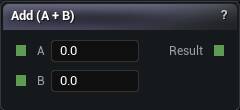
The Add node
When to use it
A plus B.
On a density field, adding a constant moves the whole surface in or out. That is how a noise field becomes solid ground: add enough and the surface swallows everything below it.
It is not a way to combine two shapes. Add two fields together and the result is neither of them. Union, Intersection and Subtraction are the nodes for that.
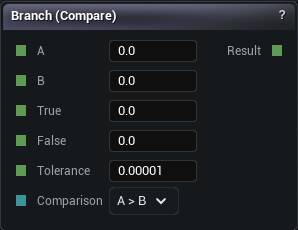
Compares A and B with the operator you pick and forwards True or False accordingly. The comparison and the choice in one node.
The Branch node
When to use it
Compares A and B with the operator you pick and forwards True or False accordingly. The comparison and the choice in one node.
Equal and NotEqual read the Tolerance pin, which defaults to 0.00001. That default is doing real work. Two values that came out of any arithmetic almost never land on the same float, so an Equal branch with Tolerance set to 0 takes the false arm over and over and reads as a broken wire.
When the result is a weight rather than a choice, Compare plus a multiply is cleaner. When the boundary should be soft, Select.
Pins
Pin
Type
Description
A
Number
The left side of the comparison.
B
Number
The right side of the comparison.
True
Number
Passed through when the comparison holds.
False
Number
Passed through when the comparison does not hold.
Tolerance
Number
Only matters for Equal and Not Equal. Two values closer together than this count as the same.
Comparison
Choice
Which test to run. Wire a Compare Op node in here to switch it from the graph.
Pin
Type
Description
Result
Number
Whichever of True and False the comparison picked.
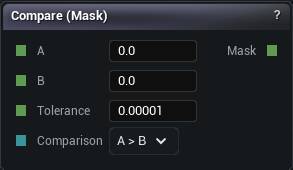
Compares A against B and hands back 1 or 0. A mask you multiply with, not a branch.
The Compare node
When to use it
Compares A against B and hands back 1 or 0. A mask you multiply with, not a branch.
When the answer is going to be multiplied anyway, this beats Branch and If. The graph stays flat and you avoid the hard edge a branch puts into the field.
The 0/1 edge is still an edge. Anywhere the transition will be visible as geometry, SmoothStep or a Select with a falloff looks better.
Pins
Pin
Type
Description
A
Number
The left side of the comparison.
B
Number
The right side of the comparison.
Tolerance
Number
Only matters for Equal and Not Equal. Two values closer together than this count as the same.
Comparison
Choice
Which test to run. Wire a Compare Op node in here to switch it from the graph.
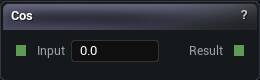
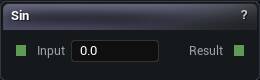
Pair it with Sin on the same angle for circles and spirals. On its own it is Sin shifted a quarter cycle, so picking the one whose value at zero you want, 1 for cos and 0 for sin, saves you an offset node.
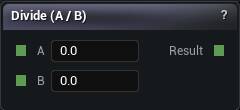
A over B. Dividing by zero, or near enough to zero, gives you 0 rather than an infinity, because an infinity reaching the mesher takes the whole chunk with it.
The Divide node
When to use it
A over B. Dividing by zero, or near enough to zero, gives you 0 rather than an infinity, because an infinity reaching the mesher takes the whole chunk with it.
That guard has a side effect worth knowing. A suspiciously flat patch of zero in your result might be a division that tripped the guard rather than a shape. Drop a Visualize node on the wire and read the number.
When the divisor never changes, multiplying by the reciprocal is cheaper and reads better.
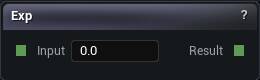
e raised to the input, with the exponent clamped to plus or minus 80 so it cannot run away to infinity.
The Exp node
When to use it
e raised to the input, with the exponent clamped to plus or minus 80 so it cannot run away to infinity.
It still grows absurdly fast. exp(20) is half a billion. This is a falloff tool, not a scaling tool: exp of a negative squared distance is the Gaussian bump you usually wanted.
A field that has gone flat and enormous is nearly always an exp with a positive argument nobody meant to feed it.
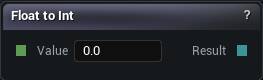
Converts a float to an integer by flooring it, which means it truncates toward negative infinity rather than toward zero. 1.7 becomes 1. -0.3 becomes -1, not 0.
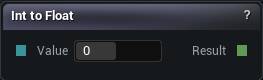
The Float To Int node
When to use it
Converts a float to an integer by flooring it, which means it truncates toward negative infinity rather than toward zero. 1.7 becomes 1. -0.3 becomes -1, not 0.
That asymmetry only bites when the value can go negative, and then it bites hard: everything below zero shifts a whole step. Add 0.5 first if you wanted nearest.
The usual reason to place one is feeding float maths into an int-typed pin such as a Seed.
Combined with a multiply and a divide it quantises a smooth value into steps, but Terrace already does that with the step size as one readable number. Come here when you actually want the integer: a cell index, a band number, the input to a hash.
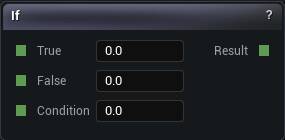
Picks one of two inputs from a Condition, treating anything at or above 0.5 as true.
The If node
When to use it
Picks one of two inputs from a Condition, treating anything at or above 0.5 as true.
It fits when the condition is already a mask, from a Compare or a thresholded noise. Branch does the comparison and the choice in one node. Select does the same thing with a soft blend.
A hard switch between two fields leaves a discontinuity at the boundary, and the mesher renders that as a step you never modelled.
It is a straight pass-through, since everything is stored as a float underneath. It exists so the conversion is visible on the canvas and the pins downstream stay float-typed. Adding one costs nothing at all.
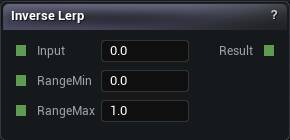
0 at Range Min, 1 at Range Max, linear between, and clamped to 0 to 1 at both ends.
The Inverse Lerp node
When to use it
0 at Range Min, 1 at Range Max, linear between, and clamped to 0 to 1 at both ends.
The clamp is the whole difference between this and Remap. It is what stops a value from outside the range driving a blend past its endpoints and pushing a colour or a displacement somewhere you never asked for.
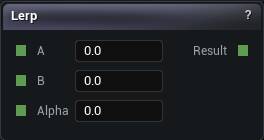
Blends A and B by Alpha. 0 gives A, 1 gives B, and Alpha is clamped so you cannot extrapolate past either end.
The Lerp node
When to use it
Blends A and B by Alpha. 0 gives A, 1 gives B, and Alpha is clamped so you cannot extrapolate past either end.
Fine for mixing two parameters or two masks. Select is the one you want when a threshold on a third value drives the blend.
For combining two shapes, Smooth Union. A lerp between two distance fields is not the distance field of anything, and it meshes as a mushy compromise between the two.
Pins
Pin
Type
Description
A
Number
What you get at Alpha 0.
B
Number
What you get at Alpha 1.
Alpha
Number
How far between A and B you want to land. Held inside 0 to 1.
Natural logarithm. Zero or negative input returns 0 rather than an infinity.
The Log node
When to use it
Natural logarithm. Zero or negative input returns 0 rather than an infinity.
Good for squashing a range that spans orders of magnitude down to something you can look at.
The guard means the negative half of a signed field collapses to flat zero, and that half is the entire inside of your shape. Log a magnitude, not a density.
The larger of A and B, which is the same operation Intersection performs, since positive means outside.
The Max node
When to use it
The larger of A and B, which is the same operation Intersection performs, since positive means outside.
Max is for numeric work: max(x, 0) to strip negatives, clamping a value by hand. Intersection is for shapes. Same maths, and a reader can tell them apart at a glance.
With negative meaning inside, that is exactly what Union does, and both nodes emit the same operation. Union in a boolean chain so the graph says what you meant, Min when you genuinely want the lower of two numbers.
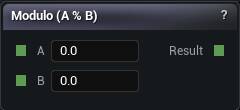
The remainder of A divided by B. Stripes, rings and repeating bands built out of a coordinate. A divisor at or near zero returns 0 rather than an error.
The Modulo node
When to use it
The remainder of A divided by B. Stripes, rings and repeating bands built out of a coordinate. A divisor at or near zero returns 0 rather than an error.
When what you want to tile is a whole shape rather than a number, Domain Repeat is the right node. Modulo on a distance field snaps the value at every cell edge, and the mesher renders that snap as a wall.
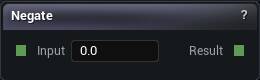
Flips the sign. On a density field that swaps solid and empty, so the inside becomes the outside. Quickest way to turn a shape into the hole it would leave.
The Negate node
When to use it
Flips the sign. On a density field that swaps solid and empty, so the inside becomes the outside. Quickest way to turn a shape into the hole it would leave.
For carving one shape out of another, Subtraction does the negate and the combine together and keeps the result valid. This node on its own leaves you to get the max() right yourself.
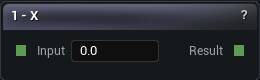
1 minus the input. The standard way to flip a 0 to 1 mask, and easier to read on the canvas than a Subtract wired to a constant.
The One Minus node
When to use it
1 minus the input. The standard way to flip a 0 to 1 mask, and easier to read on the canvas than a Subtract wired to a constant.
It is not how you invert a density field; Negate is. A distance field is not confined to 0 to 1, so 1 - d shifts the surface as well as flipping it and the shape comes out the wrong size.
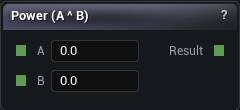
A raised to the power B, using the absolute value of A so a negative base cannot produce something undefined.
The Power node
When to use it
A raised to the power B, using the absolute value of A so a negative base cannot produce something undefined.
That guard matters more than it sounds, because a density field is negative half the time. Raise a signed field to a power and the sign quietly disappears, taking the inside of your shape with it. Shape masks with this. Leave signed fields alone.
On a 0 to 1 mask, exponents above 1 push it toward 0 and sharpen the edge. Below 1 pushes toward 1 and softens it.
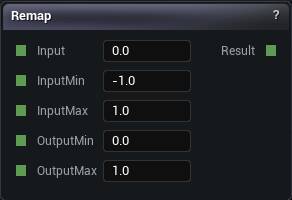
Rescales a value from one range to another, linearly.
The Remap node
When to use it
Rescales a value from one range to another, linearly.
Most noise comes out around -1 to 1 and most things that consume it expect 0 to 1. Forgetting that is the single most common reason a pattern looks half missing: the negative half is being read as zero.
It does not clamp. Feed it something outside Input Min to Input Max and the output runs straight past Output Min and Output Max. Inverse Lerp is the clamped version, or put a Clamp after this one.
Pins
Pin
Type
Description
InputMin
Number
The input value that should come out as Output Min.
InputMax
Number
The input value that should come out as Output Max.
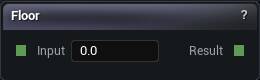
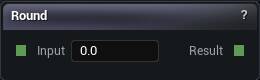
Pick it over Floor when the quantised value has to stay centred on the original. Flooring biases everything down by half a step, and once that result drives a position you see it as a systematic shift of the whole pattern.
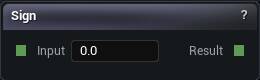
+1 for positive, -1 for negative, 0 for exactly zero.
The Sign node
When to use it
+1 for positive, -1 for negative, 0 for exactly zero.
On a density field that turns a smooth distance into a hard inside-or-outside flag. Occasionally that is what a mask wants. It is always bad input for the mesher, which needs a slope to find the crossing point in. Give it a sign and the surface snaps to voxel corners.
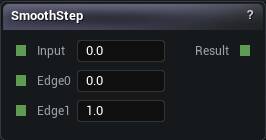
An S-curve ramp. 0 below Edge0, 1 above Edge1, smooth in between.
The Smooth Step node
When to use it
An S-curve ramp. 0 below Edge0, 1 above Edge1, smooth in between.
The standard way to turn any value into a soft mask, and better than Compare for anything that ends up visible, because the slope is continuous at both ends instead of jumping.
Putting Edge0 above Edge1 works and inverts the ramp, which saves a node when you want the mask the other way round.
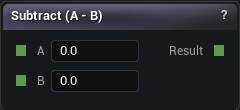
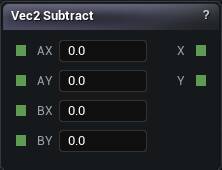
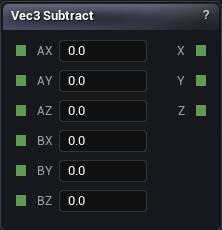
To carve one shape out of another, use the Subtraction node. It computes max(A, -B) and leaves you something that is still a distance field. Plain subtraction does not.
Where this one earns its place is building expressions. noise * amplitude - z is the standard height-based terrain field, and it is exactly what both erosion nodes expect to be handed.
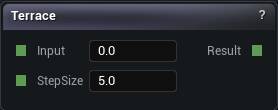
Quantises a smooth value into flat plateaus. Rice-paddy terracing on a height field. Step Size is the height of one plateau, in whatever units the input is in.
The Terrace node
When to use it
Quantises a smooth value into flat plateaus. Rice-paddy terracing on a height field. Step Size is the height of one plateau, in whatever units the input is in.
Pins
Pin
Type
Description
StepSize
Number
How tall each flat step is, in the same units the input is in.
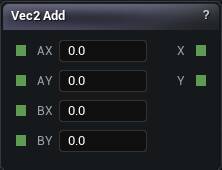
The Vec2 family exists for the XY-plane work heightmap terrain needs. Mixing it with the Vec3 family silently drops Z, so a pattern that should climb ends up flat.
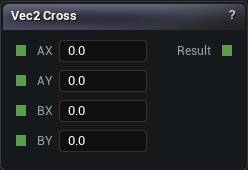
The 2D perp-dot product, A.X B.Y - A.Y B.X. It comes out as a single number, not a vector.
The Vec2 Cross node
When to use it
The 2D perp-dot product, A.X * B.Y - A.Y * B.X. It comes out as a single number, not a vector.
Positive if B is counter-clockwise from A, negative if clockwise. That makes it the 2D handedness test and the sign of the angle between two directions.
Vec3 Cross is the one that gives you a vector back. Do not expect these two to behave alike.
Pins
Pin
Type
Description
AX
Number
A X component.
AY
Number
A Y component.
BX
Number
B X component.
BY
Number
B Y component.
Pin
Type
Description
Result
Number
Which side of A the vector B falls on. Positive counter-clockwise, negative clockwise.
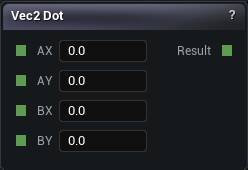
Dot product of two 2D vectors. Positive when they point the same way, zero when perpendicular, negative when opposed.
The Vec2 Dot node
When to use it
Dot product of two 2D vectors. Positive when they point the same way, zero when perpendicular, negative when opposed.
Normalise both inputs first if you want to read the result as a cosine. Unnormalised inputs scale it by their lengths, and the comparison you thought you were making stops meaning what you thought.
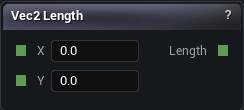
Planar distances: how far from an axis, ignoring height. That is exactly what turns a position into a cylinder, and it is cheaper than taking a 3D length and then having to ignore a component of it.
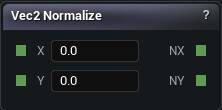
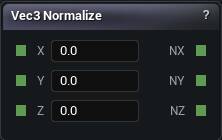
Unit-length version of a 2D vector. A zero-length input safely returns (0, 0) rather than an error.
The Vec2 Normalize node
When to use it
Unit-length version of a 2D vector. A zero-length input safely returns (0, 0) rather than an error.
That guard is why a direction built from a difference can come out as zero instead of blowing up. When a direction-driven pattern goes blank at one spot, this is usually where it happened.
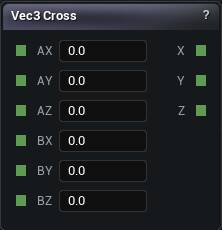
Cross product. The vector perpendicular to both inputs.
The Vec3 Cross node
When to use it
Cross product. The vector perpendicular to both inputs.
Use it to build a frame, like a tangent from a normal and an up vector.
The result is zero when the inputs are parallel, which is exactly what happens at the poles of any up-based frame. Whatever you built on that frame goes undefined there.
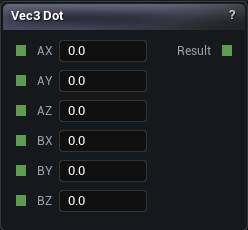
Dot product of two 3D vectors. +1 parallel, 0 perpendicular, -1 opposite, but only when both inputs are unit length.
The Vec3 Dot node
When to use it
Dot product of two 3D vectors. +1 parallel, 0 perpendicular, -1 opposite, but only when both inputs are unit length.
That condition is the trap. Dot a raw position against World Up and what comes back is a height, not a slope, and it keeps growing the higher you go. Normalise first whenever you want an angle.
Length of position minus centre, minus a radius, is a sphere, and the Sphere primitive already computes that for you. Come here when you want the distance itself as a control value.
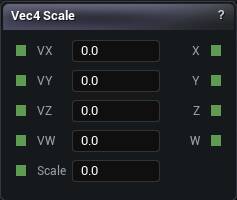
On an RGBA colour this pulls alpha into the magnitude, so what comes back is not a brightness. Take the RGB as a Vec3 if brightness is what you wanted.
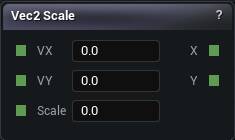
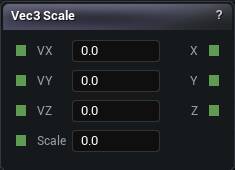
On an RGBA colour that scales the alpha too, which is almost never what anyone meant. Halve a colour and it comes back half transparent as well as half as bright. Scale the RGB as a Vec3 and carry alpha separately.
Pins
Pin
Type
Description
VX
Number
V X component.
VY
Number
V Y component.
VZ
Number
V Z component.
VW
Number
V W component.
Scale
Number
One number that multiplies every part of the vector.
Holds the value between Min and Max. Anything outside gets pulled back to the nearest end.
The Clamp node
When to use it
Holds a value inside a range.
Useful for keeping a computed parameter within what the thing downstream tolerates, and for flattening the extremes of a noise. Clamping the top of a height field is how you get mesas.
Clamping a distance field puts flat plateaus in the field itself, and the mesher reads those as abrupt surfaces in places you never put any. Clamp the amplitude before it becomes a field, not after.
Picks A or B depending on whether Control sits above or below Threshold. Leave Falloff at 0 for a hard switch; raise it to fade across the boundary instead.
The Select node
When to use it
Chooses between A and B depending on whether Control sits above or below Threshold, with Falloff blending the changeover instead of switching hard.
This is the node for blending biomes or materials by height, slope or noise, because the falloff removes the seam that If and Branch leave behind.
Falloff is measured in whatever units Control is in, and the blend band runs from Threshold minus Falloff to Threshold plus Falloff. A falloff of 1 on a control that only ranges 0 to 1 blends across the entire range, and the threshold stops meaning anything at all.
Pins
Pin
Type
Description
A
Number
What you get when Control is above the Threshold.
B
Number
What you get when Control is below the Threshold.
Control
Number
The value being tested.
Threshold
Number
The line Control gets measured against.
Falloff
Number
How wide the fade around the threshold runs. 0 gives a hard switch.
Pin
Type
Description
Result
Number
A or B, with a fade between them when Falloff is above 0.
Constructive solid geometry: union, intersection and subtraction of distance fields, with smooth (blended) variants that round the seam instead of creasing it.
Studio and Graph › Voxel › CSG
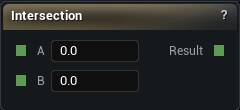
Intersection
Keeps only what is solid in both inputs. max(A, B), since positive means outside.
The Intersection node
When to use it
Keeps only what is solid in both inputs. max(A, B), since positive means outside.
The everyday use is trimming. Intersect a detailed shape with a Box or a Plane and it gets cut to size without you modelling the cut.
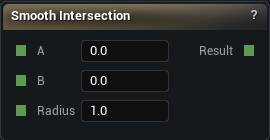
Smooth Intersection is the filleted version of the same thing.
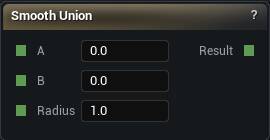
A Union whose seam is blended over a radius instead of meeting at a crease. This is what makes boolean-built forms read as grown rather than assembled.
The Smooth Union node
When to use it
A Union whose seam is blended over a radius instead of meeting at a crease. This is what makes boolean-built forms read as grown rather than assembled.
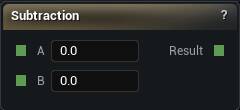
Carves B out of A. Solid where A is solid and B is not, computed as max(A, -B).
The Subtraction node
When to use it
Carves B out of A. Solid where A is solid and B is not, computed as max(A, -B).
Holes, windows, caves and doorways all come from this node. It is also why you should not reach for the arithmetic Subtract, which leaves you a field that is no longer a distance to anything and makes everything downstream worse.
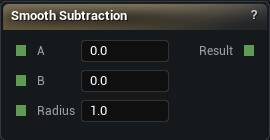
The cut edge is sharp. Smooth Subtraction rounds it.
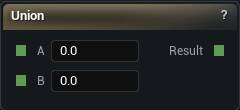
Solid wherever either input is solid. The add of boolean modelling.
The Union node
When to use it
Solid wherever either input is solid. The add of boolean modelling.
Under this graph's convention, where negative means inside, that comes out as min(A, B).
The join is a crease. Smooth Union gives you a fillet instead. And do not reach for the arithmetic Add here: adding two fields gives you a shape that is neither of them.
Primitive distance fields - spheres, boxes, cylinders and friends - used as building blocks for CSG.
Studio and Graph › Voxel › Shape
Box
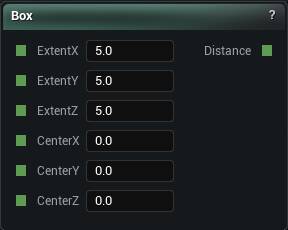
An axis-aligned box, negative inside. As often a cutter as a shape: intersect to crop a field down to a region, subtract to punch a rectangular hole.
The Box node
When to use it
An axis-aligned box, negative inside. As often a cutter as a shape: intersect to crop a field down to a region, subtract to punch a rectangular hole.
Axis-aligned by construction. To tilt it, rotate the domain.
For anything that will be smooth-unioned, Rounded Box is the better start. Sharp corners give Smooth Union nothing even to blend against and the fillets come out uneven around them.
Pins
Pin
Type
Description
ExtentX
Number
Half the width of the box, so 5 gives you a box 10 across.
ExtentY
Number
Half the depth of the box.
ExtentZ
Number
Half the height of the box.
CenterX
Number
Where the box sits along X.
CenterY
Number
Where the box sits along Y.
CenterZ
Number
Where the box sits along Z.
Pin
Type
Description
Distance
Number
The shape as a field. Negative inside it, positive outside, zero on the skin.
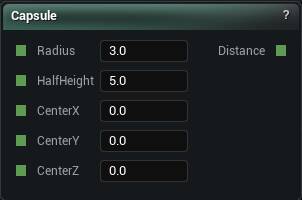
A vertical capsule: a cylinder with hemispherical caps. Limbs, balloons, rounded pillars.
The Capsule node
When to use it
A vertical capsule: a cylinder with hemispherical caps. Limbs, balloons, rounded pillars.
Radius sets both the tube and the caps. Half Height covers only the straight middle section, so the total length works out at twice Half Height plus twice Radius.
For a shape going into a Smooth Union this beats Cylinder every time. Round caps blend where flat caps crease.
Pins
Pin
Type
Description
Radius
Number
How fat the pill is. Also the size of the domed ends.
HalfHeight
Number
Half the length of the straight middle bit. The domes are on top of this.
CenterX
Number
Where the pill sits along X.
CenterY
Number
Where the pill sits along Y.
CenterZ
Number
Where the pill sits along Z.
Pin
Type
Description
Distance
Number
The shape as a field. Negative inside it, positive outside, zero on the skin.
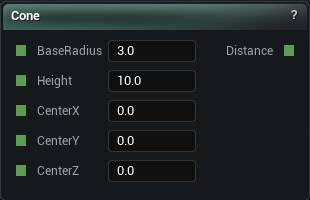
A vertical cone. The base sits at the centre point and the apex is Height above it. Mountain peaks, spikes, stylised trees.
The Cone node
When to use it
A vertical cone. The base sits at the centre point and the apex is Height above it. Mountain peaks, spikes, stylised trees.
The field is built from three flat tests rather than a true distance, and near the very tip all three go slack. Smooth Union around the apex pinches oddly because of it.
Blend at the base instead, or cut the tip off with an Intersection against a Plane and blend there.
Pins
Pin
Type
Description
BaseRadius
Number
How wide the cone is where it meets the ground.
Height
Number
How tall the cone is, base to tip.
CenterX
Number
Where the cone sits along X.
CenterY
Number
Where the cone sits along Y.
CenterZ
Number
Where the base of the cone sits along Z.
Pin
Type
Description
Distance
Number
The shape as a field. Negative inside it, positive outside, zero on the skin.
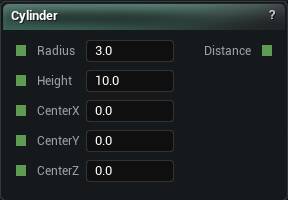
A cylinder, negative inside. Pipes, columns, and a drill bit for Subtraction.
The Cylinder node
When to use it
A cylinder, negative inside. Pipes, columns, and a drill bit for Subtraction.
Its axis runs along Y, the same axis the Torus hole uses, so a fresh one lies on its side rather than standing up. Rotate the domain to aim it anywhere else. Capsule, Cone and Hex Prism are all built along Z instead, which is worth knowing before you swap one for another and watch the shape fall over.
The caps are flat and sharp. When the ends are heading into a Smooth Union, Capsule blends far more cleanly.
Pins
Pin
Type
Description
Radius
Number
How fat the cylinder is.
Height
Number
How long the cylinder is, end to end along its Y axis.
CenterX
Number
Where the cylinder sits along X.
CenterY
Number
Where the cylinder sits along Y.
CenterZ
Number
Where the cylinder sits along Z.
Pin
Type
Description
Distance
Number
The shape as a field. Negative inside it, positive outside, zero on the skin.
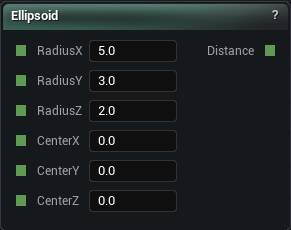
A sphere stretched or squashed independently on each axis. Eggs, pebbles, elongated blobs.
The Ellipsoid node
When to use it
A sphere stretched or squashed independently on each axis. Eggs, pebbles, elongated blobs.
A non-uniformly scaled sphere is only an approximate distance field, so a strongly stretched ellipsoid blends slightly unevenly under Smooth Union. A Sphere inside a scaled domain has the same problem, so at least here it is visible on the node.
Pins
Pin
Type
Description
RadiusX
Number
How far the shape reaches along X.
RadiusY
Number
How far the shape reaches along Y.
RadiusZ
Number
How far the shape reaches along Z.
CenterX
Number
Where the shape sits along X.
CenterY
Number
Where the shape sits along Y.
CenterZ
Number
Where the shape sits along Z.
Pin
Type
Description
Distance
Number
The shape as a field. Negative inside it, positive outside, zero on the skin.
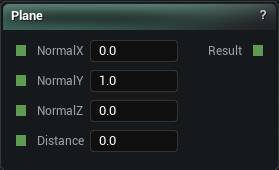
An infinite half-space. Everything on one side is inside, everything on the other is outside.
The Plane node
When to use it
An infinite half-space. Everything on one side is inside, everything on the other is outside.
It is rarely a shape and nearly always a knife. Intersect with it to slice a model flat. Subtract it to remove everything below a level.
Because it is infinite, unioning it with anything fills the entire world on one side. That is a fast way to fill your whole Search Extent with solid by accident and then wonder why the bake is taking ten minutes.
Pins
Pin
Type
Description
NormalX
Number
Which way the plane faces, along X.
NormalY
Number
Which way the plane faces, along Y.
NormalZ
Number
Which way the plane faces, along Z.
Distance
Number
How far the plane sits from the origin.
Pin
Type
Description
Result
Number
Negative on the solid side of the plane, positive on the empty side.
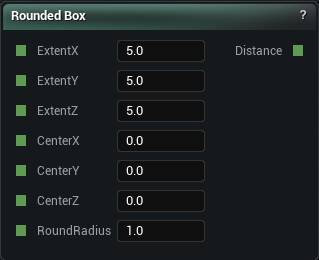
A box with softly rounded corners, and the primitive most boolean modelling should start from. The corner radius gives Smooth Union something even to work with, which a sharp Box does not.
The Rounded Box node
When to use it
A box with softly rounded corners, and the primitive most boolean modelling should start from. The corner radius gives Smooth Union something even to work with, which a sharp Box does not.
A small Round Radius reads as machined. A large one reads as a pill.
The radius eats into the extents rather than adding to them, so a rounded box is never bigger than the box you asked for.
Pins
Pin
Type
Description
ExtentX
Number
Half the width of the box, measured before the corners are rounded off.
ExtentY
Number
Half the depth of the box.
ExtentZ
Number
Half the height of the box.
CenterX
Number
Where the box sits along X.
CenterY
Number
Where the box sits along Y.
CenterZ
Number
Where the box sits along Z.
RoundRadius
Number
How much to take off the corners. Push it up to half the smallest extent and the box turns into a ball.
Pin
Type
Description
Distance
Number
The shape as a field. Negative inside it, positive outside, zero on the skin.
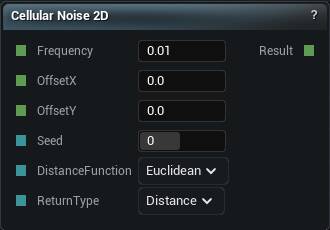
2D cellular noise. Voronoi cells in the XY plane, the standard way to lay out biome regions or a cracked-ground pattern on terrain.
The Cellular Noise 2D node
When to use it
2D cellular noise. Voronoi cells in the XY plane, the standard way to lay out biome regions or a cracked-ground pattern on terrain.
As with the 3D one, Return Type changes what the output means. Distance gives you something smooth to shape with. Cell Value gives you a flat label per cell. Pick it on purpose.
Pins
Pin
Type
Description
Frequency
Number
How tight the pattern is. Higher numbers give you finer, busier detail.
OffsetX
Number
Slide the pattern along X.
OffsetY
Number
Slide the pattern along Y.
Seed
Whole Number
Change this for a different pattern at the same settings. The same seed always gives you the same noise.
DistanceFunction
Choice
How cell edges are measured. Changes whether the cells look rounded or angular.
ReturnType
Choice
What the node hands back: distance to the nearest cell centre, the gap between the two nearest, and so on.
Pin
Type
Description
Result
Number
The noise here. Roughly -1 to 1, and the same at every height.
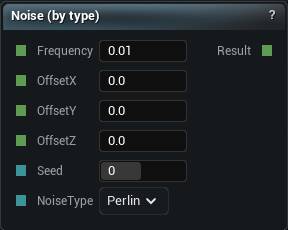
3D noise whose basis is picked at runtime through the Noise Type pin. Wire a Noise Type selector, or any int source, and swap between Perlin, Simplex and Value without rewiring anything.
The Noise 3D node
When to use it
3D noise whose basis is picked at runtime through the Noise Type pin. Wire a Noise Type selector, or any int source, and swap between Perlin, Simplex and Value without rewiring anything.
Those three are the whole list. White Noise and Cellular Noise are separate nodes and this pin cannot reach them.
Worth it when the basis is genuinely data-driven or you are comparing two of them side by side. When it is not, the fixed nodes say on the canvas which noise you are getting, and six months later that matters.
Pins
Pin
Type
Description
Frequency
Number
How tight the pattern is. Higher numbers give you finer, busier detail.
OffsetX
Number
Slide the pattern along X.
OffsetY
Number
Slide the pattern along Y.
OffsetZ
Number
Slide the pattern along Z.
Seed
Whole Number
Change this for a different pattern at the same settings. The same seed always gives you the same noise.
NoiseType
Choice
Which flavour of noise to use. Wire a Noise Type node in to swap it from the graph.
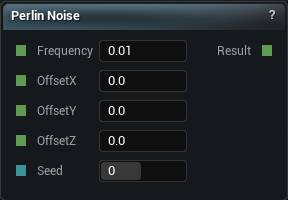
Classic Perlin. Smoothly varying pseudo-random values, good for soft bumps and gentle organic detail. Output sits roughly between -1 and 1, so remap before treating it as a mask.
The Perlin Noise node
When to use it
Classic Perlin. Smoothly varying pseudo-random values, good for soft bumps and gentle organic detail. Output sits roughly between -1 and 1, so remap before treating it as a mask.
One octave only. For the layered detail that actually reads as terrain, Perlin FBM.
Perlin has mild axis-aligned artefacts, faint grid lines you notice once you know they are there. Simplex is the better default for that reason.
Pins
Pin
Type
Description
Frequency
Number
How tight the pattern is. Higher numbers give you finer, busier detail.
OffsetX
Number
Slide the pattern along X.
OffsetY
Number
Slide the pattern along Y.
OffsetZ
Number
Slide the pattern along Z.
Seed
Whole Number
Change this for a different pattern at the same settings. The same seed always gives you the same noise.
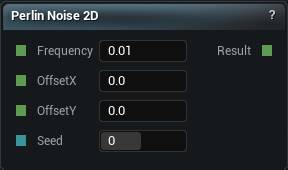
Perlin sampled in the XY plane only, so the same value comes back at every height.
The Perlin Noise 2D node
When to use it
Perlin sampled in the XY plane only, so the same value comes back at every height.
That is exactly what a heightmap wants and exactly wrong for caves or overhangs, which need the value to change as you go up.
Build terrain as height minus Z with the 2D family. Switch to the 3D family the moment you need real volume. The 2D version is cheaper too, which is another reason to choose deliberately.
Pins
Pin
Type
Description
Frequency
Number
How tight the pattern is. Higher numbers give you finer, busier detail.
OffsetX
Number
Slide the pattern along X.
OffsetY
Number
Slide the pattern along Y.
Seed
Whole Number
Change this for a different pattern at the same settings. The same seed always gives you the same noise.
Pin
Type
Description
Result
Number
The noise here. Roughly -1 to 1, and the same at every height.
Value noise. Blockier than Perlin or Simplex, cheaper to evaluate, with visible cell structure.
The Value Noise node
When to use it
Value noise. Blockier than Perlin or Simplex, cheaper to evaluate, with visible cell structure.
Choose it on purpose, for a chunky stylised look or somewhere the cost genuinely matters. For anything meant to read as natural, Simplex is the better basis.
Pins
Pin
Type
Description
Frequency
Number
How tight the pattern is. Higher numbers give you finer, busier detail.
OffsetX
Number
Slide the pattern along X.
OffsetY
Number
Slide the pattern along Y.
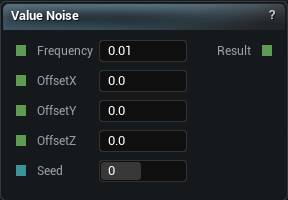
OffsetZ
Number
Slide the pattern along Z.
Seed
Whole Number
Change this for a different pattern at the same settings. The same seed always gives you the same noise.
Never wire it into density. Neighbouring voxels are completely uncorrelated, so there is no surface anywhere for the mesher to find and what you get back is static.
Good for stippling and scatter masks. When the same position has to give the same answer twice, Hash and the Stable random nodes are the ones.
Pins
Pin
Type
Description
Frequency
Number
How tight the pattern is. Higher numbers give you finer, busier detail.
OffsetX
Number
Slide the pattern along X.
OffsetY
Number
Slide the pattern along Y.
OffsetZ
Number
Slide the pattern along Z.
Seed
Whole Number
Change this for a different pattern at the same settings. The same seed always gives you the same noise.
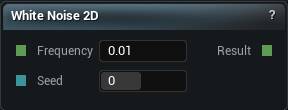
2D white noise. Per-sample random with no smoothing.
The White Noise 2D node
When to use it
2D white noise. Per-sample random with no smoothing.
Same rule as the 3D version: never into a density. Scatter masks and stippling only. When the value has to be stable for a given position, Hash or a Stable random node.
Pins
Pin
Type
Description
Frequency
Number
How tight the pattern is. Higher numbers give you finer, busier detail.
OffsetX
Number
Slide the pattern along X.
OffsetY
Number
Slide the pattern along Y.
Seed
Whole Number
Change this for a different pattern at the same settings. The same seed always gives you the same noise.
Pin
Type
Description
Result
Number
The noise here. Roughly -1 to 1, and the same at every height.
Layered noise: octaves of a base noise summed into fractal detail, with the usual lacunarity and gain controls.
Studio and Graph › Voxel › Fractal Noise
Fractal Noise
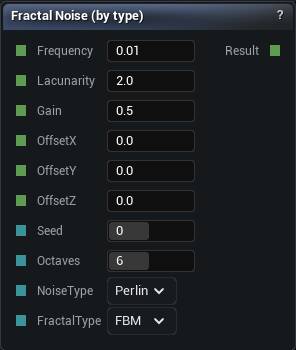
Fractal noise with both the basis and the fractal shape chosen at runtime through pins. The most flexible noise node here and the least self-documenting.
The Fractal Noise node
When to use it
Fractal noise with both the basis and the fractal shape chosen at runtime through pins. The most flexible noise node here and the least self-documenting.
Reach for it when a selector is genuinely driving the choice. Otherwise Simplex FBM, Perlin Ridged and the rest of the named nodes leave a graph someone can read.
Pins
Pin
Type
Description
Frequency
Number
How tight the biggest layer is. Everything else is built on top of it.
Lacunarity
Number
How much smaller each layer gets. At 2 every layer is half the size of the one before.
Gain
Number
How much quieter each layer gets. Low is crisp, high is rough and grubby.
OffsetX
Number
Slide the pattern along X.
OffsetY
Number
Slide the pattern along Y.
OffsetZ
Number
Slide the pattern along Z.
Seed
Whole Number
Change this for a different pattern at the same settings. The same seed always gives you the same noise.
Octaves
Whole Number
How many layers to stack. Past about 8 you are paying for detail finer than your voxels can show.
NoiseType
Choice
Which flavour of noise to use.
FractalType
Choice
How the layers get folded together: plain, ridged, puffy or churning.
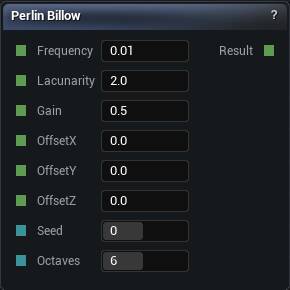
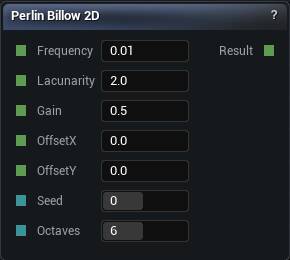
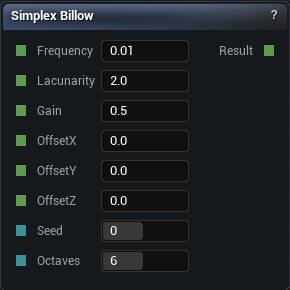
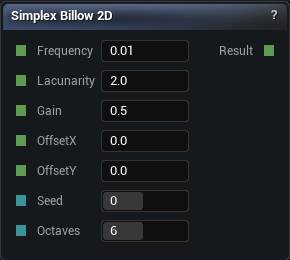
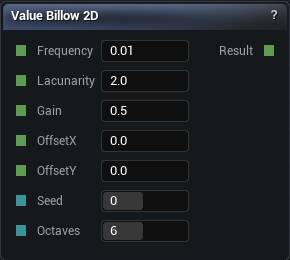
Multi-octave Perlin with puffy rounded features. Clouds, foam, lumpy surfaces.
The Perlin Billow node
When to use it
Multi-octave Perlin with puffy rounded features. Clouds, foam, lumpy surfaces.
It is Ridged folded the other way, so it biases the field downward by about as much as Ridged biases it up. Expect to re-tune your offset when swapping between them.
Pins
Pin
Type
Description
Frequency
Number
How tight the biggest layer is. Everything else is built on top of it.
Lacunarity
Number
How much smaller each layer gets. At 2 every layer is half the size of the one before.
Gain
Number
How much quieter each layer gets. Low is crisp, high is rough and grubby.
OffsetX
Number
Slide the pattern along X.
OffsetY
Number
Slide the pattern along Y.
OffsetZ
Number
Slide the pattern along Z.
Seed
Whole Number
Change this for a different pattern at the same settings. The same seed always gives you the same noise.
Octaves
Whole Number
How many layers to stack. Past about 8 you are paying for detail finer than your voxels can show.
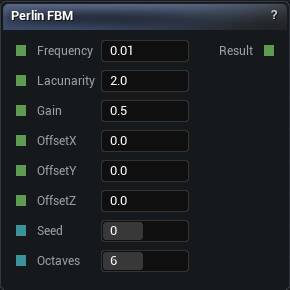
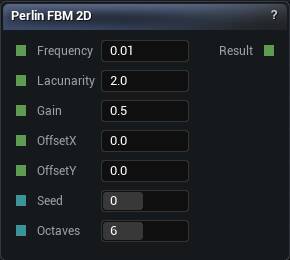
Multi-octave Perlin. The default for natural-looking terrain, because real landscapes have detail at every scale and one octave does not.
The Perlin FBM node
When to use it
Multi-octave Perlin. The default for natural-looking terrain, because real landscapes have detail at every scale and one octave does not.
Octaves cost linearly. Any octave finer than your voxel size is invisible work that also makes the mesher noisier, so match the highest frequency to the resolution you will actually bake at.
Pins
Pin
Type
Description
Frequency
Number
How tight the biggest layer is. Everything else is built on top of it.
Lacunarity
Number
How much smaller each layer gets. At 2 every layer is half the size of the one before.
Gain
Number
How much quieter each layer gets. Low is crisp, high is rough and grubby.
OffsetX
Number
Slide the pattern along X.
OffsetY
Number
Slide the pattern along Y.
OffsetZ
Number
Slide the pattern along Z.
Seed
Whole Number
Change this for a different pattern at the same settings. The same seed always gives you the same noise.
Octaves
Whole Number
How many layers to stack. Past about 8 you are paying for detail finer than your voxels can show.
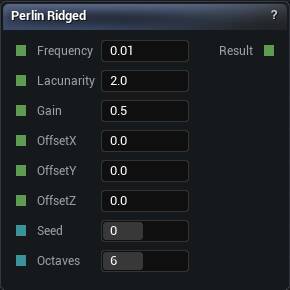
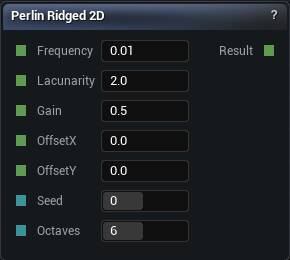
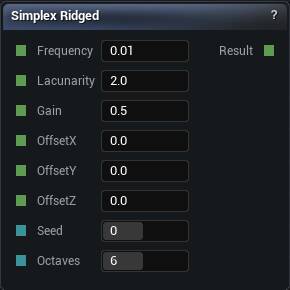
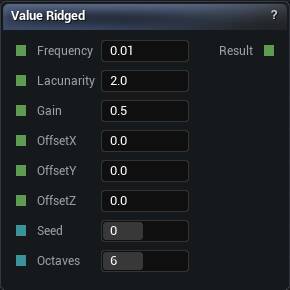
Multi-octave Perlin folded to emphasise sharp ridges. Mountain ranges, cracked earth, anything where FBM looks too rounded.
The Perlin Ridged node
When to use it
Multi-octave Perlin folded to emphasise sharp ridges. Mountain ranges, cracked earth, anything where FBM looks too rounded.
Ridged noise is biased toward its maximum. Swap it in for an FBM at the same amplitude and the whole field sits higher than it did, so the offset that used to put the surface at ground level now buries it.
Pins
Pin
Type
Description
Frequency
Number
How tight the biggest layer is. Everything else is built on top of it.
Lacunarity
Number
How much smaller each layer gets. At 2 every layer is half the size of the one before.
Gain
Number
How much quieter each layer gets. Low is crisp, high is rough and grubby.
OffsetX
Number
Slide the pattern along X.
OffsetY
Number
Slide the pattern along Y.
OffsetZ
Number
Slide the pattern along Z.
Seed
Whole Number
Change this for a different pattern at the same settings. The same seed always gives you the same noise.
Octaves
Whole Number
How many layers to stack. Past about 8 you are paying for detail finer than your voxels can show.
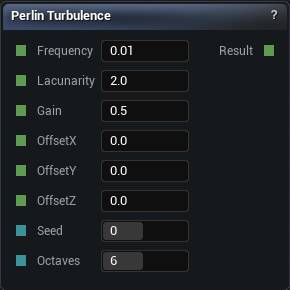
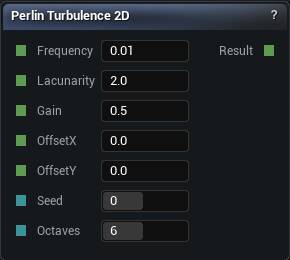
Multi-octave Perlin with a chaotic, swirling character.
The Perlin Turbulence node
When to use it
Multi-octave Perlin with a chaotic, swirling character.
Its best job is as the Warp signal for a Domain Warp, or as abstract texture. As a terrain height it reads as noise rather than landscape, because the slope jumps instead of curving.
Pins
Pin
Type
Description
Frequency
Number
How tight the biggest layer is. Everything else is built on top of it.
Lacunarity
Number
How much smaller each layer gets. At 2 every layer is half the size of the one before.
Gain
Number
How much quieter each layer gets. Low is crisp, high is rough and grubby.
OffsetX
Number
Slide the pattern along X.
OffsetY
Number
Slide the pattern along Y.
OffsetZ
Number
Slide the pattern along Z.
Seed
Whole Number
Change this for a different pattern at the same settings. The same seed always gives you the same noise.
Octaves
Whole Number
How many layers to stack. Past about 8 you are paying for detail finer than your voxels can show.
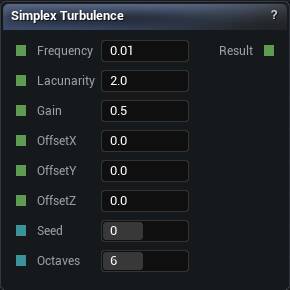
Swirling chaotic noise on a Simplex basis. Best as a Domain Warp source rather than directly as a height, for the same reason as its Perlin counterpart: the slope jumps.
The Simplex Turbulence node
When to use it
Swirling chaotic noise on a Simplex basis. Best as a Domain Warp source rather than directly as a height, for the same reason as its Perlin counterpart: the slope jumps.
Pins
Pin
Type
Description
Frequency
Number
How tight the biggest layer is. Everything else is built on top of it.
Lacunarity
Number
How much smaller each layer gets. At 2 every layer is half the size of the one before.
Gain
Number
How much quieter each layer gets. Low is crisp, high is rough and grubby.
OffsetX
Number
Slide the pattern along X.
OffsetY
Number
Slide the pattern along Y.
OffsetZ
Number
Slide the pattern along Z.
Seed
Whole Number
Change this for a different pattern at the same settings. The same seed always gives you the same noise.
Octaves
Whole Number
How many layers to stack. Past about 8 you are paying for detail finer than your voxels can show.
Multi-octave Value noise. The cheap, blockier alternative to Perlin FBM.
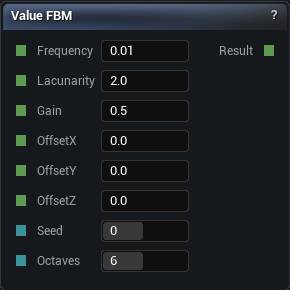
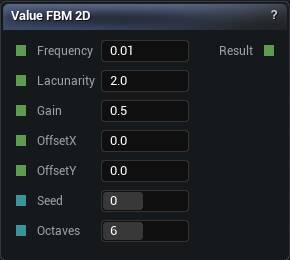
The Value FBM node
When to use it
Multi-octave Value noise. The cheap, blockier alternative to Perlin FBM.
Worth choosing when the look is deliberately stylised or the evaluation budget is genuinely tight. Otherwise the cell structure shows through, worst of all at low octave counts.
Pins
Pin
Type
Description
Frequency
Number
How tight the biggest layer is. Everything else is built on top of it.
Lacunarity
Number
How much smaller each layer gets. At 2 every layer is half the size of the one before.
Gain
Number
How much quieter each layer gets. Low is crisp, high is rough and grubby.
OffsetX
Number
Slide the pattern along X.
OffsetY
Number
Slide the pattern along Y.
OffsetZ
Number
Slide the pattern along Z.
Seed
Whole Number
Change this for a different pattern at the same settings. The same seed always gives you the same noise.
Octaves
Whole Number
How many layers to stack. Past about 8 you are paying for detail finer than your voxels can show.
Regular, repeating fields - tilings and structured patterns rather than noise.
Studio and Graph › Voxel › Pattern
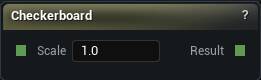
Checkerboard
A 3D checkerboard alternating between +1 and -1 per cell. Scale controls how fine the cells are.
The Checkerboard node
When to use it
A 3D checkerboard alternating between +1 and -1 per cell. Scale controls how fine the cells are.
It is a pattern, not a distance field. Wire it into Density and you get a lattice of solid cubes with no smooth crossing anywhere for the mesher to find.
As a mask it earns its keep: pick out alternating cells for colour, or for a brick-and-mortar classification. Combine it with maths nodes rather than with booleans.
Pins
Pin
Type
Description
Scale
Number
How tight the squares are. Higher numbers make them smaller.
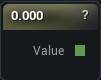
A fixed float, in a small node that fits inside a dense pattern subgraph without taking over the canvas. The title shows the value.
The Constant node
When to use it
A fixed float, in a small node that fits inside a dense pattern subgraph without taking over the canvas. The title shows the value.
Float Input does exactly the same thing in a bigger node with a named field. There is no behavioural difference. Pick whichever keeps the graph readable.
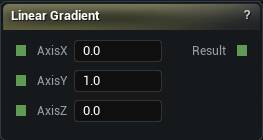
A value that increases along a chosen direction. Layered strata, and any masking that depends on which way something faces in world space.
The Linear Gradient node
When to use it
A value that increases along a chosen direction. Layered strata, and any masking that depends on which way something faces in world space.
The default axis is Y, not Z, so a fresh node varies north-south rather than by height. Set Axis Z to 1 if height is what you meant.
It is unbounded and in world units. Run it through Remap or Inverse Lerp before anything treats it as a 0 to 1 mask, or the mask saturates the moment you leave the origin.
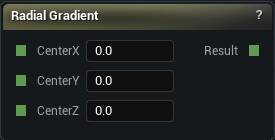
Straight-line distance from a centre point. Circular masks and falloffs.
The Radial Gradient node
When to use it
Straight-line distance from a centre point. Circular masks and falloffs.
It is not a sphere. A sphere is this minus a radius, and that subtraction is the whole difference between something you can mesh and something you can only mask with.
Spherical Gradient is the version that arrives already normalised, 1 at the centre falling to 0.
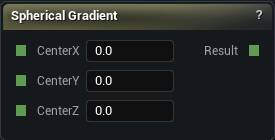
A soft blob mask that needs no remapping: 1 at the centre, falling to 0 at a distance of 1.
The Spherical Gradient node
When to use it
A soft blob mask that needs no remapping: 1 at the centre, falling to 0 at a distance of 1.
That 1 is one world unit, which is tiny. Straight out of the box this node reads 0 almost everywhere and looks broken. Scale the domain to size it, because the falloff distance is fixed and there is no radius pin to change.
Good for localising an effect: noise only near a point, colour only around a landmark.
Domain operations bend the space a field is sampled in: repeat it, mirror it, twist it or transform it, without touching the field itself.
Studio and Graph › Voxel › Domain
Domain Bend
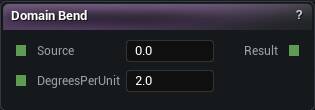
Bends Source around Y, with the bend growing along X. A straight column becomes an arch.
The Domain Bend node
When to use it
Bends Source around Y, with the bend growing along X. A straight column becomes an arch.
Same warning as Domain Twist. Bending distorts the distances, and Smooth Union and the mesher both rely on those being roughly honest. A heavy bend shows up as uneven fillets and rough patches.
Bend for the big gesture, then model the detail after the bend rather than before it.
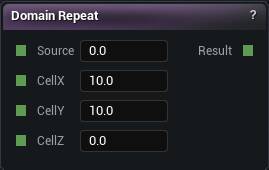
Tiles the Source subgraph forever by folding the sample position into one cell. A single Sphere plus a small Domain Repeat is a whole field of spheres for the memory of one.
The Domain Repeat node
When to use it
Tiles the Source subgraph forever by folding the sample position into one cell. A single Sphere plus a small Domain Repeat is a whole field of spheres for the memory of one.
Cell Z defaults to 0, and an axis with a cell of 0 does not tile at all. That is usually what you want for pillars standing on ground, and a surprise if you expected a 3D lattice.
The cell has to be bigger than the shape inside it. A shape wider than its cell gets sliced by the fold and the copies fuse into one slab. Pair it with Domain Warp so the grid does not read as a grid.
Pins
Pin
Type
Description
Source
Number
The thing to repeat.
CellX
Number
How far apart the copies sit along X. 0 means no repeat on this axis.
CellY
Number
How far apart the copies sit along Y. 0 means no repeat on this axis.
CellZ
Number
How far apart the copies sit along Z. 0 means no repeat on this axis.
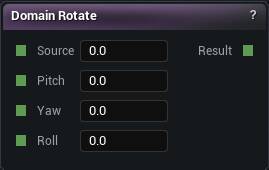
Rotates the coordinates before Source samples them, so any position-based pattern can be tilted or turned. Pitch turns around Y, Yaw around Z, Roll around X, all in degrees.
The Domain Rotate node
When to use it
Rotates the coordinates before Source samples them, so any position-based pattern can be tilted or turned. Pitch turns around Y, Yaw around Z, Roll around X, all in degrees.
The patterns that need it are the ones with a direction baked in: Linear Gradient, Sine Wave, a 2D noise that only knows about XY. You cannot fix their orientation with vector maths further down the graph, because by then they have already been sampled.
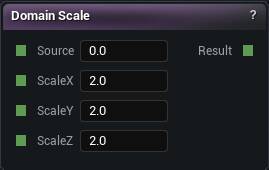
Stretches or squashes the coordinates before Source sees them. That is how you grow or shrink noise features, or any position-driven pattern, without touching the pattern itself.
The Domain Scale node
When to use it
Stretches or squashes the coordinates before Source sees them. That is how you grow or shrink noise features, or any position-driven pattern, without touching the pattern itself.
The multiply lands on the sample point, so a scale of 2 makes features half as big, not twice as big.
On a distance field it scales the distances too. A shape inside a scaled domain blends through Smooth Union with a different effective radius than the one you typed. When the exact distances matter, change the primitive's own Radius or Extent instead.
Pins
Pin
Type
Description
Source
Number
The thing to stretch or squash.
ScaleX
Number
Squash along X. Higher numbers make the pattern tighter, not bigger.
ScaleY
Number
Squash along Y. Higher numbers make the pattern tighter, not bigger.
ScaleZ
Number
Squash along Z. Higher numbers make the pattern tighter, not bigger.
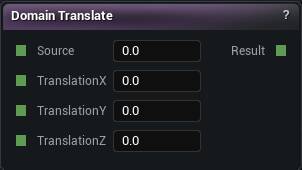
Shifts the coordinates before the Source subgraph reads them, which moves whatever Source produces without reshaping it.
The Domain Translate node
When to use it
Shifts the coordinates before the Source subgraph reads them, which moves whatever Source produces without reshaping it.
Here is the part that catches everyone. The offset is added to the sample point, so the shape appears to go the other way. Type 100 into Translation X and the sphere slides 100 units toward negative X. Nudge it, look, then commit to a sign.
Worth reaching for when one subgraph has to appear in several places. Building the offset into a primitive's own Center X only works once.
Pins
Pin
Type
Description
Source
Number
The thing to move.
TranslationX
Number
Shift along X. The shape travels the opposite way from the number you type.
TranslationY
Number
Shift along Y. The shape travels the opposite way from the number you type.
TranslationZ
Number
Shift along Z. The shape travels the opposite way from the number you type.
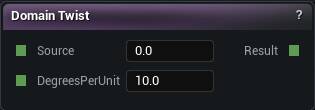
Twists Source around the vertical axis, with the rotation growing as you go up. A straight tower comes out a helix. Degrees Per Unit is how much turn each world unit of height adds.
The Domain Twist node
When to use it
Twists Source around the vertical axis, with the rotation growing as you go up. A straight tower comes out a helix. Degrees Per Unit is how much turn each world unit of height adds.
A hard twist shears the distance field. What was an exact distance becomes an overestimate, and the mesher answers with facets or holes through the twisted part. Keep the rate modest, or drop the voxel size to compensate.
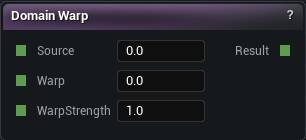
Pushes the sample position around by a Warp signal before Source reads it. Noise fed into noise. It breaks up repetition and gives a field that drifting, organic look.
The Domain Warp node
When to use it
Pushes the sample position around by a Warp signal before Source reads it. Noise fed into noise. It breaks up repetition and gives a field that drifting, organic look.
Feed Warp from a second noise at a lower frequency than the one inside Source. Using the same noise for both just smears the pattern along itself.
The displacement is in world units, and the same value shifts all three axes together, so it slides the sample point along a diagonal. A Warp Strength anywhere near your feature size dissolves the shape completely. Start at a tenth of it.
Pins
Pin
Type
Description
Source
Number
The thing to push around.
Warp
Number
What does the pushing. Nearly always a noise node.
WarpStrength
Number
How hard the warp pushes. Too much and the shape tears itself apart.
One fixed colour, for the R/G/B/A inputs on Density to Mesh or a Paint node. The quickest way to give voxel output a solid colour without touching a material.
The Constant Color node
When to use it
One fixed colour, for the R/G/B/A inputs on Density to Mesh or a Paint node. The quickest way to give voxel output a solid colour without touching a material.
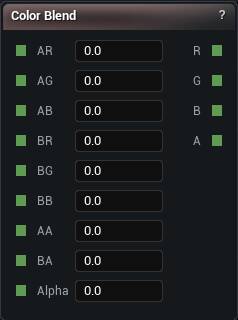
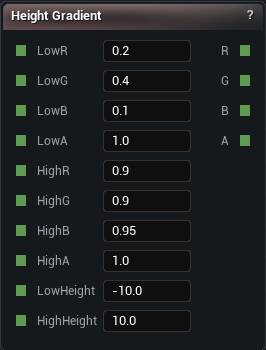
When the colour should follow the shape, Height Gradient and Color Blend are the nodes that do that.
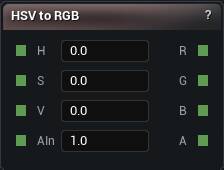
Converts HSV back to RGB. Hue is in degrees from 0 to 360, saturation and value from 0 to 1.
The HSV to RGB node
When to use it
Converts HSV back to RGB. Hue is in degrees from 0 to 360, saturation and value from 0 to 1.
The degrees are the trap. Feed a 0 to 1 hue in here, as though it were normalised, and you get one thin sliver of red instead of the spectrum you expected. Multiply by 360 first.
Values outside the range wrap, so a hue of 400 is a hue of 40.
Pins
Pin
Type
Description
H
Number
Hue, in degrees round the wheel. Go past 360 or below 0 and it wraps by itself.
S
Number
How strong the colour is, 0 to 1. Anything outside gets pulled back in.
V
Number
How bright it is, 0 to 1. Anything outside gets pulled back in.
AIn
Number
Alpha, 0 to 1. It comes out the far side untouched.
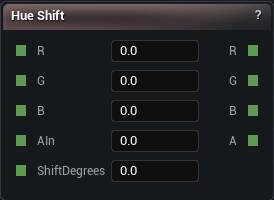
Rotates the hue of an RGB colour and leaves saturation and value alone. Per-region biome variation from one base colour, without the round trip through HSV and back.
The Hue Shift node
When to use it
Rotates the hue of an RGB colour and leaves saturation and value alone. Per-region biome variation from one base colour, without the round trip through HSV and back.
Shift Degrees wraps at 360, so 370 and 10 give you the same colour.
When you need to change more than hue, the explicit RGB to HSV and HSV to RGB pair is the way.
Pins
Pin
Type
Description
R
Number
Red of the colour going in.
G
Number
Green of the colour going in.
B
Number
Blue of the colour going in.
AIn
Number
Alpha. It comes out the far side untouched.
ShiftDegrees
Number
How far round the colour wheel to spin, in degrees. It wraps, so 400 is the same as 40.
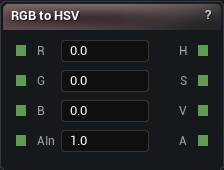
Converts RGB to HSV so hue, saturation and value can be moved independently.
The RGB to HSV node
When to use it
Converts RGB to HSV so hue, saturation and value can be moved independently.
That is the only sane way to build colour variation. Nudge R, G and B separately and you change brightness and hue together, and you end up chasing your own tail.
Pair it with HSV to RGB to convert back. Hue Shift is the shortcut when rotating hue is all you need. Alpha passes through untouched.
Pins
Pin
Type
Description
R
Number
Red, 0 to 1.
G
Number
Green, 0 to 1.
B
Number
Blue, 0 to 1.
AIn
Number
Alpha, 0 to 1. It comes out the far side untouched.
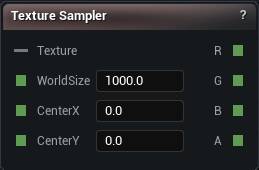
Samples a 2D texture at the current world XY position with bilinear filtering. Hand-painted biome masks, splat maps, height ramps, anything easier to draw than to describe.
The Texture Sampler node
When to use it
Samples a 2D texture at the current world XY position with bilinear filtering. Hand-painted biome masks, splat maps, height ramps, anything easier to draw than to describe.
Pins
Pin
Type
Description
Texture
Texture
The picture to read. It has to come from a Load Texture File node.
WorldSize
Number
How much ground the picture is stretched across, in world units.
CenterX
Number
Where the middle of the picture sits along X.
CenterY
Number
Where the middle of the picture sits along Y.
Pin
Type
Description
R
Number
Red of the pixel under this voxel.
G
Number
Green of the pixel under this voxel.
B
Number
Blue of the pixel under this voxel.
A
Number
Alpha of the pixel under this voxel.
Settings
Setting
Type
Description
Wrap
True/False
What happens past the edge of the picture. On, it tiles forever. Off, the edge pixels smear outwards in long streaks.
Operations that reshape an existing field, such as offsetting or thickening its surface.
Studio and Graph › Voxel › Modification
Erosion
Slope-weighted fractal noise laid over a shape you already have. Rough highlights along cliffs and ridges, flat ground left mostly alone.
The Erosion node
When to use it
Slope-weighted fractal noise laid over a shape you already have. Rough highlights along cliffs and ridges, flat ground left mostly alone.
No water is involved and no valleys get carved. Hydraulic Erosion is the one that does that, at the cost of a full simulation on every compile. This is cheap enough to leave switched on while you work.
Save it for last. It roughens large forms. It cannot create them.
Pins
Pin
Type
Description
Density
Number
The shape you want roughed up.
Strength
Number
How much of the detail to add. Push it far and the surface breaks into noise instead of looking weathered.
Scale
Number
How big the bumps are.
Seed
Whole Number
Changes the pattern without changing anything else.
Octaves
Whole Number
How many layers of detail to pile on. Each one is finer than the last and costs a little more.
Lacunarity
Number
How much finer each layer gets.
Gain
Number
How much quieter each layer gets.
SlopeWeight
Number
How much the steep parts get over the flats. At 0 the detail lands evenly everywhere.
Actual water erosion. At compile time it pulls a 2D heightmap out of the field above it, runs tens of thousands of simulated droplets down the slopes, and lets them carve valleys and drop sediment....
The Hydraulic Erosion node
When to use it
Actual water erosion. At compile time it pulls a 2D heightmap out of the field above it, runs tens of thousands of simulated droplets down the slopes, and lets them carve valleys and drop sediment. At runtime the eroded heights get sampled back into the density.
Pins
Pin
Type
Description
Density
Number
The landscape to run water over. It has to be height-based, something like noise minus Position Z.
Pin
Type
Description
Result
Number
The same landscape with valleys cut into it and sediment left in the low spots.
Settings
Setting
Type
Description
Resolution
Whole number
How fine the grid the water runs on is. Higher picks up narrower valleys, and costs you compile time and memory for it.
World Size
Number
How much ground the simulation covers, in world units, square. Make it smaller than the area you are actually generating and everything past the edge comes out uneroded.
World Center
Vector 2D
Where that square sits in the world.
Blend Margin
Number
How far past the edge the eroded ground fades back into the ground you fed in. Set it to 0 and the two meet in a step, which the mesher renders as a tall vertical wall right around the perimeter. The default is a tenth of World Size; widen it if the join still shows.
Num Droplets
Whole number
How many droplets get released. Too few and you get scattered scratches instead of a connected drainage pattern. More of them means a longer compile.
Max Droplet Lifetime
Whole number
How far one droplet is allowed to travel before it gives up. Raise it for long rivers, lower it for short gullies near the peaks.
Erosion Radius
Whole number
How wide a track each droplet cuts, in grid cells. Wider gives you smooth valleys, narrow gives you sharp channels.
Seed
Whole number
Changes where the droplets start. Same seed, same rivers, every time.
Inertia
Number
How much a droplet keeps its heading instead of turning downhill. At 0 it hugs the steepest line and rivers come out kinked; near 1 it coasts straight across dips and barely carves anything.
Sediment Capacity Factor
Number
How much a fast droplet can carry. Raise it for deeper carving.
Min Sediment Capacity
Number
The floor on that capacity, so a droplet crawling across a flat does not dump everything it is holding in one spot.
Erode Speed
Number
How quickly ground is cut away when a droplet has room for more.
Deposit Speed
Number
How quickly a droplet lets go of what it is carrying once it is overloaded.
Evaporate Speed
Number
How fast a droplet dries up. Higher gives you short streams near the peaks; lower lets them run all the way to the bottom.
Gravity
Number
How hard the slope pulls. It sets how much speed a droplet picks up on the way down.
Initial Water Volume
Number
How much water each droplet starts with.
Initial Speed
Number
How fast each droplet is already moving when it lands.
Bringing polygonal meshes into the voxel world and back out again.
Studio and Graph › Voxel › Mesh
Dynamic Mesh SDF
Turns a real mesh into a density field so it can take part in voxel booleans. Subtract a sculpted cave out of terrain, union a scanned rock into a cliff.
The Dynamic Mesh SDF node
When to use it
Turns a real mesh into a density field so it can take part in voxel booleans. Subtract a sculpted cave out of terrain, union a scanned rock into a cliff.
Pins
Pin
Type
Description
Mesh
Mesh
The mesh to turn into a field. Comes from a Load Mesh File node.
Pin
Type
Description
Result
Number
The mesh as a density field. Negative inside it, positive outside, zero on the skin.
Settings
Setting
Type
Description
Resolution
Whole number
How many voxels across the mesh's longest side. Higher keeps sharper detail. Cost climbs fast: doubling this is eight times the memory, so a face at 512 will eat gigabytes. Start at 64 and only go up when you can see the corners rounding off.
Inverted
True/False
Swap inside for outside. Pair it with a Subtraction downstream to punch the mesh's shape out of something else.
Carve the voxel surface with brushes instead of describing every bump with maths. Add, Subtract, Clay, Smooth, Flatten, Grab, Pinch, Erase and more. Select the node to pick the tools up. Deselect i...
The Sculpt Density node
When to use it
Carve the voxel surface with brushes instead of describing every bump with maths. Add, Subtract, Clay, Smooth, Flatten, Grab, Pinch, Erase and more. Select the node to pick the tools up. Deselect it and they go away.
Pins
Pin
Type
Description
Density
Number
The shape you are sculpting on. Leave it empty and you start from nothing.
Settings
Voxel Settings
Wants a Generate Settings node: blocky or smooth, how fine the voxels are, how far to look for the surface. Share one settings node with Density to Mesh and what you sculpt is exactly what you bake.
Pin
Type
Description
Density
Number
The shape with your strokes in it. Send it on to more density nodes, or to Density to Mesh when you want real geometry.
Settings
Setting
Type
Description
Composition Mode
Choice
How your strokes meet the shape underneath. Add piles them on top, Replace swaps them in wherever you touched, Max and Min keep whichever of the two is stronger or weaker.
Current Brush
Text
Which brush a click or a drag uses.
Brush Rate
Number
How many times a second the brush fires while you hold the button down. A single click always lands once. Crank it up and held strokes build much faster. Size, strength and falloff come from the viewport Brush controls, same as mesh sculpting.
Flatten Band Voxels
Number
Flatten brush. How thick a slab either side of the brush plane gets pulled flat, in voxels. Bigger reaches deeper in one pass.
Clay Lift Ratio
Number
Clay brush. How far above the surface to build, as a share of the brush radius. At 0 it fills up to the surface and no further. Raise it for a thicker slab per pass.
Noise Type
Choice
Noise brush. Which flavour of noise to stamp.
Noise Fractal
Choice
Noise brush. Layers of noise stacked on the basic pattern. None is one plain layer; the others pile several on for more detail.
Noise Octaves
Whole number
Noise brush. How many layers to stack. More layers, finer detail, more time per stroke.
Noise Frequency
Number
Noise brush. How big the pattern is in the world. Higher numbers give you tighter, finer wobble.
Noise Seed
Whole number
Noise brush. Change this for a different random pattern at the same settings.
Paints vertex colours straight onto the voxel surface. Paint, Texture, Smooth and Erase brushes. Density goes in one side and out the other untouched; only the colour channels change.
The Paint node
When to use it
Paints vertex colours straight onto the voxel surface. Paint, Texture, Smooth and Erase brushes. Density goes in one side and out the other untouched; only the colour channels change.
Hand painting is for variation you cannot describe as a rule. Anything rule-based belongs in Height Gradient, Hue Shift or Color Blend, because those follow the shape when it changes and strokes do not.
It needs the same Generate Settings node as everything else. Feed the upstream density and colour into Density and R/G/B/A. Strokes save with the graph.
Pins
Pin
Type
Description
Density
Number
The shape. This node never touches it.
R
Number
Red coming in. Leave it empty and the surface starts white.
G
Number
Green coming in. Leave it empty and the surface starts white.
B
Number
Blue coming in. Leave it empty and the surface starts white.
A
Number
Alpha coming in. Leave it empty and everything is opaque.
Settings
Voxel Settings
Wants a Generate Settings node: blocky or smooth, how fine the voxels are, how far to look for the surface. Share one settings node with Density to Mesh and what you paint on is exactly what you bake.
Pin
Type
Description
Density
Number
The shape, exactly as it came in.
R
Number
Red with your paint in it.
G
Number
Green with your paint in it.
B
Number
Blue with your paint in it.
A
Number
Alpha with your paint in it. The alpha of the brush colour lands here.
Settings
Setting
Type
Description
Composition Mode
Choice
How your paint meets the colour underneath. Replace swaps it out where you touched, Add tints on top, Multiply darkens.
Current Brush
Text
Which brush a click or a drag uses.
Brush Rate
Number
How many times a second the brush fires while you hold the button down. A single click always lands once. Size, strength and falloff come from the viewport Brush controls, same as mesh sculpting.
Brush Color
Colour
The colour the Paint brush lays down.
Brush Texture Node Id
Node picker
The image the Texture brush stamps. The list holds every Load Texture File node in this graph, so drop one in first and it shows up here.
Texture World Size
Number
How big the image is on the surface, in world units. Bigger stretches it further, so the pattern repeats less often.
Where a voxel graph stops being maths and becomes a mesh. Wire your field into Density, hang a Generate Settings node off Settings, press Generate Mesh. R/G/B/A and U/V are optional; wire them and ...
The Density To Mesh node
When to use it
Where a voxel graph stops being maths and becomes a mesh. Wire your field into Density, hang a Generate Settings node off Settings, press Generate Mesh. R/G/B/A and U/V are optional; wire them and the result carries vertex colours and UVs.
Pins
Pin
Type
Description
Density
Number
The shape, as a field. Negative means inside, positive means outside, and the skin sits where it crosses zero.
R
Number
Red for the vertex colour, 0 to 1. Optional.
G
Number
Green for the vertex colour, 0 to 1. Optional.
B
Number
Blue for the vertex colour, 0 to 1. Optional.
A
Number
Alpha for the vertex colour, 0 to 1. Leave it alone and everything is opaque.
U
Number
U for the UVs. Optional.
V
Number
V for the UVs. Optional.
Settings
Voxel Settings
Wants a Generate Settings node. It decides blocky or smooth, how fine the voxels are and how much of the field gets built. Share one settings node with Voxel Sculpt and what you sculpted is what you bake. Collision and raytracing settings do nothing here.
Pin
Type
Description
Mesh
Mesh
The finished mesh, carrying colour and UVs if you wired those inputs. Goes into any mesh node from here.
Settings
Setting
Type
Description
Material Section Name
Text
What the mesh's one material slot gets called. Worth setting, or it shows up as "Section 0" everywhere you look at it later. Renaming it does not rebuild anything.
One node, wired into every voxel consumer in the graph. It carries the mesher choice, the voxel size, the ISO level and the volume that gets scanned.
The Generate Settings node
When to use it
One node, wired into every voxel consumer in the graph. It carries the mesher choice, the voxel size, the ISO level and the volume that gets scanned.
Pins
Pin
Type
Description
Settings
Voxel Settings
The settings, ready to plug into a Generate, Sculpt or Paint node.
Settings
Setting
Type
Description
Mesher Type
Choice
Blocky or smooth. Everything under Cubic applies to the first and everything under Dual Marching Cubes to the second; the details panel hides whichever one you are not using.
Setting
Type
Description
Cubic: Grid Size
Whole number (X, Y, Z)
How many voxels make up one chunk, per axis. Bigger chunks mean fewer of them and more work in each.
Cubic: Voxel Size
Number
How much world space one voxel covers, in centimetres. Halve it for twice the detail and roughly eight times the work.
Cubic: ISO Level
Number
The density value the mesher treats as the surface. Everything in this toolset - the primitives, the CSG nodes, the sculpt brushes - is written for 0, so leave it there unless the field is coming from somewhere else.
Cubic: Inverted
True/False
Swaps inside for outside: solid where the density is above the iso level instead of below it. The sculpt brushes follow it, so Add still adds.
Greedy Meshing
True/False
Merges neighbouring coplanar faces into single large quads instead of emitting one per voxel face. Far fewer triangles for the same blocky shape, and on by default.
Per Chunk Parallelization
True/False
Splits the meshing work inside a single chunk across threads. Off by default.
Setting
Type
Description
Dual Marching Cubes: Grid Size
Whole number (X, Y, Z)
How many voxels make up one chunk, per axis. Bigger chunks mean fewer of them and more work in each.
Dual Marching Cubes: Voxel Size
Number
How much world space one voxel covers, in centimetres. Halve it for twice the detail and roughly eight times the work.
Dual Marching Cubes: ISO Level
Number
The density value the mesher treats as the surface. Everything in this toolset - the primitives, the CSG nodes, the sculpt brushes - is written for 0, so leave it there unless the field is coming from somewhere else.
Dual Marching Cubes: Inverted
True/False
Swaps inside for outside: solid where the density is above the iso level instead of below it. The sculpt brushes follow it, so Add still adds.
Force Manifold
True/False
Runs the extra pass that resolves the cell configurations which would otherwise leave an edge shared by more than two faces. On by default, because most of what you would do next with the mesh refuses a non-manifold one.
Setting
Type
Description
Auto Fit Bounds
True/False
Find the shape on its own and build only where it actually is. On by default, and it saves you sizing a box by hand. It works by sniffing for the surface, which needs the field to behave like a distance. Multiply a density by 50 somewhere upstream and the sniffing goes wrong: patches of surface never get built and you get a mesh full of holes. Turn this off and give it a box when that happens, or when you only want a piece of a bigger field.
Search Extent
Number
How far out from the origin to look for the surface. Be generous. Empty space costs nothing here, and if your shape runs past this line it gets cut off flat at the edge. The node warns you when it hits the boundary.
Bounds Center
Vector
Where the box sits, when you are placing it yourself.
Bounds Extent
Vector
How big the box is from the middle out, when you are placing it yourself. What gets built is filled in whole tiles, so it can spill a little past the size you type.
Setting
Type
Description
Enable Raytracing
True/False
Builds raytracing data for the live preview. It has no bearing on the mesh Density to Mesh hands you.
Setting
Type
Description
Enable Collision
True/False
Builds collision for the live preview. Same as raytracing: the baked mesh does not carry it.
Collision Max LOD
Whole number
How far down the LOD chain to build collision. 0 is full detail only, which is nearly always what you want.
Async Collision
True/False
Cooks that collision on a worker thread so the preview does not stall while it finishes.