Print view · Animation · 6 pagesChoose "Save as PDF" as the destination in the print dialog.
Back to the docs

Mesh Morpher documentation

Animation

6 pages · exported 2026-09-06 · https://meshmorpher.com/docs/studio-and-graph/animation

Studio and Graph

Animation

  • Delta Mush Animation (Experimental): Runs Delta Mush over every frame of an animation and bakes what it cleaned up into corrective morph targets the animation itself drives.
  • Apply Animation Frame: Poses a skinned mesh at one moment in an animation and hands back that pose as a mesh.
  • Load Animation (FBX): Imports an animation take out of an FBX file. The keys are stored in the graph itself, so the FBX can move or disappear afterwards and the graph still plays.
  • Pose Animation Sequence: Scrub to a frame, pose the skeleton with the gizmo, and the edit is blended over neighbouring frames and cached on the Animation output until Save Animation Sequence writes it into an asset.
  • Retarget Animation: Moves a whole animation take onto a different rig's bones, chain by chain, one retarget per frame of the take.

Studio and Graph › Animation

Delta Mush Animation (Experimental)

Editor-only node. Runs only in Mesh Morpher Graph inside the Unreal Editor, because it reads or writes Unreal Engine assets. Not available in the standalone Mesh Morpher Studio app.

Editor-only node. Runs only in Mesh Morpher Graph inside the Unreal Editor, because it reads or writes Unreal Engine assets. Not available in the standalone Mesh Morpher Studio app.

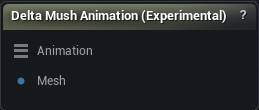
Delta Mush Animation (Experimental) node

The Delta Mush Animation (Experimental) node

When to use it

Editor only. Runs Delta Mush on every frame of an animation and bakes the corrections into morph targets driven by that animation, so the skinning fix ships with the asset instead of costing a deformer at runtime.

How to use it

  1. 1

    Connect a rest-pose mesh and an Animation input (from a Load Animation node)

  2. 2

    Configure Delta Mush settings

  3. 3

    Click "Apply" to process the animation and create corrective morph targets

Pins

Pin Type Description
Animation Animation The animation to correct. It has to come from one of the Load Animation nodes - those carry the live sequence this node writes the shapes back into.
Mesh Mesh The mesh at rest, from a skeletal mesh import. Every frame is measured against this.

Settings

Setting Type Description
Capture Baseline From GPU True/False Take each frame's starting shape from what the mesh actually renders, so post-process Anim Blueprints, deformer graphs and morph curves all count. Turn it off to pose on the CPU from the raw keyframes instead: faster and exact, but blind to anything an Anim Blueprint does.
Smoothing: Iterations Whole number How many smoothing passes run over the mesh. More passes clean up worse collapsing, at the cost of time, and thin shapes start to shrink unless Edge Preservation is up.
Weight Type Choice How a vertex is weighted against its neighbours while smoothing. Inverse Distance: safest around fingers, joints and anything thin. Avoids the pinching Cotangent can cause. Cotangent: the usual pick for smooth organic surfaces with tidy triangles. Mean Value: holds together on meshes with badly shaped triangles. Uniform: every neighbour counts the same. Fast, but blind to the shape of the surface.
Amount Number How much of the original surface detail comes back once the smoothing is done. At 0 you keep the smoothed blob. At 1 the pores, folds and seams return in full.
Frame Smoothing Whole number Smoothing passes over the local frame each detail offset rides on. Raise it when the restored detail shimmers or jitters as the pose moves. 0 turns it off.
Inward Number How far vertices may move inward, toward the middle of the mesh. Pull it down when armpits and the backs of knees cave in on themselves. 0 blocks inward motion outright.
Outward Number How far vertices may move outward, away from the middle of the mesh. Pull it down when the smoothing starts inflating shoulders and knuckles. 0 blocks outward motion outright.
Edge Preservation Number Limits how far a vertex can slide in toward the middle of its neighbours, which is what stops fingers, horns and antennae shrivelling into sticks. At 0 edges are free to shorten; at 1 they keep their length. Once you run past 100 iterations, 0.3 to 0.7 is the useful range.
Skin Sliding: Iterations Whole number Passes that stop the restored detail creeping across the surface as the pose changes, which reads on screen as the texture sliding over the skin. 0 turns it off.
Stiffness Number Trades detail against sliding correction. 0 corrects the most and softens fine detail. 1 keeps every last detail and corrects nothing.
Strain Falloff: Iterations Whole number Spreads the effect outward from the parts that actually deformed, so it fades away instead of stopping at a visible line across the limb. 0 leaves that line.
Decay Number How fast that spread runs out. Low values keep the effect tight around the joint, high values carry it further down the limb.
Angle Threshold Number Surfaces twisted further than this from their rest orientation get an extra round of smoothing. Aimed at the hard cases, like a wrist rolled almost the whole way over.
Extreme Rotation: Iterations Whole number Extra smoothing passes, applied only to those heavily twisted areas.
Preserve Boundaries True/False Ease off the smoothing along open edges so the mesh does not creep back from its border. Worth turning on for a cut-out piece like a shirt or a face patch.
Weight Number How firmly those open edges are held. 0 smooths them like anywhere else, 1 pins them in place.
Name Text What the morph targets get called. They come out numbered from this, one per processed frame, so keep it short and recognisable in the asset.
Apply To LODs True/False Push the shapes down onto the lower LODs too, so they do not pop away as the character gets further from camera.
LOD Vertex Threshold Number Same distance rule as above, but for landing the shape on the lower LODs.
LOD Smooth Type Choice How the shape gets smoothed on the lower LODs.
LOD Smooth Strength Number How hard each LOD smoothing pass pulls. Does nothing while LOD Smooth Iterations is 0.
LOD Smooth Iterations Whole number How many smoothing passes to run on the lower LODs. Coarse LODs usually need a pass or two where LOD0 needs none.
Use Dual Quaternion Skinning True/False Dual quaternion skinning instead of linear blend. Keeps volume on a twisted forearm or wrist, where linear blend pinches the mesh into a candy wrapper.
Use Linear Interpolation True/False Ramp each morph target's weight in and out with linear keys instead of switching it on and off at full strength. Off, the correction pops the frame it starts on.
Transition Frames Whole number How many frames that ramp takes at each end. 1 fades in over a single frame; raise it for a softer hand-off on a slow take. Only read when Use Linear Interpolation is on.
Start Frame Whole number First frame to process. -1 starts at the beginning.
End Frame Whole number Last frame to process, and it is included. -1 runs to the end. Set it below Start Frame and the two are swapped rather than refused.

Learn more

Delta Mush in Mesh Morpher GraphRead the walkthrough on meshmorpher.comhttps://meshmorpher.com/blog/delta-mush-in-mesh-morpher-graph
ML Deformer and MetaHuman facial expressionsRead the walkthrough on meshmorpher.comhttps://meshmorpher.com/blog/ml-deformer-and-meta-human-facial-expressions

Available in Mesh Morpher Graph only. Compare the products.

Studio and Graph › Animation

Apply Animation Frame

Samples an animation at one moment, in seconds, and hands you the mesh deformed into that pose. From there it is an ordinary mesh: measure it, sculpt on it, bake it, compare it against another pose.

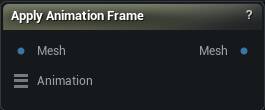
Apply Animation Frame node

The Apply Animation Frame node

When to use it

Samples an animation at one moment, in seconds, and hands you the mesh deformed into that pose. From there it is an ordinary mesh: measure it, sculpt on it, bake it, compare it against another pose.

Pins

Pin Type Description
Mesh Mesh The mesh to pose. It needs bones and skin weights on it already - a skeletal import, an auto-rig, or Transfer Weights.
Animation Animation The animation to sample. Its bone names have to match the mesh's, or nothing moves.
Pin Type Description
Mesh Mesh The mesh, posed at Time.

Settings

Setting Type Description
Time Number Where in the animation to sample, in seconds. Past the end it holds on the last frame, unless Looping is on.
Looping True/False Wrap Time back round to the start once it runs past the end, instead of sticking on the last frame.
Use Dual Quaternion Skinning True/False Dual quaternion skinning instead of linear blend. Keeps volume on a twisted forearm or wrist, where linear blend pinches the mesh into a candy wrapper.
Recompute Normals True/False Rebuild the normals after posing. Turn it off and the shading stays keyed to the rest pose, so the lighting slides around over the deformed surface.

Learn more

Delta Mush in Mesh Morpher GraphRead the walkthrough on meshmorpher.comhttps://meshmorpher.com/blog/delta-mush-in-mesh-morpher-graph
ML Deformer and MetaHuman facial expressionsRead the walkthrough on meshmorpher.comhttps://meshmorpher.com/blog/ml-deformer-and-meta-human-facial-expressions

Studio and Graph › Animation

Load Animation (FBX)

Imports an FBX animation take via the runtime-safe FBX wrapper.

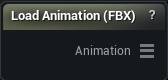
Load Animation (FBX) node

The Load Animation (FBX) node

Imports an FBX animation take via the runtime-safe FBX wrapper.

Additionally, in the editor, the node builds a transient Animation Sequence (+ its skeleton asset) from the keyframes and carries its path inside the same "Animation" struct for Delta Mush Animation Corrective.

How to use it

  1. 1

    Set the FBX file path + axis/coordinate options on the details panel

  2. 2

    The node imports + bakes the animation into the output pin

  3. 3

    Wire "Animation" into an "Apply Animation Frame" node or a Delta Mush Animation Corrective node

Pins

Pin Type Description
Animation Animation The imported animation, ready for Apply Animation Frame or Delta Mush Animation Corrective.

Settings

Setting Type Description
File File path Path to the FBX File.
Use T0 Pose True/False T0 Pose
Coordinate System Choice
Front Axis Choice
Up Axis Choice

Learn more

Delta Mush in Mesh Morpher GraphRead the walkthrough on meshmorpher.comhttps://meshmorpher.com/blog/delta-mush-in-mesh-morpher-graph
ML Deformer and MetaHuman facial expressionsRead the walkthrough on meshmorpher.comhttps://meshmorpher.com/blog/ml-deformer-and-meta-human-facial-expressions

Studio and Graph › Animation

Pose Animation Sequence

Poses the skeleton at a chosen frame of an animation and writes the edit back into the bone keys, blended over Falloff Frames on each side of the posed frame and fading with distance. The selected ...

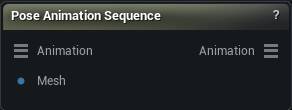
Pose Animation Sequence node

The Pose Animation Sequence node

When to use it

Poses the skeleton at a chosen frame of an animation and writes the edit back into the bone keys, blended over Falloff Frames on each side of the posed frame and fading with distance. The selected range is a hard boundary the edit never crosses - narrow it to protect a section of the take regardless of how large the falloff is.

How to use it

  1. 1

    Connect an Animation input (from a Load Animation node) and the rest rigged mesh the animation plays on

  2. 2

    Select the node, scrub to a frame, pose the skeleton with the gizmo, Accept

  3. 3

    Wire the Animation output into Save Animation Sequence to write it back into an asset

Pins

Pin Type Description
Animation Animation The animation whose bones you want to edit, from a Load Animation node.
Mesh Mesh The rest-pose rigged mesh the animation plays on. It is the bind reference the posing skins from, so it must be at rest, not already posed.
Pin Type Description
Animation Animation The same animation with your bone edits written into its keyframes.

Settings

Setting Type Description
Use Dual Quaternion Skinning True/False Skin with dual quaternions instead of linear blend when posing the frame baseline.
Include Root Bone True/False Include the root bone in the blended edit. Root edits shift the whole take - that is a root motion edit, not a pose fix, so it is off by default.
Falloff Frames Whole number How many frames on each side of the current frame the edit blends into, fading out with distance. 0 keys only the frame you posed. The selected range is a hard boundary - frames outside it are never touched no matter how large the falloff.

Learn more

Delta Mush in Mesh Morpher GraphRead the walkthrough on meshmorpher.comhttps://meshmorpher.com/blog/delta-mush-in-mesh-morpher-graph
ML Deformer and MetaHuman facial expressionsRead the walkthrough on meshmorpher.comhttps://meshmorpher.com/blog/ml-deformer-and-meta-human-facial-expressions

Studio and Graph › Animation

Retarget Animation

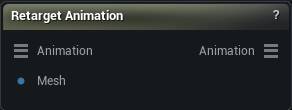
Moves a whole animation take onto a different rig's bones, chain by chain - one retarget per frame of the source take.

Retarget Animation node

The Retarget Animation node

When to use it

Moves a whole animation take onto a different rig's bones, chain by chain - one retarget per frame of the source take.

Pins

Pin Type Description
Animation Animation The animation to retarget, from a Load Animation node. Its own skeleton is the source rig.
Mesh Mesh The rigged mesh whose skeleton the animation is moved onto. It is read at its rest pose - that is the bind reference every frame is measured against.
Pin Type Description
Animation Animation The same take on the target rig's bones.

Settings

Setting Type Description
Rotation Mode Choice How a target chain takes its rotation from the source chain when the two have different bone counts. Interpolated copes with most rigs.
Apply Root Rotation True/False Carry the source's body facing and torso lean across. Turn it off to keep the target pointing the way it was authored.
Apply Root Translation True/False Move the target's pelvis by the source's root motion, scaled to the target's height.
Enable IK True/False A second pass over the arm and leg chains that pins hands and feet onto a goal worked out from the source. The plain bone transfer already gives you a correct pose; this tightens up where the hands and feet land when the two characters are built very differently. It only fires on chains the source marks as limbs, which today means a SAM 3D Body source. On anything else it changes nothing either way.
IK Alpha Number 0 leaves the pose where the bone transfer put it, 1 puts the hand or foot right on the goal.
Allow Stretch True/False Let a limb stretch past its rest length to reach a goal it cannot otherwise get to, instead of stopping at full extension. Watch for rubbery forearms.
Retarget IK Bones True/False Keep the rig's marker bones (ik_foot_l, ik_hand_r, ik_hand_gun and the rest) following their real bones after the transfer, so foot planting and weapon setups still work on the new pose. Leave it on for UE5 Mannequin and MetaHuman skeletons.

Learn more

Delta Mush in Mesh Morpher GraphRead the walkthrough on meshmorpher.comhttps://meshmorpher.com/blog/delta-mush-in-mesh-morpher-graph
ML Deformer and MetaHuman facial expressionsRead the walkthrough on meshmorpher.comhttps://meshmorpher.com/blog/ml-deformer-and-meta-human-facial-expressions