Fit Skeleton: Moves a rig's joints to follow a reshaped version of the same mesh, so the skeleton still sits inside the body.
Pose: Pose a rigged mesh by dragging its joints in the viewport. Accept to send the posed mesh on.
Remove Bones: Deletes joints from a rig and hands their skin weights up to the nearest surviving parent.
Transfer Weights: Gives an unrigged mesh the skeleton and skin weights of a rigged one, so a new garment or a retopo picks up the body's rig. Press Transfer Weights to run it.
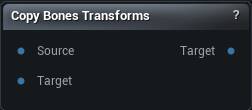
Copy Bones Transforms: Copies a skeleton's pose from one mesh onto another, matching bones by name.
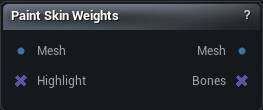
Paint Skin Weights: Brush skin weights onto a rigged mesh by hand, one bone at a time, with locking and left/right mirroring.
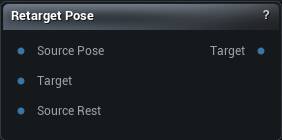
Retarget Pose: Puts one character's pose onto another character built on a completely different rig, keeping the second one's own proportions.
Skeleton Edit: Build or fix a skeleton by hand: place joints on the surface, drag them, rename, reparent, mirror, delete. Skin weights follow every edit.
Studio and Graph › Skeleton
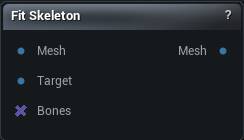
Fit Skeleton
The geometry is right and the skeleton is still sitting where the original character's joints were. This moves the bones to match. It is the step after a body-shape change, a wrap or a non-rigid fit.
The Fit Skeleton node
When to use it
The geometry is right and the skeleton is still sitting where the original character's joints were. This moves the bones to match. It is the step after a body-shape change, a wrap or a non-rigid fit.
How to use it
1
Connect the rigged mesh and its reshaped version
2
Set Start Bone, and list anything that should stay put
3
The output updates on its own as the meshes or settings change
Pins
Pin
Type
Description
Mesh
Mesh
The rigged mesh whose joints get moved.
Target
Mesh
The reshaped version of that same mesh. Same vertex count and order.
Bones
Bone Selection
Optional. Wire a bone list here to fit only those and leave the rest alone.
Pin
Type
Description
Mesh
Mesh
The mesh with its joints moved to fit.
Settings
Setting
Type
Description
Start Bone
Text
The first bone that gets fitted. Anything ahead of it in the skeleton stays put. Usually "root", which fits the whole rig. Point it at the pelvis to leave the root and its motion bones alone.
End Bone
Text
Nothing reads this. The fit runs from Start Bone to the end of the skeleton, so to spare a bone put it in Ignore Bones or wire the Bones pin instead.
Ignore Bones
Text
Bones to leave exactly where they are, one per row. Names have to match exactly. Shift+Enter adds a row.
Ignore String
Text
Leave alone any bone whose name contains one of these, one per row. Quickest way to skip every twist or corrective joint at once. Keep the fragments long enough to be specific: "l_" catches half the rig.
Orient Bones
Text
Bones that also get re-aimed at their child once the fit has moved everything, one per row. Limb bones want this. Without it a forearm whose wrist has moved keeps its old rotation, and the twist shows up as a pinched elbow.
Orient Bones Above Bone
Text
Re-aim every bone that comes after this one in the skeleton's bone order too, on top of the list above. Leave it empty to use the list alone.
Bone To Vertex Threshold
Number
How far a vertex can sit from a joint and still be used to work out where that joint should move to. Only comes into play for joints the surface itself could not guide.
Bone To Bone Threshold
Number
How close a joint has to sit to the line between two other joints before it counts as riding on that segment. Only used when Preserve Relative Bone Transforms is on.
Max Distance To Surface
Number
How far from the surface a joint can be and still be moved by the surface right underneath it. Joints deeper than this fall back to averaging nearby vertices, which is looser. Raise it on a chunky character whose spine sits well inside the body.
Use Vertex Weights
True/False
Use the mesh's skin weights to decide which vertices belong to a joint that sits too deep for the surface to guide. On a mesh with junk weights this drags joints toward whatever happens to be weighted to them, so turn it off there.
Preserve Relative Bone Transforms
True/False
Keep a joint that sat on top of another bone's segment stuck to that segment after the fit, instead of letting it drift off the line.
Vertex Sample Size
Whole number
How many nearby vertices to average when a joint has to fall back to proximity. Small numbers make the joint chase one lump of geometry.
Always Match Geometry
True/False
After fitting, snap the output vertices onto Target so the shape matches exactly. Turn it off and you get whatever the skinning produced, which drifts from Target.
Advanced Skeleton Fitting
True/False
Adds a solver pass that works the joints out from the skin weights rather than just sliding them to follow the surface. Slower, and only bones with vertices actually weighted to them use its result.
Global Iterations
Whole number
Passes the solver spends building its starting guess before the main loop.
Iterations
Whole number
Main solver passes. More costs time and settles closer, then stops helping.
Transformation Iterations
Whole number
Passes spent on the bone transforms inside each main pass.
Affinity
Whole number
Strength of the solver's soft affinity constraint.
Opens a viewport for posing the skeleton by hand and outputs the deformed mesh. Select the node to get the gizmos; deselect it and they go away.
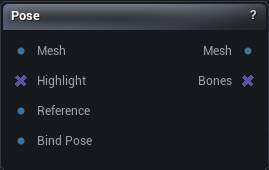
The Pose node
When to use it
Opens a viewport for posing the skeleton by hand and outputs the deformed mesh. Select the node to get the gizmos; deselect it and they go away.
Use it to check a rig at extreme angles before shipping it, to build the corrected pose Set DNA Expression or Set DNA RBF Pose will record, or simply to pose a character for a render.
How to use it
1
Connect a skeletal mesh
2
Pose the skeleton in the viewport
3
The output is the posed mesh
Pins
Pin
Type
Description
Mesh
Mesh
The rigged mesh to pose. Its skeleton is what you grab in the viewport.
Highlight
Bone Selection
Bones to have picked already when the tool opens.
Reference
Mesh
Optional second mesh drawn alongside, to pose against.
Bind Pose
Mesh
Optional: the same mesh at its bind or neutral pose. Wire it only if you want the skinning solved from the T-pose while the gizmos start on an already-posed Mesh. Leave it unwired to treat Mesh as the rest pose - Get DNA RBF Pose's Mesh is already a matching vertices-and-bones pair.
Pin
Type
Description
Mesh
Mesh
The mesh in its new pose, skeleton and all.
Bones
Bone Selection
The bones you had selected, plus their mirror partners when mirroring was on.
Deletes named bones and redistributes their vertex weights onto the bones that remain, so the mesh stays fully skinned. Stripping twist bones, facial joints or an IK chain a target engine will not ...
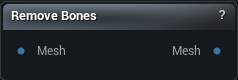
The Remove Bones node
When to use it
Deletes named bones and redistributes their vertex weights onto the bones that remain, so the mesh stays fully skinned. Stripping twist bones, facial joints or an IK chain a target engine will not accept, without hand-editing weights.
Remove Children is the surprise. Off, a removed bone's children get re-parented and survive. On, naming a limb's root makes the whole limb disappear.
Weights go to the parent, so removing a chain piles all of that influence onto one joint and the deformation there stiffens up. Check the result at extreme angles, not at rest.
How to use it
1
Connect the rigged mesh
2
List the bones to remove, one per line
3
The output carries the smaller skeleton
Pins
Pin
Type
Description
Mesh
Mesh
The rigged mesh to strip bones from.
Pin
Type
Description
Mesh
Mesh
The mesh with a smaller skeleton. Weights from the deleted joints move up to the nearest surviving parent.
Settings
Setting
Type
Description
Bones
Text
Bones to delete, one per line. Names have to match exactly, so a typo silently leaves that bone in place, and the root is never deleted whatever you type here. Shift+Enter adds a row.
Remove Children
True/False
Also delete every joint parented under the ones you named.
Copies a rigged mesh's skeleton and its per-vertex skin weights onto a mesh that has neither, matching the two by position or through their UVs.
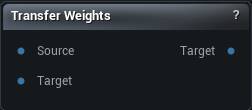
The Transfer Weights node
When to use it
Copies a rigged mesh's skeleton and its per-vertex skin weights onto a mesh that has neither, matching the two by position or through their UVs.
This is how anything new gets rigged without hand-painting: a garment modelled over a body, a retopologised head, a piece appended onto a character. The recipient comes out skinned to the same skeleton and poses with it.
Whatever skeleton the target already had is replaced by the source's, so run it before you start editing the recipient's rig rather than after.
How to use it
1
Connect the rigged mesh and the mesh that needs rigging
2
Pick UV matching if both share a layout, otherwise set the search radius
3
Press Transfer Weights
Pins
Pin
Type
Description
Mesh
Mesh
The rigged mesh to take the skeleton and weights from.
Target
Mesh
The mesh that gets rigged. Whatever skeleton it had is replaced by the source's.
Pin
Type
Description
Target
Mesh
That mesh, now skinned to the source's skeleton.
Settings
Setting
Type
Description
Transfer By UV Match
True/False
Match by UV instead of by position. Turn it on when both meshes share a UV layout - it beats proximity around fingers, armpits and anywhere two surfaces nearly touch.
Radius Percentage
Number
How far to look for a source point, as a fraction of the target's bounding box diagonal. Too small and whole regions find nothing and drop back to plain nearest-point weights. Use a negative number to search the entire source mesh.
Normal Threshold
Number
How far a source normal may point away from the target's and still count as a match, in degrees. Use a negative number to ignore normals altogether.
Layered Mesh Support
True/False
When a match fails the normal test, try again with the normal flipped. Helps on layered meshes where an inner and an outer surface sit close together facing opposite ways, like a jacket lining over a shirt.
Num Smoothing Iterations
Whole number
How many smoothing passes to run over the weights the solver had to guess. Too many and a tight area like the jaw blurs into its neighbours.
Smoothing Strength
Number
How much each of those passes moves the weights.
Max Num Influences
Whole number
The most bones allowed to influence any one vertex.
Bone transforms from one mesh's skeleton onto another's, matched by bone name, with an option to re-skin the target geometry to the new pose while it is there.
The Copy Bones Transforms node
When to use it
Bone transforms from one mesh's skeleton onto another's, matched by bone name, with an option to re-skin the target geometry to the new pose while it is there.
How to use it
1
Connect the mesh holding the pose, and the mesh that should receive it
2
Turn Apply Skinning on if the geometry should move too
3
The output carries the copied skeleton pose
Pins
Pin
Type
Description
Mesh
Mesh
The mesh holding the pose you want to copy. Bones are matched by name.
Target
Mesh
The rigged mesh that receives the pose. Bones with no match by name stay where they are.
Pin
Type
Description
Target
Mesh
That same mesh, now holding the source's pose.
Settings
Setting
Type
Description
Apply Skinning
True/False
Also move the vertices to follow the new bone poses. It needs skin weights on the mesh to do anything, so leave it off when the mesh has none, or when something further down the graph does the skinning.
Paints per-vertex skin weights onto a skeletal mesh by hand, one bone at a time. Select the node to get the brush; deselect it and the tool goes away.
The Paint Skin Weights node
When to use it
Paints per-vertex skin weights onto a skeletal mesh by hand, one bone at a time. Select the node to get the brush; deselect it and the tool goes away.
This is the fix for the places an automatic bind gets wrong - a shoulder that collapses, a jaw that drags the neck with it. For a first pass across the whole character, Auto-Skin or Transfer Weights get you most of the way there first.
The mesh has to arrive with a skeleton and skin weights already on it. A static mesh or a plain file import has nothing to paint into.
How to use it
1
Connect a skinned mesh
2
Pick a bone in the tool and paint its weights in the viewport
3
The output is the mesh with the updated weights
Pins
Pin
Type
Description
Mesh
Mesh
The mesh to paint on. It needs a skeleton and skin weights already.
Highlight
Bone Selection
The bone, or bones, to have active when the tool opens.
Takes the articulation of one rigged mesh - a Body Pose Detection result, an animation frame, any posed rig - and puts it onto a different skeleton entirely: a MetaHuman, the UE Mannequin, a Mixamo...
The Retarget Pose node
When to use it
Takes the articulation of one rigged mesh - a Body Pose Detection result, an animation frame, any posed rig - and puts it onto a different skeleton entirely: a MetaHuman, the UE Mannequin, a Mixamo character, a rig of your own. The recipient keeps its own proportions; only the pose crosses over.
Pins
Pin
Type
Description
Mesh
Mesh
The posed character you want to copy from: a Body Pose Detection result, an animation frame, any posed rig. Shown as Source Pose on the node.
Target
Mesh
The character that gets posed, a MetaHuman body for instance. It needs a skeleton and skin weights.
SourceRest
Mesh
The same source character un-posed. Leave it empty for a Body Pose Detection source, where the rest pose is reconstructed for you; connect it for anything else or nothing will move. Shown as Source Rest on the node.
Pin
Type
Description
Target
Mesh
That character in the new pose, skinned.
Settings
Setting
Type
Description
Rotation Mode
Choice
How a target chain takes its rotation from the source chain when the two have different bone counts. Interpolated copes with most rigs.
Apply Root Rotation
True/False
Carry the source's body facing and torso lean across. Turn it off to keep the target pointing the way it was authored.
Apply Root Translation
True/False
Move the target's pelvis by the source's root motion, scaled to the target's height.
Recompute Normals
True/False
Rebuild the vertex normals after skinning. Off, the shading keeps the creases of the rest pose and every new bend lights wrong.
Enable IK
True/False
A second pass over the arm and leg chains that pins hands and feet onto a goal worked out from the source. The plain bone transfer already gives you a correct static pose; this tightens up where the hands and feet land when the two characters are built very differently. It only fires on chains the source marks as limbs, which today means a Body Pose Detection source. On anything else it changes nothing either way.
IK Alpha
Number
0 leaves the pose where the bone transfer put it, 1 puts the hand or foot right on the goal.
Allow Stretch
True/False
Let a limb stretch past its rest length to reach a goal it cannot otherwise get to, instead of stopping at full extension. Watch for rubbery forearms.
Retarget IK Bones
True/False
Keep the rig's marker bones (ik_foot_l, ik_hand_r, ik_hand_gun and the rest) following their real bones after the transfer, so foot planting and weapon setups still work on the new pose. Leave it on for UE5 Mannequin and MetaHuman skeletons.
Authors and edits a mesh's skeleton by hand. Click to select joints, Ctrl-click the surface to add one, drag to move them, and use the panel to rename, reparent, mirror or delete. Skin weights are ...
The Skeleton Edit node
When to use it
Authors and edits a mesh's skeleton by hand. Click to select joints, Ctrl-click the surface to add one, drag to move them, and use the panel to rename, reparent, mirror or delete. Skin weights are preserved through every edit.
It works on an unrigged mesh too: build a skeleton from scratch here, then Auto-Skin or Paint Skin Weights downstream.
For one joint sitting in the wrong place this is the right tool. When the whole skeleton has to follow a reshaped body, Fit Skeleton does it in one go.
How to use it
1
Connect a mesh, rigged or not
2
Edit the skeleton in the viewport
3
The output carries the edited skeleton, weights remapped
Pins
Pin
Type
Description
Mesh
Mesh
The mesh to work on. It does not need a rig - an unrigged mesh starts you from nothing.
Pin
Type
Description
Mesh
Mesh
The mesh with your edited skeleton, weights remapped to match.