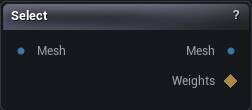
Select: Paint over the mesh in the viewport to mark the part you want. Accept and that region comes out as a weight map and as a trimmed-down mesh.
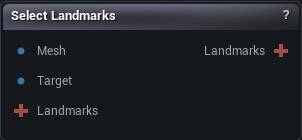
Select Landmarks: Click matching points on two meshes side by side to pair them up, or draw splines along matching curves. The pairs come out on the Landmarks pin as you place them.
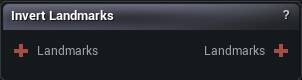
Invert Landmarks: Swaps the two sides of a landmark set, so what was the source becomes the target. Splines swap with them.
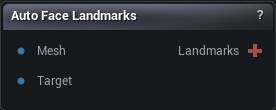
Auto Face Landmarks: Places 478 MediaPipe facial landmarks on a head scan. Wire a second head into Target to get a source-to-target correspondence for Non-Rigid Fit or Elastic Conformer instead of a self-paired set.
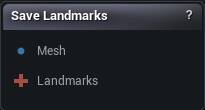
Save Landmarks: Writes one side of a landmark set out to a .mmlmk file, so another graph or another mesh can load the same points back in.
Studio and Graph › Selection
Select
Mark triangles by hand with the viewport's selection brush, then accept to emit the selection and the clipped mesh. When the region is a judgement call rather than something measurable, this beats ...
The Select node
When to use it
Mark triangles by hand with the viewport's selection brush, then accept to emit the selection and the clipped mesh. When the region is a judgement call rather than something measurable, this beats deriving one with Weight Map To Selection.
How to use it
1
Connect a mesh and select the node to pick up the brush
2
Paint the triangles you want in the viewport
3
Press Accept
Weights carries the mask, Mesh carries the trimmed geometry.
Pins
Pin
Type
Description
Mesh
Mesh
The mesh you paint on.
Pin
Type
Description
Mesh
Mesh
Just the triangles you painted, cut out as their own mesh. Passes the whole mesh through when nothing is selected.
Weights
Weight Map
The painted mask, brush falloff and all: 1 is fully selected, 0 is untouched. These line up with the input mesh's vertices, not with the trimmed Mesh output, which gets renumbered. Selection Threshold cuts the Mesh output only, never these weights.
Settings
Setting
Type
Description
Selection Threshold
Number
A painted vertex counts as selected once its weight reaches this. The cut keeps or drops whole triangles, so the soft brush edge has to become a yes or no somewhere, and this is where. At 0 the faintest touch of the falloff drags a triangle in. It trims the Mesh output only; the Weights output keeps its falloff either way. Two catches. There is only a falloff to cut when Full Strength Mask is off, under Masking > Draw. With the default on, the brush stamps a hard 1.0 and the marquee and Sections list seed exactly 1.0, so every value above 0 picks the same triangles. And the viewport never previews the cut: hide-unselected isolates anything you have painted at all, so a feathered mask accepts tighter than the region you were looking at.
Occlusion Test Method
Choice
How hidden geometry is judged. Fast winding is quick and catches sealed pockets inside a closed mesh; ray visibility fires rays out of each face and is the safer choice on an open or messy mesh.
Triangle Sampling
Choice
Where on each triangle the hidden-or-not test is taken.
Winding Iso Value
Number
The cutoff that separates inside from outside for the winding test. 0.5 is standard; raise it to select less, lower it to select more.
Add Random Rays
Whole number
Extra rays in random directions on top of the six axis rays. Raise it when the ray test leaves slivers of hidden surface unselected.
Add Triangle Samples
Whole number
Extra sample points scattered over each triangle. Raise it when a big triangle is missed because only a corner of it happens to be hidden.
Grow Shrink
Whole number
Reach the selection outward (+) by a ring or two to catch the rim around a cavity, or pull it inward (-) to keep clear of the visible surface. Counts in rings of vertices.
Invert
True/False
Flip it: select everything you can see from outside instead of what you cannot.
Place and pair landmark correspondences by hand across a source and a target mesh, splines included for edges like a lip line or a jaw. Landmarks are the constraints Non-Rigid Fit and Elastic Confo...
The Select Landmarks node
When to use it
Place and pair landmark correspondences by hand across a source and a target mesh, splines included for edges like a lip line or a jaw. Landmarks are the constraints Non-Rigid Fit and Elastic Conformer solve against, so this is where a wrap either becomes accurate or stays approximate.
On a head scan, run Auto Face Landmarks first and refine here rather than placing every point yourself. When both meshes have albedo and you want hundreds of pairs instead of dozens, Texture Flow Landmarks is the faster route in.
A spline is sampled into individual pairs, and Spline Segment Samples says how many. A dense spline is a strong constraint, so too many samples on a badly placed spline will fight the rest of the fit instead of helping it.
Pins
Pin
Type
Description
Mesh
Mesh
The mesh shown in the left pane. Points you click get snapped onto its surface.
Target
Mesh
Optional. The mesh shown in the right pane, where you click the matching points.
Landmarks
Landmarks
Optional. A landmark set to start from - its points and splines come in as your editable selection so you can nudge, add or delete them instead of placing every one by hand. Wire Auto Face Landmarks here. Leave it unwired to start blank.
Pin
Type
Description
Landmarks
Landmarks
The paired points and splines, updated every time you place or move one. A point with no partner yet is held back until you pair it.
Settings
Setting
Type
Description
Spline Segment Samples
Whole number
How many points get generated between each pair of spline control points. Higher gives a smoother curve and more landmarks downstream. Splines you already finished keep the density they were drawn with. Each Select Landmarks node has its own setting.
Swaps the source and target sides of a Landmarks wire, splines included. One node, one job: a single hand-placed correspondence set can then drive a fit in either direction without being re-authored.
The Invert Landmarks node
When to use it
Swaps the source and target sides of a Landmarks wire, splines included. One node, one job: a single hand-placed correspondence set can then drive a fit in either direction without being re-authored.
Drop it in when the wrap has to go the other way, template onto scan instead of scan onto template.
Whatever consumes the landmarks has Mesh and Target wires that need swapping too. Invert only the landmarks and the fit pulls exactly the wrong way.
Pins
Pin
Type
Description
Landmarks
Landmarks
The landmark set to flip.
Pin
Type
Description
Landmarks
Landmarks
The same landmarks with each pair's two sides swapped over.
Places all 478 MediaPipe facial landmarks on a head scan without you clicking them on by hand.
The Auto Face Landmarks node
When to use it
Places all 478 MediaPipe facial landmarks on a head scan without you clicking them on by hand.
It needs the Face Landmarks model pack to run at all, and without it the node reports the missing pack and does nothing. It also needs the mesh to carry colour or texture detail: MediaPipe reads a rendered image of the head, and a bare grey scan is refused outright rather than guessed at.
With nothing wired into Target, it places all 478 points on Mesh alone, each one paired with itself: save that set with Save Landmarks, or load it into Select Landmarks to refine by hand. Wire a second head into Target and it detects independently on both meshes, then pairs every point that landed on both sides into a source-to-target correspondence, ready to drive Non-Rigid Fit or Elastic Conformer with nothing hand-placed on either side.
For a correspondence that lives in a mole or a printed seam rather than a standard face point, Texture Flow Landmarks is still the better start.
How to use it
1
Wire the scan into Mesh
Check that Up Axis and Front Axis match how the scan is actually sitting. The defaults are the app's own, front +Y, up +Z.
2
Press Detect Landmarks
Read LastRun and Detector Used.
3
For a full correspondence, also wire a second head into Target, then press again
4
Send the Landmarks output into Non-Rigid Fit or Elastic Conformer, or into Select Landmarks to nudge any of them by hand. Needs the Face Landmarks model pack (Help > AI Model Packs). There is no geometry-only fallback: without the pack this node cannot run at all
Pins
Pin
Type
Description
Mesh
Mesh
The head scan to place landmarks on.
Target
Mesh
Optional. A second head to pair every landmark against. Wire this to get a proper source-to-target correspondence instead of a self-paired set.
Pin
Type
Description
Landmarks
Landmarks
The landmarks that were placed. With no Target wired in, each pair's two sides are the same point, since there is only one mesh. With a Target, the Mesh side is the source and the Target side is where it lands, which is what Non-Rigid Fit and Elastic Conformer want.
Settings
Setting
Type
Description
Up Axis
Choice
Which world axis points from the chin to the crown.
Front Axis
Choice
Which world axis the face looks along. The app's own convention is +Y, which with Up +Z puts the subject's left at -X.
ML Albedo Source
Choice
Which colour MediaPipe reads the mesh through. Same source Texture Flow Landmarks resolves from.
ML Render Resolution
Whole number
How big the internal render MediaPipe reads is. A landmark can only land as precisely as one pixel is wide on the model.
ML Min Detection Score
Number
MediaPipe's own detector confidence floor. Below this the rendered view is treated as having found no face at all.
Writes one side of a Landmarks wire out to a Graph Landmarks asset on disk, the way the classic Mesh Morpher wrapper saved control points. A hand-placed set that took real time to author is worth k...
The Save Landmarks node
When to use it
Writes one side of a Landmarks wire out to a Graph Landmarks asset on disk, the way the classic Mesh Morpher wrapper saved control points. A hand-placed set that took real time to author is worth keeping, so a later graph can start from it instead of from nothing.
Side picks whether the source or the target points get stored. The pairs are not symmetric, so saving the wrong side leaves you with a file of points that belong to the other mesh.
Saving happens from the node, not from a wire changing.
How to use it
1
Connect the mesh and the landmarks
2
Select the side to save
Left is the source, Right is the target.
3
Toggle the Save property to write the file
Pins
Pin
Type
Description
Mesh
Mesh
Optional, but worth wiring. Each landmark records where it sits in this mesh's UVs, which is what lets the saved set be placed by UV later.
Landmarks
Landmarks
The landmarks to write out.
Settings
Setting
Type
Description
Side
Choice
Which half of each pair gets saved. Left is the source side, Right is the target side.