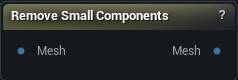
Remove Small Components: Throw away the loose shells a scan or a boolean leaves behind. Anything not connected to the rest of the mesh and smaller than your thresholds goes; a mesh that is all one piece is never touched.
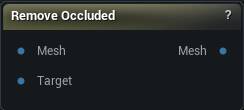
Remove Occluded: Delete the triangles you can never see from outside: the body under the clothes, the inside of a boot, the overlapping shells a kitbash left behind.
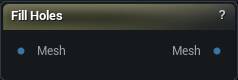
Fill Holes: Close the open boundary loops in a mesh. Five ways to triangulate the patch, from a quick flat fan up to a smoothed surface that blends into the shape around it.
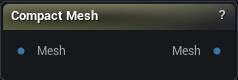
Compact Mesh: Renumber a mesh so its vertex and triangle IDs run without gaps. Several nodes refuse to touch a mesh with holes in its numbering and say so; drop this in front of them.
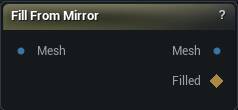
Fill From Mirror: Deletes the thin half of a mesh, appends a mirror of the half that is there, and welds the seam. Use this when one side is missing. Topology changes.
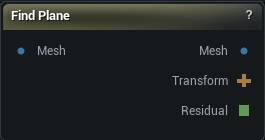
Find Plane: Estimates the best mirror plane on a scan. Press Find Plane. Tick Align To X to rotate the mesh onto the sculpt X plane; the Transform pin is written either way.
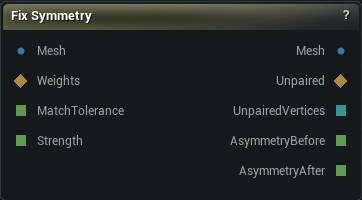
Fix Symmetry: Make a nearly-symmetric scan exactly symmetric by pairing each vertex with its mirror and averaging the two, so both halves keep their detail instead of one half being thrown away.
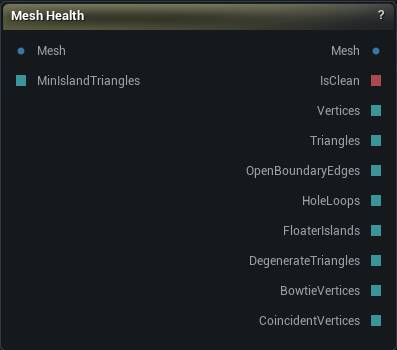
Mesh Health: Drop it anywhere in a chain to see what is wrong with the mesh: invalid positions, open edges, holes, floating islands, degenerate triangles, pinch points, duplicate vertices.
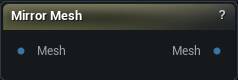
Mirror Mesh: Reflects the mesh about the sculpt / Fix Symmetry plane and flips winding so it is a valid Non-Rigid Fit target. Not a finished symmetrised asset.
Studio and Graph › Repair
Remove Small Components
Photogrammetry scans and marching-cubes surfaces leave confetti behind. This throws away every disconnected island under a triangle-count or surface-area threshold, in one press of Remove Small Com...
The Remove Small Components node
When to use it
Photogrammetry scans and marching-cubes surfaces leave confetti behind. This throws away every disconnected island under a triangle-count or surface-area threshold, in one press of Remove Small Components.
For junk that is connected but buried inside the model, Remove Occluded is the one.
On a mesh with uneven density, set the threshold by area rather than triangle count. Otherwise a dense speck survives while a sparse but real part gets deleted.
Nothing protects the largest island. A threshold above your actual model deletes everything, so when the output comes back empty, look at the result before you go hunting through the settings.
How to use it
1
Wire the mesh into Mesh
2
Set a triangle count, a surface area, or both
Either one on its own is enough; an island only has to fail one test to go.
3
Press Remove Small Components
A mesh that is all one connected piece is never touched, whatever the thresholds say. Once there are two pieces, neither is protected for being the bigger one, so set the thresholds under the size of the part you want to keep.
Pins
Pin
Type
Description
Mesh
Mesh
The mesh with loose bits floating around it.
Pin
Type
Description
Mesh
Mesh
The mesh with the undersized islands gone.
Settings
Setting
Type
Description
Min Area Island
Number
Islands with less surface area than this get deleted. 0 turns the area test off. Being the biggest piece protects nothing, so keep this under the area of the part you want or it goes out with the scraps.
Min Tri Count Island
Whole number
Islands with fewer triangles than this get deleted. 0 turns the triangle test off. Same warning as the area threshold: the main body is not exempt.
Deletes interior triangles that cannot be seen from outside, using winding number or raycast sampling. Hidden geometry inside a merged or scanned asset - the inner wall of a double-sided surface, a...
The Remove Occluded node
When to use it
Deletes interior triangles that cannot be seen from outside, using winding number or raycast sampling. Hidden geometry inside a merged or scanned asset - the inner wall of a double-sided surface, a body under clothing - costs triangles and confuses bakes.
Winding number is the more reliable test and wants a reasonably closed mesh. Raycast works on open ones, but a sample count that is too low fools it, either leaving interior shells behind or punching holes through thin visible geometry.
Weld first. An unwelded surface has no inside for the winding number to compute.
How to use it
1
Wire the mesh into Mesh
Leave Target empty and the mesh hides itself, which is what you want on a kitbash full of overlapping shells.
2
To strip a body under clothing
Wire the body into Mesh and the clothing into Target.
3
Press Remove Occluded
This deletes triangles for good. If the cut nibbles into surface you can still see, raise Shrink Removal a ring or two before reaching for anything else.
Pins
Pin
Type
Description
Mesh
Mesh
The mesh to cut hidden triangles out of.
Target
Mesh
Optional second mesh doing the hiding. Wire the jacket in here to strip the torso underneath it. Empty means the mesh hides itself.
Pin
Type
Description
Mesh
Mesh
The mesh with the hidden triangles gone.
Settings
Setting
Type
Description
Occlusion Test Method
Choice
How a triangle is judged hidden.
Triangle Sampling
Choice
Where on each triangle the test gets taken.
Winding Iso Value
Number
The cutoff that separates inside from outside for the winding test. 0.5 is the standard value; raise it to be stricter about what counts as inside and keep more, lower it to cut more.
Add Random Rays
Whole number
Extra rays in random directions on top of the six axis rays. Raise it when the raycast test is leaving slivers of hidden surface behind.
Add Triangle Samples
Whole number
Extra sample points scattered over each triangle. Raise it when big triangles are being kept because a corner happens to peek out.
Shrink Removal
Whole number
Pulls the removal set back by this many rings of triangles before deleting, so the cut stops short of the visible surface instead of nibbling into it.
Min Area Island
Number
After the cut, delete any leftover island with less surface area than this. 0 keeps them all.
Min Tri Count Island
Whole number
After the cut, delete any leftover island with fewer triangles than this. 0 keeps them all.
Closes open boundaries. The method matters more than anything else here. A triangle fan is instant and fine on a small flat hole. Ear clipping copes with a concave outline. Minimal produces the few...
The Fill Holes node
When to use it
Closes open boundaries. The method matters more than anything else here. A triangle fan is instant and fine on a small flat hole. Ear clipping copes with a concave outline. Minimal produces the fewest triangles. Smooth fill reconstructs a curved surface that carries on from the shape around it, and on an organic form it is the only one that looks right.
Run it after a crop, a Remove Geometry or a scan cleanup, then check with Mesh Health that the boundary count actually reached zero.
A hole that refuses to fill is usually not one loop. Two boundaries that touch at a pinch vertex read as a figure eight, so weld first. Press Fill Holes.
How to use it
1
Wire the mesh into Mesh
2
Pick a fill method
Minimal handles most things; use Smooth on a large opening across a curved surface.
3
Press Fill Holes
Every patch gets flat face normals and a flat UV projection, so it will read as a facet against the surface around it until you recompute normals and lay its UVs out properly.
Pins
Pin
Type
Description
Mesh
Mesh
The mesh with holes in it.
Pin
Type
Description
Mesh
Mesh
The mesh with its boundary loops closed. Each patch inherits the material of the triangles around it.
Settings
Setting
Type
Description
Fill Method
Choice
How the patch gets triangulated.
Filter By Size
True/False
Skip holes with more boundary edges than Max Hole Edges. Off, a scan's whole open back gets sealed over along with the pinholes you were after.
Max Hole Edges
Whole number
Holes with more boundary edges than this are left open.
Constrain To Hole Interior
True/False
Keep the fill from touching any triangle outside the hole. Protects the surrounding mesh, at the cost of a patch that meets it more abruptly.
Interior Smoothness
Number
Trades smoothness inside the patch against staying close to the shape the first fill produced.
Remeshing Exterior Region Width
Whole number
How many rings of surrounding triangles get remeshed along with the patch. Only does anything when the fill is not constrained to the hole interior.
Smoothing Exterior Region Width
Whole number
How many rings outside the patch get smoothed too. Raise it to soften the seam where the patch meets the mesh.
Smoothing Interior Region Width
Whole number
How far in from the patch border the smoothing constraint fades out.
Fill Density Scalar
Number
Sets the patch's triangle size: the average edge length around the hole, divided by this. Higher gives you a denser patch.
Project During Remesh
True/False
Pull vertices back onto the fill surface while the patch is remeshed.
After a lot of deleting, vertex, edge and triangle indices have gaps in them. This renumbers everything dense and contiguous again.
The Compact Mesh node
When to use it
After a lot of deleting, vertex, edge and triangle indices have gaps in them. This renumbers everything dense and contiguous again.
Hardly anything needs it by hand. What does is per-index data: a saved selection, an attribute array, an external file of vertex positions. All of that is only meaningful against a compact mesh, so run this before exporting index-keyed data or handing vertices to an outside tool.
Compacting changes vertex ids. Any selection, weight map or delta set captured beforehand no longer lines up. Compact first, capture second.
Pins
Pin
Type
Description
Mesh
Mesh
The mesh to renumber. Deleting geometry upstream is what leaves the gaps.
Pin
Type
Description
Mesh
Mesh
The same geometry, with no gaps left in the vertex and triangle numbering.
The missing-half tool. Deletes every triangle on the drop side of the plane, appends a reflected copy of the keep side, and welds the seam. Topology changes. Use it when one half of a scan is simpl...
The Fill From Mirror node
When to use it
The missing-half tool. Deletes every triangle on the drop side of the plane, appends a reflected copy of the keep side, and welds the seam. Topology changes. Use it when one half of a scan is simply gone, not when both halves are there and only disagree.
Fix Symmetry cannot invent partners that do not exist, and Mirror Mesh plus a wrap keeps the original topology, which is the wrong answer when half the surface is missing. This is delete, append, weld - not a boolean.
Set Keep to the half that exists, or leave it on Larger Side. A wrong Keep copies the thin stub over the good half. Press Fill From Mirror; the Filled weight map marks the vertices the mirror added.
How to use it
1
Wire the incomplete scan into Mesh and pick the Axis
2
Set Keep to the half that exists (or leave Larger Side)
3
Press Fill From Mirror
Topology will change.
Pins
Pin
Type
Description
Mesh
Mesh
The mesh that is missing a half. Passes straight through until you press Fill From Mirror.
Pin
Type
Description
Mesh
Mesh
The mesh with the missing half filled from the mirror of the keep side. Topology changes.
Filled
Weight Map
1.0 on vertices appended from the mirrored keep side that survived the weld, 0.0 everywhere else.
Settings
Setting
Type
Description
Axis
Choice
The axis the mirror plane faces along. X mirrors left to right for a head looking down +Y, which is the app's front. None is refused rather than quietly doing nothing.
Plane Origin
Choice
Which point the mirror plane passes through.
Plane Offset
Vector
Nudges the plane off that point, in cm. Only the component along Axis does anything; the other two just slide the plane around inside itself.
Keep
Choice
Which side of the plane is kept. The other side is deleted and replaced by the mirror of this one.
Seam Tolerance Fraction
Number
Vertices this close to the plane, as a fraction of the bounds diagonal, count as the seam and are kept with both sides.
Weld Tolerance
Number
How close two seam vertices must sit before the weld merges them, in cm.
Seam Snap Fraction
Number
How far off the plane a boundary counts as the seam, as a fraction of the bounds diagonal. A ragged scan cut wanders off the true midline by a few millimetres; every boundary edge with both ends inside this band is pulled exactly onto the plane before the mirror, so the two halves meet with no slit no matter how far that stretch wandered. Raise it if a stubborn gap remains; lower it if a real hole near the plane (an eye socket) is being sealed shut. Keep it below the distance from the plane to the nearest hole you want to preserve. An edge with only one end in the band is a rim crossing the plane, not the seam, and is left alone.
Estimates the dominant mirror plane of a scan when you do not already know which axis it sits on, or when the scan arrived rotated off the sculpt X plane.
The Find Plane node
When to use it
Estimates the dominant mirror plane of a scan when you do not already know which axis it sits on, or when the scan arrived rotated off the sculpt X plane.
How to use it
1
Wire the scan into Mesh
2
Press Find Plane
Read Closest Axis and Residual.
3
Tick Align To X if you want the mesh rotated onto the sculpt X plane; the Transform pin is written either way so Apply Rigid Transform can consume it without moving this mesh
Pins
Pin
Type
Description
Mesh
Mesh
The mesh whose mirror plane you want to find. Passes straight through until you press Find Plane.
Pin
Type
Description
Mesh
Mesh
The input mesh, or the same mesh rotated onto X if Align To X is on.
Transform
Transform
The rigid transform that would align the found plane to X. Written even when the mesh is left unmoved.
Residual
Number
How far the estimated plane is from a perfect mirror. Blank when the run was refused.
Settings
Setting
Type
Description
Max Samples
Whole number
How many vertices to sample. More is slower and a little more stable.
Align To X
True/False
Rotate the mesh so the found plane becomes the X axis. Off leaves the mesh where it is and still writes the Transform pin.
Snap Aligned Plane To Origin
True/False
After aligning, slide the plane onto the world origin.
Takes a nearly symmetric mesh and makes it exactly symmetric. Each vertex finds its mirror partner across the plane and the pair is averaged, so both halves keep their detail and every vertex moves...
The Fix Symmetry node
When to use it
Takes a nearly symmetric mesh and makes it exactly symmetric. Each vertex finds its mirror partner across the plane and the pair is averaged, so both halves keep their detail and every vertex moves by half the disagreement instead of one side being overwritten by the other. On a scan that beats mirroring geometry, because nothing gets thrown away.
How to use it
1
Wire the scan into Mesh and pick the Axis
X for a head facing +Y.
2
Press Fix Symmetry
Read Asymmetry Before / After in the details panel.
3
If Unpaired Vertices is not zero, find out where
Wire the Unpaired output into a mask to see the gaps, then either raise Match Tolerance or fix the crop upstream.
4
Paint a Weights mask when part of the mesh should stay lopsided
A pair moves by the lower of its two weights, so paint the region on both sides of the plane. A vertex painted 0 never moves and holds its partner still as well, which is what keeps "unpainted means untouched" true for the whole mesh rather than only for the half you happened to paint.
Pins
Pin
Type
Description
Mesh
Mesh
The nearly-symmetric mesh. Passes straight through until you press Fix Symmetry.
Weights
Weight Map
Optional mask scaling how far each vertex moves, so you can straighten a face without touching a deliberately lopsided hairstyle. A pair moves by the lower of its two weights, so paint both sides of the region you want fixed - a vertex painted 0 is never moved, and neither is its partner. Unconnected means full strength everywhere.
MatchTolerance
Number
Partner search radius, as a fraction of the bounds diagonal. Leave it unconnected to use the value in the details panel.
Strength
Number
How far each vertex travels toward the symmetric average, 0 to 1. Leave it unconnected to use the value in the details panel.
Pin
Type
Description
Mesh
Mesh
The symmetrised mesh. Only positions moved - vertex count, order and every attribute are untouched.
Unpaired
Weight Map
1.0 on every vertex that found no mirror partner and was left where it was, 0.0 everywhere else. Wire it into a mask to see the gaps.
UnpairedVertices
Whole Number
How many vertices had no mirror partner. Zero means everything paired up.
AsymmetryBefore
Number
Largest gap, in cm, between a vertex and the mirror of its partner before the fix.
AsymmetryAfter
Number
The same measurement after the fix. Zero, to floating point, at full Strength.
Settings
Setting
Type
Description
Axis
Choice
The axis the mirror plane faces along. X mirrors left to right for a head looking down +Y, which is the app's front. None is refused rather than quietly doing nothing.
Plane Origin
Choice
Which point the mirror plane passes through.
Plane Offset
Vector
Nudges the plane off that point, in cm. Only the component along Axis does anything; the other two just slide the plane around inside itself.
Correspondence
Choice
How each vertex finds its mirror partner. Nearest Vertex matches the other half's vertices. Closest Point On Surface matches the mirrored position onto the mesh itself, which is what a scan needs when the two halves were tessellated independently.
Match Tolerance Fraction
Number
How far from its mirrored position a partner may sit, as a fraction of the bounds diagonal, so one number works on a 2 cm ear and a 200 cm body. It has to be bigger than the asymmetry you are fixing or nothing pairs at all, and smaller than the gap between neighbouring vertices or a vertex grabs its partner's neighbour instead and the fix smears detail sideways. One percent of the diagonal clears typical scan asymmetry with room left. On a dense scan that one percent is larger than the neighbour spacing, so Limit Match To Spacing (on by default) also caps the search at a few mean edge lengths. Closest Point On Surface uses the same radius against the mirrored surface rather than the nearest vertex. Clamped at a quarter of the diagonal: past that the search radius covers a large fraction of the mesh, every query returns most of the other side and the pairing stops being a mirror match at all - while the cost climbs toward comparing every vertex with every other one. The clamp also bounds what a value driven in through the Match Tolerance pin can do.
Limit Match To Spacing
True/False
Cap the partner search at a few mean edge lengths. The default 1% of the bounds diagonal is larger than neighbour spacing on a dense scan and the extra radius is how a vertex grabs its partner's neighbour and smears detail. Off restores a pure diagonal fraction.
Max Match Edge Lengths
Number
Search radius in mean edge lengths, used only while Limit Match To Spacing is on. 1.5 keeps the query inside the first ring of neighbours.
Seam Tolerance Fraction
Number
Vertices this close to the plane, as a fraction of the bounds diagonal, count as seam vertices and pair with themselves. They need their own rule: a seam vertex's mirrored position lands within Match Tolerance of both itself and its neighbours across the plane, so it would otherwise compete for a partner it must not have. Note the band between this and Match Tolerance: a vertex just outside the seam whose true partner sits just inside it cannot pair, because seam vertices are deliberately kept out of the partner search. Those vertices are reported as unpaired (count, Unpaired map and node warning) rather than quietly skipped, so the usual symptom is a thin ring of unpaired vertices hugging the plane. Lower Seam Tolerance until it clears.
Snap Seam To Plane
True/False
Pull seam vertices exactly onto the plane. Off leaves them where they are, which keeps a deliberately off-plane seam intact but means the result is not exactly symmetric along it.
Strength
Number
How far each vertex travels toward the symmetric average. 1 lands exactly symmetric; lower closes part of the gap and leaves the mesh measurably straighter without being exact.
Inspects the incoming mesh for the flaws that make sculpting and deformation tools misbehave, passes the mesh straight through, and publishes what it found on pins. Findings are ranked by severity ...
The Mesh Health node
When to use it
Inspects the incoming mesh for the flaws that make sculpting and deformation tools misbehave, passes the mesh straight through, and publishes what it found on pins. Findings are ranked by severity and written in plain language, and each one has a repair button next to it.
Drop one in wherever you suspect the input rather than the operation: before a boolean that keeps failing, after an import, either side of a Weld to see how many boundary edges actually went away. Branch a batch graph on Is Clean to stop a bad mesh reaching an export.
Until you press a repair button it is a pass-through, so it re-checks on its own whenever the mesh upstream changes. Press one and the output becomes a computed result like any other node's: an upstream edit then marks it stale and waits for you to re-run it.
How to use it
1
Drop it anywhere in a mesh chain
Mesh in, mesh out, nothing changes.
2
Read the findings in the details panel
3
Press a repair button for what can be fixed
Remove Floaters, Weld, Remove Degenerate, Split Pinch Points and Fill Holes. Each is one undo step, and each publishes the repaired mesh downstream.
Pins
Pin
Type
Description
Mesh
Mesh
The mesh to inspect. Passes straight through to the Mesh output unless you press a repair button.
MinIslandTriangles
Whole Number
Islands with fewer triangles than this count as floaters. Leave it unconnected to use the value in the details panel.
Pin
Type
Description
Mesh
Mesh
The input mesh, unchanged, or the repaired mesh once you have pressed a repair button.
IsClean
True/False
True when the mesh has no invalid positions, no open edges, no floaters, no degenerate triangles and no pinch points. Blank at the fast scan depth, which skips two of those checks.
Vertices
Whole Number
Vertex count of the analysed mesh.
Triangles
Whole Number
Triangle count of the analysed mesh.
OpenBoundaryEdges
Whole Number
Edges with only one triangle attached. Non-zero means the surface is open.
HoleLoops
Whole Number
Number of distinct boundary loops (holes) in the surface. A lower bound when pinch points interrupt the walk.
FloaterIslands
Whole Number
Disconnected islands smaller than Min Island Triangles.
DegenerateTriangles
Whole Number
Triangles with effectively zero area. Empty (no value) when the scan depth is Boundary + Islands.
BowtieVertices
Whole Number
Vertices where two surface fans meet at a single point. Empty (no value) when the scan depth is Boundary + Islands.
CoincidentVertices
Whole Number
Vertices sitting on top of another vertex. Empty (no value) when the check did not run - it is skipped on very large meshes.
Settings
Setting
Type
Description
Analyze Automatically
True/False
Re-check the mesh every time it changes upstream. Turn it off on a mesh dense enough that the scan gets in your way; the node then shows nothing until you press Analyze, rather than numbers describing an older mesh.
Scan Depth
Choice
Which checks to run.
Min Island Triangles
Whole number
Islands with fewer triangles than this count as floaters, both in the report and for the Remove Floaters button, so the button deletes what the report named. The one exception is the largest surface, which the repair always keeps even when it is itself under the threshold - otherwise "remove everything under 1000 triangles" would empty a model made entirely of small pieces. Set the threshold above every island and the report counts them all while the button removes all but the biggest.
Max Auto Analyze Vertices
Whole number
Automatic checking is skipped above this vertex count; the Analyze button still works. 0 removes the ceiling.
Measure Symmetry
True/False
Also measure how far the mesh is from mirroring itself. Off by default: on a dense mesh this one check costs more than all the others together.
Symmetry Axis
Choice
Which plane the symmetry measurement mirrors about.
Symmetry Plane Origin
Choice
Which point that plane passes through. Mesh Centre is the sculpt / Fix Symmetry default, so a scan imported off-origin still measures about itself. World Origin is what you need when a one-sided crop has dragged the bounds centre off the real plane.
Symmetry Plane Offset
Vector
Nudges the plane off that point, in cm. Only the component along the symmetry axis does anything; the other two just slide the plane around inside itself.
Weld Tolerance Fraction
Number
How close two vertices have to be before Weld merges them, as a fraction of the bounds diagonal, so one number works on a 1 cm prop and a 200 cm character.
Max Hole Edges
Whole number
Fill Holes leaves boundary loops longer than this alone.
Reflects every vertex about the same plane Fix Symmetry and the sculpt brushes use, and flips the winding so the result is a valid Non-Rigid Fit Target. That is what it is for: wrap a scan onto its...
The Mirror Mesh node
When to use it
Reflects every vertex about the same plane Fix Symmetry and the sculpt brushes use, and flips the winding so the result is a valid Non-Rigid Fit Target. That is what it is for: wrap a scan onto its own mirror, blend half way, then last-mile Fix Symmetry.
How to use it
1
Wire the scan into Mesh and pick the Axis
X for a head facing +Y.
2
The node runs on its own when the mesh arrives
Read the output as the Non-Rigid Fit target, not as the finished asset.
Pins
Pin
Type
Description
Mesh
Mesh
The mesh to reflect. Passes straight through until a mesh arrives, then this node runs on its own.
Pin
Type
Description
Mesh
Mesh
The reflected mesh. A wrap target, not a finished symmetrised asset.
Settings
Setting
Type
Description
Axis
Choice
The axis the mirror plane faces along. X mirrors left to right for a head looking down +Y, which is the app's front. None is refused rather than quietly doing nothing.
Plane Origin
Choice
Which point the mirror plane passes through.
Plane Offset
Vector
Nudges the plane off that point, in cm. Only the component along Axis does anything; the other two just slide the plane around inside itself.
Reverse Winding
True/False
Flip triangle winding after the reflection. Leave this on: a wrap target with inverted faces will not fit.