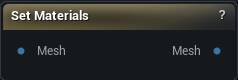
Set Materials: Swaps the material on each of a mesh's slots and lets you rename them. The names carry through to the sections list, to everything downstream, and to the slot names you get on export.
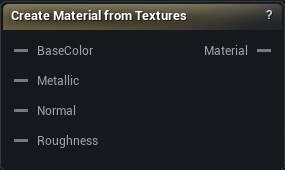
Create Material from Textures: Builds a material out of the textures you plug in, so a map you baked or painted can actually be seen on the mesh.
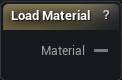
Load Material: Grabs a material from your project so you can drop it on a mesh slot. Editor only.
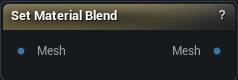
Set Material Blend: Forces a material slot to render solid or see-through when the import guessed wrong, like hair cards that come in opaque or a stylised eye that comes in transparent.
Studio and Graph › Materials
Set Materials
Overrides which material sits in each of a mesh's material slots, and renames the sections.
The Set Materials node
When to use it
Overrides which material sits in each of a mesh's material slots, and renames the sections.
The renaming is the part worth knowing. Section names flow onward to the sections list, to nodes that address a slot by name such as Replace Geometry, and to Convert To Static Mesh's slot names. Naming a section here is how a part of the mesh becomes addressable later.
Feed the material inputs from Load Material or Create Material from Textures. Both emit the same wire type, so they are interchangeable here.
Setting a slot the mesh does not have does nothing. When an override looks ignored, check the mesh's real section count.
Builds a live material instance from the texture wires you connect - base colour, metallic, normal and roughness - and publishes it for Set Materials to assign.
The Create Material from Textures node
When to use it
Builds a live material instance from the texture wires you connect - base colour, metallic, normal and roughness - and publishes it for Set Materials to assign.
When the textures were produced inside the graph by Bake Maps, Project Texture or Transfer Texture, there is no project material to point at and this fills the gap. When there already is one, use Load Material.
The parent material has to expose parameters with the expected names. A slot left unconnected keeps the parent's default, and for a normal map that default is flat, which makes surfaces look suspiciously smooth rather than obviously broken.
Nothing is written to disk, so it works in the packaged app as well as the editor. Press Create Material to build or refresh it.
How to use it
1
Set the parent material
It must expose matching texture parameters.
2
Connect the texture inputs
Base colour, metallic, normal, roughness - whichever you have.
3
Click Apply to create or refresh the material instance
Pins
Pin
Type
Description
BaseColor
Asset
The colour map.
Metallic
Asset
The metallic mask.
Normal
Asset
The normal map.
Roughness
Asset
The roughness map.
Pin
Type
Description
Material
Asset
The finished material. Wire it into a Set Materials slot.
Editor-only node. Runs only in Mesh Morpher Graph inside the Unreal Editor, because it reads or writes Unreal Engine assets. Not available in the standalone Mesh Morpher Studio app.
Editor-only node. Runs only in Mesh Morpher Graph inside the Unreal Editor, because it reads or writes Unreal Engine assets. Not available in the standalone Mesh Morpher Studio app.
The Load Material node
When to use it
Exposes a project material asset to the graph, on the same wire type Create Material from Textures produces, so Set Materials consumes either one the same way.
It is editor only because picking an asset out of the content browser is an authoring operation. When there is no project material to point at - because the textures were made inside the graph - use Create Material from Textures instead.
How to use it
1
Pick a material or material instance asset
2
Wire the Material output into a Set Materials slot pin
Pins
Pin
Type
Description
Material
Asset
The material you picked. Wire it into a Set Materials slot.
Forces a mesh's embedded materials to opaque or translucent per slot, over the top of whatever the importer guessed.
The Set Material Blend node
When to use it
Forces a mesh's embedded materials to opaque or translucent per slot, over the top of whatever the importer guessed.
Hair or eyelashes that came in opaque and look like cardboard, a body slot that came in translucent and shows through itself: that is what this fixes. Transparency only. Swapping the material itself is Set Materials.
Auto is not off. It means keep what the importer decided from the source file and the mostly-opaque heuristic, and the panel shows you what Auto currently resolves to. Leave slots you have no opinion about on Auto rather than pinning them to Opaque.
Pins
Pin
Type
Description
Mesh
Mesh
The mesh whose material slots you want to fix.
Pin
Type
Description
Mesh
Mesh
The same mesh with your solid / see-through choices applied.