Studio and Graph
Weight Map
Creating, converting and combining weight maps - the 0..1 per-vertex masks that gate deformers, sculpting and Wrangle expressions.
Mesh Morpher documentation
Studio and Graph
Creating, converting and combining weight maps - the 0..1 per-vertex masks that gate deformers, sculpting and Wrangle expressions.
Studio and Graph › Weight Map
Blends two versions of the same mesh vertex by vertex, with a weight map deciding how far each vertex travels between them. Where the weight is 0 the vertex stays exactly where Mesh put it; where i...
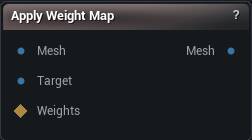
The Apply Weight Map node
Blends two versions of the same mesh vertex by vertex, with a weight map deciding how far each vertex travels between them. Where the weight is 0 the vertex stays exactly where Mesh put it; where it is 1 it lands exactly where Target has it; in between it slides along the straight line joining the two.
That makes it the universal way to make any deformation partial. Run whatever operation you like at full strength, feed the before into Mesh and the after into Target, and the weight map decides which parts of the model actually receive it. No operation needs its own masking option, because this one node masks all of them.
Both meshes have to have the same vertex count, in the same order. They will, as long as Target came from Mesh through operations that deform rather than retopologise. Anything that adds, removes or reorders vertices in between breaks the correspondence, and the pairing is by index, so the result is scrambled rather than refused.
| Pin | Type | Description |
|---|---|---|
Mesh |
Mesh | What you get where the weight is 0. Usually the mesh before the change. |
Target |
Mesh | What you get where the weight is 1. Needs the same vertex count and order as Mesh. |
WeightMap |
Weight Map | How far each vertex travels from Mesh toward Target. Leave it unwired and you get Mesh straight back. |
| Pin | Type | Description |
|---|---|---|
Mesh |
Mesh | Mesh pulled toward Target by the weights. |
| Setting | Type | Description |
|---|---|---|
Strength |
Number | Multiplies the whole weight map before blending. Push it above 1 to drive soft areas up to full effect; the result still stops at Target and never overshoots it. |
Invert Weight Map |
True/False | Flips the map before Strength is applied, so the area a mask was protecting becomes the only part that moves. |
Available in Mesh Morpher Graph and Mesh Morpher Studio.
Studio and Graph › Weight Map
Where a weight map comes from when you are not painting it by hand. One value between 0 and 1 per vertex, derived from something the mesh already knows about itself, and from there it goes to Apply...
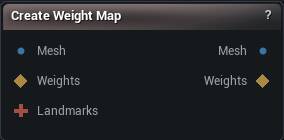
The Create Weight Map node
Where a weight map comes from when you are not painting it by hand. One value between 0 and 1 per vertex, derived from something the mesh already knows about itself, and from there it goes to Apply Weight Map or into any node that takes a Weights pin.
| Pin | Type | Description |
|---|---|---|
Mesh |
Mesh | The mesh the weight map is built for. One value per vertex. |
Weights |
Weight Map | An existing mask, read only in From Selection mode. It comes through as it is, and Falloff Rings grow a soft fringe out from its edge. |
Landmarks |
Landmarks | Points and splines to measure distance from. Only read in From Landmarks mode. |
| Pin | Type | Description |
|---|---|---|
Mesh |
Mesh | The input mesh, unchanged. |
WeightMap |
Weight Map | The finished weight map, one 0-1 value per vertex. |
| Setting | Type | Description |
|---|---|---|
Mode |
Choice | Where the weights come from. |
Default Value |
Number | The value every vertex gets in Uniform mode. |
Falloff Rings |
Whole number | How many rings of vertices to fade over, growing outward from the edge of the mask. At 0 the edge is hard and you see it as a stair-step across the surface wherever the mask is used to blend. |
Proximity Radius |
Number | Distance at which the weight has faded to nothing. Only a vertex sitting right on a landmark gets a full 1, and it drops off evenly from there. Set it too small and you get a few bright specks instead of a usable mask. |
Bone Name |
Text | Which bone's skin weights to copy, spelled exactly. A * matches anything, so thigh_* picks up both thigh_l and thigh_r. Leave it empty and the map comes out all zeros, with a warning saying so. |
Normalize To Max |
True/False | Divides everything by the highest weight on the mesh, so the strongest vertex reads 1. Off by default, which gives you the bone's raw influence: already 0-1, but a bone that never fully owns any vertex then never reaches 1. |
Invert |
True/False | Flips the finished map, so 1 becomes 0 and 0 becomes 1. |
Available in Mesh Morpher Graph and Mesh Morpher Studio.
Studio and Graph › Weight Map
Measures per-vertex stretch between two meshes that share vertex count and order, and hands you a 0 to 1 weight map. This is how you find the regions a conform, a wrap or a pose damaged, instead of...
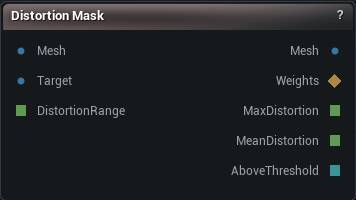
The Distortion Mask node
Measures per-vertex stretch between two meshes that share vertex count and order, and hands you a 0 to 1 weight map. This is how you find the regions a conform, a wrap or a pose damaged, instead of hunting for them by eye.
Max Distortion in the details panel is in log units, so 0.69 means something on this mesh doubled in size.
| Pin | Type | Description |
|---|---|---|
Mesh |
Mesh | The mesh as it is now, the one being measured. Passes straight through untouched. |
Target |
Mesh | The same mesh before whatever conform or wrap you suspect. Vertex count and order have to match. |
DistortionRange |
Number | How much change maps to a weight of 1.0, in log units; 0 is auto. Leave it unconnected to use the value in the details panel. |
| Pin | Type | Description |
|---|---|---|
Mesh |
Mesh | The input mesh, unchanged. |
Weights |
Weight Map | Distortion per vertex, scaled to 0-1. All zeroes when the two meshes match. |
MaxDistortion |
Number | The worst raw distortion on the mesh, in log units (0.69 is a doubling). Branch on this, not on the weight map, which is scaled and says nothing about how bad it actually got. |
MeanDistortion |
Number | Average raw distortion across the vertices that could be measured. |
AboveThreshold |
Whole Number | How many vertices went past Report Threshold. |
| Setting | Type | Description |
|---|---|---|
Metric |
Choice | What counts as distortion: change in edge length, or change in the area around each vertex. |
Direction |
Choice | Whether stretching, squashing or both show up in the mask. |
Distortion Range |
Number | How much change maps to a weight of 1.0, in log units. Zero means auto: scale against the worst vertex on this mesh, so the mask always fills the whole 0-1 range. Pin it to a number (0.69 is a doubling, 0.1 is a ten percent change) when you compare masks across several meshes, or a clean mesh's rounding noise ends up looking exactly like a torn mesh's tear. |
Report Threshold |
Number | Vertices whose raw, un-normalised distortion goes past this get counted on the Above Threshold pin. Same log units as Max Distortion. |
Available in Mesh Morpher Graph and Mesh Morpher Studio.
Studio and Graph › Weight Map
Two meshes in, per-vertex distance out as a normalised weight map, with the minimum, maximum and average alongside it in the details panel. The first mesh passes through unchanged.
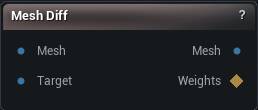
The Mesh Diff node
Two meshes in, per-vertex distance out as a normalised weight map, with the minimum, maximum and average alongside it in the details panel. The first mesh passes through unchanged.
| Pin | Type | Description |
|---|---|---|
Mesh |
Mesh | The mesh being measured. The weight map is sized to this one. |
Target |
Mesh | The mesh it gets measured against. |
| Pin | Type | Description |
|---|---|---|
Mesh |
Mesh | The input mesh, unchanged. |
WeightMap |
Weight Map | Distance per vertex, scaled to 0-1. Dark where the two agree, bright where they part. |
| Setting | Type | Description |
|---|---|---|
Topology Mode |
Choice | How vertices get paired up between the two meshes. |
Distance Threshold |
Number | Anything further apart than this is counted in the Vertices Above Threshold readout. It only feeds that number. The weight map ignores it. |
Max Display Distance |
Number | The distance that comes out as a full weight of 1. Left at 0 it uses the biggest distance it found, which rescales the map on every run and makes two runs impossible to compare by eye. Type a real number in once you know your range. |
Available in Mesh Morpher Graph and Mesh Morpher Studio.
Studio and Graph › Weight Map
The hand-painted weight map. Select the node, brush the region you want onto the mesh in the viewport, and press Accept to publish it on the WeightMap pin.
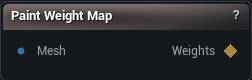
The Paint Weight Map node
The hand-painted weight map. Select the node, brush the region you want onto the mesh in the viewport, and press Accept to publish it on the WeightMap pin.
Reach for it when the region you need is a judgement call rather than something the mesh can be asked about. Create Weight Map covers everything derivable - curvature, landmark proximity, a bone's skin weights - and it re-derives itself when the mesh changes, which strokes cannot. Paint the ones only you can decide: which corner of a cloth is pinned, where a muscle attaches.
Brush size, strength and falloff come from the viewport Brush controls, the same ones mesh sculpting uses. Nothing leaves the node until you press Accept.
| Pin | Type | Description |
|---|---|---|
Mesh |
Mesh | The mesh the weight map is painted on. One value per vertex. |
| Pin | Type | Description |
|---|---|---|
WeightMap |
Weight Map | The painted 0-1 weight map. Wire it into a Cloth Object's Pin Map, a Flesh Attachment, or a Muscle's origin and insertion. |
Available in Mesh Morpher Graph and Mesh Morpher Studio.
Studio and Graph › Weight Map
Turns a weight map into a hard 1 or 0. Everything that passes the test comes out at 1, everything else at 0.
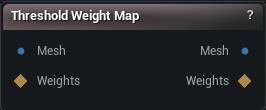
The Threshold Weight Map node
Turns a weight map into a hard 1 or 0. Everything that passes the test comes out at 1, everything else at 0.
| Pin | Type | Description |
|---|---|---|
Mesh |
Mesh | The mesh the weight map belongs to. |
WeightMap |
Weight Map | The soft weight map to cut up. |
| Pin | Type | Description |
|---|---|---|
Mesh |
Mesh | The input mesh, unchanged. |
Weights |
Weight Map | 1 on every vertex that passed the test, 0 everywhere else. |
| Setting | Type | Description |
|---|---|---|
Threshold |
Number | The value every vertex is measured against. |
Selection Mode |
Choice | Which side of the threshold passes. |
Tolerance |
Number | How far either side of the threshold still counts as equal. It starts almost at zero, so on a smooth gradient nothing passes until you widen it. |
Available in Mesh Morpher Graph and Mesh Morpher Studio.
Studio and Graph › Weight Map
Combines weight maps: add, subtract, multiply, min and max, invert, remap, smooth, lerp, power. This is where a usable mask gets built out of the raw ones other nodes produce. Multiply a distortion...
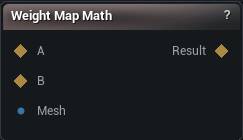
The Weight Map Math node
Combines weight maps: add, subtract, multiply, min and max, invert, remap, smooth, lerp, power. This is where a usable mask gets built out of the raw ones other nodes produce. Multiply a distortion map by a hand-painted region to limit a repair. Invert a coverage map to select what is missing. Power a falloff to sharpen it.
Operations that need one map use input A. Smooth also needs the Mesh input, because smoothing follows mesh connectivity rather than index order, and without that wire it has no neighbours to average over.
The output updates on its own, so there is no button.
Two maps built against different meshes will not line up. Weights are stored per vertex and nothing checks that for you.
| Pin | Type | Description |
|---|---|---|
A |
Weight Map | The first weight map. Every operation reads this one. |
B |
Weight Map | The second weight map. Add, Subtract, Multiply, Min, Max and Lerp need it, and it has to come off the same mesh as A. |
Mesh |
Mesh | Only Smooth reads this, to spread values between neighbouring vertices. It has to be the mesh the map was built on. |
| Pin | Type | Description |
|---|---|---|
Result |
Weight Map | The finished weight map. |
| Setting | Type | Description |
|---|---|---|
Operation |
Choice | What to do with the maps. |
Input Min |
Number | Anything at or below this drops to 0. |
Input Max |
Number | Anything at or above this rises to 1. Drag it down close to Input Min and the gradient collapses into a hard on/off edge. |
Iterations |
Whole number | How many smoothing passes to run. Each one bleeds the values out another ring of vertices, so a high count washes a tight mask away entirely. |
Factor |
Number | 0 gives you A, 1 gives you B, halfway gives you the average. |
Exponent |
Number | Below 1 the mask fattens up and its soft edge spreads. Above 1 it shrinks back toward the bright core. |
Available in Mesh Morpher Graph and Mesh Morpher Studio.
Studio and Graph › Weight Map
Marks which parts of a source mesh are actually covered by a target mesh. Vertices with a close match come out at 1, vertices with none at 0, with a falloff in between.
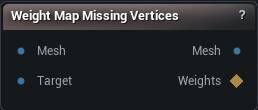
The Weight Map Missing Vertices node
Marks which parts of a source mesh are actually covered by a target mesh. Vertices with a close match come out at 1, vertices with none at 0, with a falloff in between.
| Pin | Type | Description |
|---|---|---|
Mesh |
Mesh | The mesh you want the mask for. The weight map is sized to this one. |
Target |
Mesh | The mesh to hunt for a matching surface on. |
| Pin | Type | Description |
|---|---|---|
Mesh |
Mesh | The input mesh, unchanged. |
WeightMap |
Weight Map | 1 where the target covers this mesh, 0 where it does not. |
| Setting | Type | Description |
|---|---|---|
Distance Threshold |
Number | How close the target surface has to be for a vertex to count as covered. Set it too tight and a body under clothing reads as missing everywhere the cloth floats off the skin. |
Falloff Distance |
Number | Extra distance past the threshold over which the weight fades out. Leave it at 0 and the mask edge follows the triangles, which shows up as a jagged line the moment you use it to blend. |
Falloff Type |
Choice | Shape of that fade. |
Invert |
True/False | Flips the map, so the missing areas come out at 1 instead. |
Available in Mesh Morpher Graph and Mesh Morpher Studio.