Studio and Graph
UV
Unwrapping, packing and editing UV layouts.
Mesh Morpher documentation
Studio and Graph
Unwrapping, packing and editing UV layouts.
Studio and Graph › UV
Builds a UV atlas for the mesh from scratch and packs it into the channel you pick. Two unwrappers are on offer: Patch Builder suits sculpted organic shapes, XAtlas copes better with scans and gene...
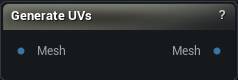
The Generate UVs node
Builds a UV atlas for the mesh from scratch and packs it into the channel you pick. Two unwrappers are on offer: Patch Builder suits sculpted organic shapes, XAtlas copes better with scans and generated meshes that turn up with no UVs at all.
Whatever was in the chosen channel is replaced, seams and all. To change only the layout while keeping the unwrap, use Pack UVs instead.
| Pin | Type | Description |
|---|---|---|
Mesh |
Mesh | The mesh to unwrap. |
| Pin | Type | Description |
|---|---|---|
Mesh |
Mesh | The same mesh with a fresh UV layout in the chosen channel. |
| Setting | Type | Description |
|---|---|---|
Method |
Choice | Which unwrapper does the work. |
UV Channel |
Whole number | Which UV channel the new layout goes into. Whatever was in that channel is replaced, so point this at a spare channel if you want to keep the old one. |
| Setting | Type | Description |
|---|---|---|
Initial Patch Count |
Whole number | How many patches the surface is broken into before any merging happens. More patches means more, smaller islands in the finished layout. |
Min Patch Size |
Whole number | The fewest triangles a patch is allowed to hold. Raise it to stop odd triangles ending up as islands of their own. |
Curvature Alignment |
Number | How closely a growing patch sticks to surface that faces the same way. Higher pushes the cuts towards the places the shape already turns a corner. |
Merging Threshold |
Number | How much stretch you will accept in exchange for merging two patches into one island. Raise it for fewer, bigger islands and more distortion in them. |
Max Angle Deviation |
Number | How far apart two neighbouring patches may face and still be merged, in degrees. Drop it towards 30 to keep seams on the hard corners. |
Smoothing Steps |
Whole number | Smooths the surface direction before solving, which settles the island shapes down at the cost of a little more distortion. |
Smoothing Alpha |
Number | How much each of those smoothing steps moves things. |
Pack Islands |
True/False | Lays the finished islands out inside the 0-1 square. Switch it off and they stay where the solve put them, which usually means overlapping. XAtlas always packs, whatever this says. |
| Setting | Type | Description |
|---|---|---|
Max Iterations |
Whole number | How many passes XAtlas spends refining where the cuts go. Higher is tidier and slower. |
| Setting | Type | Description |
|---|---|---|
Packing Resolution |
Whole number | The texture size the layout is packed for. It turns the padding below from a pixel count into a real UV distance, so set it to whatever you will bake at. |
Island Padding |
Whole number | Blank space left between islands, in pixels of the resolution above. Too little and a bake bleeds across an island edge, or the low mips smear the shoulder into the ear. Patch Builder always leaves at least one pixel even at 0; XAtlas will pack flush. |
Rotate Islands To Pack |
True/False | Lets islands turn so they nest tighter. Switch it off to keep every island upright, which keeps checker squares square and the layout readable. You give up some coverage for that. Patch Builder only reads it while Pack Islands is on. |
Available in Mesh Morpher Graph and Mesh Morpher Studio.
Studio and Graph › UV
Repacks the UV islands of one channel into the unit square, moving only islands that already exist.
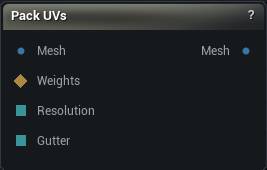
The Pack UVs node
Repacks the UV islands of one channel into the unit square, moving only islands that already exist.
An atlas generated once is rarely laid out the way the asset finally needs it, and re-running Generate UVs to change the layout throws away the seams and the unwrap along with it. This is the step in between: same islands, same distortion, tighter arrangement.
It needs UVs to work with. On a mesh that has none, Generate UVs comes first.
From Generate UVs, or an imported asset.
| Pin | Type | Description |
|---|---|---|
Mesh |
Mesh | The mesh to repack. It needs UVs in the chosen channel already - this node will not make them. |
Weights |
Weight Map | Optional. Repack only the islands this selection touches. Leave it empty to repack everything. |
Resolution |
Whole Number | Texture Resolution, taken from the graph instead of the details panel. |
Gutter |
Whole Number | Gutter Texels, taken from the graph instead of the details panel. |
| Pin | Type | Description |
|---|---|---|
Mesh |
Mesh | The mesh with the chosen channel repacked. The other channels come out untouched. |
| Setting | Type | Description |
|---|---|---|
UV Channel |
Whole number | Which UV channel to repack. The others come out untouched. |
Pack Mode |
Choice | How the islands get laid out. |
Texture Resolution |
Whole number | The size of the texture you plan to bake at. It turns the gutter below from a pixel count into a real UV distance, and it limits how small an island is allowed to get. |
Gutter Texels |
Whole number | Blank space left between islands, counted in pixels of the texture above. Set it too low and a bake bleeds across an island edge, or the low mips smear the shoulder into the ear. 2 to 4 is normal. Go higher when the texture will be seen mostly from a distance. |
Allow Rotation |
True/False | Lets islands turn so they nest tighter. Switch it off to keep every island the way you authored it, which keeps checker squares square and the layout readable. You give up some coverage for that. |
Allow Flips |
True/False | Lets islands mirror as well as turn. Buys a little more coverage and does no harm on symmetric detail, but any text or directional pattern painted into the texture will read backwards. Ignored while Allow Rotation is off. |
Selection Threshold |
Number | A vertex counts as selected once its weight reaches this. Only read when something is plugged into Weights. |
Available in Mesh Morpher Graph and Mesh Morpher Studio.
Studio and Graph › UV
Measures, and optionally equalises, texel density across the UV islands of one channel. Texel density is texels per centimetre of surface: Resolution sqrt(UV area / 3D area).
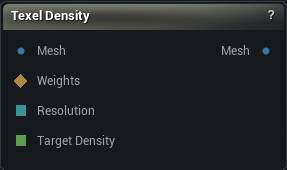
The Texel Density node
Measures, and optionally equalises, texel density across the UV islands of one channel. Texel density is texels per centimetre of surface: Resolution * sqrt(UV area / 3D area).
Auto-unwrappers optimise for packing, not for this, so a generated atlas routinely gives a character's ear four times the texels per centimetre of the torso. That is invisible in the UV view and obvious the moment anything is baked or painted, which is why this is measured in numbers rather than eyeballed.
Normalising scales each island about its own UV centre, so islands can end up overlapping. Follow this node with Pack UVs in Preserve Relative Scale mode, which lays them out again without disturbing the density you just equalised. Fit To Unit Square below is the quick alternative when you only need the result inside the tile and do not care about overlap.
| Pin | Type | Description |
|---|---|---|
Mesh |
Mesh | The mesh to measure. It needs UVs in the chosen channel already. |
Weights |
Weight Map | Optional. Work on only the islands this selection touches. Leave it empty for the whole mesh. |
Resolution |
Whole Number | Texture Resolution, taken from the graph instead of the details panel. |
Target Density |
Number | Target Texel Density in texels per centimetre, taken from the graph. Only read in Normalise To Target mode. |
| Pin | Type | Description |
|---|---|---|
Mesh |
Mesh | The mesh. Untouched in Measure Only, otherwise with the chosen channel's islands rescaled. The other channels come out untouched either way. |
| Setting | Type | Description |
|---|---|---|
UV Channel |
Whole number | Which UV channel to measure or rescale. The others come out untouched. |
Mode |
Choice | Report the numbers only, or rescale the islands as well. |
Texture Resolution |
Whole number | The texture size the density numbers are quoted against. Without it they mean nothing: the same UVs read 5 texels/cm at 512 and 20 at 2048. Set it to whatever you will actually bake at. Every density on this node is texels per centimetre in the app's own units. |
Target Texel Density |
Number | Texels per centimetre every island gets scaled to. 10.24 works out to 1024 texels per metre, which is where most game work starts. Centimetres means the app's own units, the same ones the viewport measures in. A mesh that was authored in metres and imported without a unit conversion reads a hundred times off, so check the scale before trusting the number. |
Fit To Unit Square |
True/False | After rescaling, shrink the whole layout as one piece so it lands back inside the tile. Every island moves by the same factor, so they stay equal to each other, but they are no longer the exact number you asked for. Off by default, since a Target run usually wants that exact number. Ignored while Weights is driving a selection: fitting only the islands you picked would centre that handful in the middle of the tile and park them on top of the ones you left alone. |
Selection Threshold |
Number | A vertex counts as selected once its weight reaches this. Only read when something is plugged into Weights. The selection grows out to whole islands first, because half an island has no density of its own. |
Available in Mesh Morpher Graph and Mesh Morpher Studio.
Studio and Graph › UV
Rotates, scales, offsets and flips the UVs of one channel, either across the whole mesh or on the islands a selection touches.
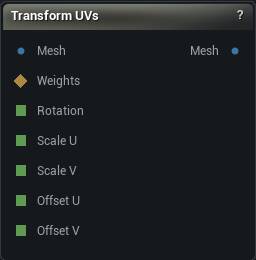
The Transform UVs node
Rotates, scales, offsets and flips the UVs of one channel, either across the whole mesh or on the islands a selection touches.
The small manual correction that every unwrap eventually needs, and the only one of these operations that has no equivalent anywhere else in the graph: turning a strip upright so its texel grid lines up with the texture, nudging an island off a tile border, mirroring a decal, or scaling a channel into a UDIM tile.
The transform is applied in the order flip, scale, rotate about the pivot, then offset - which is the order that makes the numbers in the details panel mean what they say.
| Pin | Type | Description |
|---|---|---|
Mesh |
Mesh | The mesh to transform. It needs UVs in the chosen channel already. |
Weights |
Weight Map | Optional. Move only the islands this selection touches. Leave it empty to move the whole channel. |
Rotation |
Number | Rotation in degrees, taken from the graph instead of the details panel. |
Scale U |
Number | Scale U, taken from the graph instead of the details panel. |
Scale V |
Number | Scale V, taken from the graph instead of the details panel. |
Offset U |
Number | Offset U, taken from the graph instead of the details panel. 1 moves a whole tile. |
Offset V |
Number | Offset V, taken from the graph instead of the details panel. 1 moves a whole tile. |
| Pin | Type | Description |
|---|---|---|
Mesh |
Mesh | The mesh with the chosen channel transformed. The other channels come out untouched. |
| Setting | Type | Description |
|---|---|---|
UV Channel |
Whole number | Which UV channel to transform. The others come out untouched. |
Pivot |
Choice | What the rotation, scale and flip happen around. Get this wrong and a rotation swings the island across the atlas instead of turning it on the spot. |
Custom Pivot U |
Number | U coordinate of the pivot point. |
Custom Pivot V |
Number | V coordinate of the pivot point. |
Rotation Degrees |
Number | Counter-clockwise rotation about the pivot, in degrees. |
Scale U |
Number | Scale along U about the pivot. 1 = unchanged. |
Scale V |
Number | Scale along V about the pivot. 1 = unchanged. |
Offset U |
Number | Slides the UVs along U, applied last. 1 moves a whole tile. |
Offset V |
Number | Slides the UVs along V, applied last. 1 moves a whole tile. |
Flip U |
True/False | Mirrors across the pivot's V axis. Anything directional in the texture, lettering above all, will read backwards afterwards. |
Flip V |
True/False | Mirrors across the pivot's U axis. Same backwards-texture catch as Flip U. |
Selection Threshold |
Number | A vertex counts as selected once its weight reaches this. Only read when something is plugged into Weights. |
Affect Whole Islands |
True/False | Grows the selection out to whole UV islands before transforming. Leave it on. An island is one continuous patch of texture, and moving half of it tears the patch open - which nothing in the viewport shows you until you bake. Turn it off only when you actually want to shear a region's UVs. |
Available in Mesh Morpher Graph and Mesh Morpher Studio.
Studio and Graph › UV
The interactive 2D UV view. See one channel's islands in the tile grid, select them by click or marquee, and move, rotate and scale them by hand.
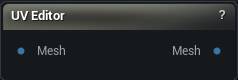
The UV Editor node
The interactive 2D UV view. See one channel's islands in the tile grid, select them by click or marquee, and move, rotate and scale them by hand.
| Pin | Type | Description |
|---|---|---|
Mesh |
Mesh | The mesh to edit. It needs UVs in the chosen channel already - this node will not make them. |
| Pin | Type | Description |
|---|---|---|
Mesh |
Mesh | The mesh with your edits to the chosen channel. The other channels come out untouched. |
| Setting | Type | Description |
|---|---|---|
UV Channel |
Whole number | Which UV channel is shown and edited. The others come out untouched. A channel that is missing or empty is refused rather than created - run Generate UVs first. |
Available in Mesh Morpher Graph and Mesh Morpher Studio.
Studio and Graph › UV
Edits UV seams - where the atlas is allowed to be cut - and re-solves only the islands that changed.
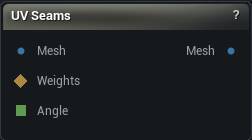
The UV Seams node
Edits UV seams - where the atlas is allowed to be cut - and re-solves only the islands that changed.
Generate UVs decides both the seams and the unwrap in one shot, and the only way to disagree with it today is to run it again with different settings and lose the whole layout. This node is the local alternative: cut or weld a seam where the result is wrong, re-unwrap the handful of islands that were touched, and leave every other island exactly where it is (see Preserve Island Bounds).
| Pin | Type | Description |
|---|---|---|
Mesh |
Mesh | The mesh to edit. It needs UVs in the chosen channel already. |
Weights |
Weight Map | The region to work on. The two selection modes will not run without it. |
Angle |
Number | Angle Threshold in degrees, taken from the graph. Only read in Add Seams By Angle mode. |
| Pin | Type | Description |
|---|---|---|
Mesh |
Mesh | The mesh with the chosen channel's seams edited and the affected islands unwrapped again. The other channels come out untouched. |
| Setting | Type | Description |
|---|---|---|
UV Channel |
Whole number | Which UV channel to edit. The others come out untouched. |
Seam Mode |
Choice | Cut new seams, carve a selection into its own island, or weld seams shut. |
Angle Threshold |
Number | How sharply the two faces of an edge have to meet before it becomes a seam. 60 catches hard corners. 30 also catches soft creases, and leaves you with a lot more islands to pack. |
Unwrap Method |
Choice | How the affected islands get their UVs worked out again after the edit. |
Preserve Island Bounds |
True/False | Drops each re-unwrapped island back into the space it already occupied, at its old aspect ratio. This is what keeps the edit local. A fresh unwrap comes back at some arbitrary size and position, so with this off the re-solved islands land on top of the rest of the atlas and you have to repack everything. Turn it off only when Pack UVs is next in the chain anyway. |
Selection Threshold |
Number | A vertex counts as selected once its weight reaches this. The two selection modes need it. In Add Seams By Angle it only limits the search to edges inside the selection, and searches the whole mesh when nothing is wired. |
Available in Mesh Morpher Graph and Mesh Morpher Studio.
Studio and Graph › UV
Renders a mesh's UV layout into a texture so you can actually look at it. Coloured islands, a texel-density heatmap or wireframe, with seam emphasis, overlap highlighting and UDIM tiles.
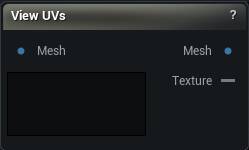
The View UVs node
Renders a mesh's UV layout into a texture so you can actually look at it. Coloured islands, a texel-density heatmap or wireframe, with seam emphasis, overlap highlighting and UDIM tiles.
| Pin | Type | Description |
|---|---|---|
Mesh |
Mesh | The mesh whose UV layout you want to look at. |
| Pin | Type | Description |
|---|---|---|
Mesh |
Mesh | The input mesh, unchanged. |
Texture |
Asset | The layout picture for the tile currently on show. |
| Setting | Type | Description |
|---|---|---|
Resolution |
Whole number | How big the picture comes out, in pixels. It is square, and you get one per UDIM tile. |
UV Channel |
Whole number | Which UV channel gets drawn. |
Mode |
Choice | What the picture shows: the islands, how evenly the texture is spread, or just the edges. |
Island Coloring |
Choice | A colour per island, or one colour for the lot. |
Island Color |
Colour | The colour every island is filled with when Island Coloring is on Single Color. |
Background |
Choice | What sits behind the layout. |
Anti-Aliasing (SSAA) |
Whole number | Renders larger and shrinks back down so the edges are not jagged. 2 is usually enough; 4 draws sixteen times the pixels to get there. |
Draw Wireframe |
True/False | Draws the triangle edges over the top of the fill. |
Line Thickness |
Number | How thick those edges come out, in pixels of the finished picture. |
Emphasize Island Borders |
True/False | Draws the island borders, which are the seams, twice as thick and brighter than the edges inside an island. |
Draw Grid |
True/False | Draws a faint grid every 0.1 of a tile, plus the border of the 0-1 square, so you can tell how far across the tile something sits. |
Highlight Overlaps |
True/False | Paints any pixel covered by more than one triangle bright magenta. Overlapping UVs bake on top of each other, and this is the quickest way to find where. |
Distortion Contrast |
Number | How hard the heatmap pushes the colours apart. Raise it to pick out small differences. Lower it when the whole mesh reads as red and blue with no green left in it. |
Enable UDIM |
True/False | Draws every tile the UVs reach instead of only the 0-1 square. |
Max UDIM Tiles |
Whole number | How many tile columns to look across, starting at 1001. UVs further right than that get folded back into the last column, so raise it if a tile you expect is missing. All ten rows are scanned either way. |
Preview Tile |
Whole number | Which UDIM tile to show, counting from the first one that has UVs in it. |
Available in Mesh Morpher Graph and Mesh Morpher Studio.