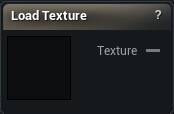
Load Texture: Reads an image off disk (PNG, JPG, TGA, BMP, EXR, HDR) and hands it to the graph on the Texture pin.
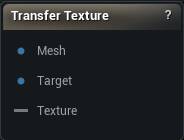
Transfer Texture: Rebuilds a texture that belongs to one mesh so it fits a second mesh's UV layout, with one output per UDIM tile on the target.
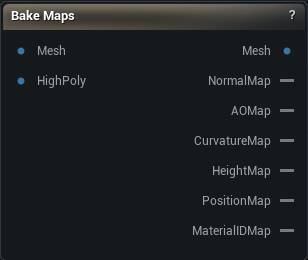
Bake Maps: Bakes the detail of a dense sculpt into flat maps laid out on a game-res mesh's UVs: normal, ambient occlusion, curvature, height, position and material ID. One UV tile only, so no UDIM.
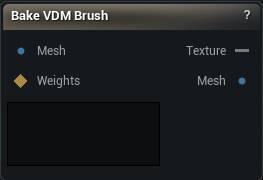
Bake VDM Brush: Bakes a sculpted canvas's displacement into a vector displacement map, in the stamp-space convention the Displace tool's Vector Displacement mode reads.
Load Texture from Asset: Pulls a texture asset out of your project and into the graph, and lists it in the tool dropdowns that offer textures. Editor only.
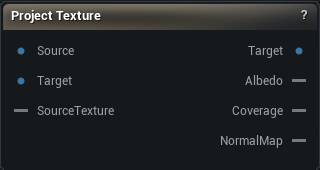
Project Texture: Lifts the colour off a scan and lays it into a texture on your retopologised mesh's UVs. The Coverage output shows which parts are real and which were filled in. One UV tile only, so no UDIM.
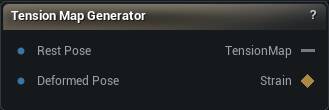
Tension Map Generator: Compares a rest pose against a posed version of the same mesh and paints where the surface is stretching and where it is bunching up into a map you can drive wrinkles with.
Load ZBrush Brush: Reads a ZBrush .zbp brush and publishes baked Native VDMs and non-alpha 2D slots (texture, optional icon) into this graph's texture registry so tools like Displace can pick them.
Studio and Graph › Texture
Load Texture
Reads an image off disk (PNG, JPG, TGA, BMP, EXR, HDR) and puts it on the Texture output. This one works in the standalone app, so it is the way in whenever the image is not a project asset. In the...
The Load Texture node
When to use it
Reads an image off disk (PNG, JPG, TGA, BMP, EXR, HDR) and puts it on the Texture output. This one works in the standalone app, so it is the way in whenever the image is not a project asset. In the editor, Load Texture (Asset) is the better route for one that already is.
How to use it
1
Browse to the image file
2
Set the compression type and sRGB to match what the image is for
3
The Texture output carries the loaded image
Pins
Pin
Type
Description
Texture
Asset
The image you loaded.
Settings
Setting
Type
Description
File
File path
Image file to read.
Texture Name Suffix
Text
Tacked onto the end of the name this texture shows up under in tool dropdowns. Handy when you load several maps that share a file name.
Compression Type
Choice
How the image should be read. Normal Map for normals, HDR for float images, Default for everything else.
SRGB
True/False
Treat the file as colour rather than data. Turn it off for masks, roughness and anything else that is not meant to be looked at.
Resamples one mesh's textures into another mesh's UV layout by spatial correspondence, and it is the UDIM-aware one. Multiple source and target tiles work here, which Bake Maps and Project Texture ...
The Transfer Texture node
When to use it
Resamples one mesh's textures into another mesh's UV layout by spatial correspondence, and it is the UDIM-aware one. Multiple source and target tiles work here, which Bake Maps and Project Texture deliberately do not do. The target's tiles each get their own output pin.
How to use it
1
Connect the textured source mesh and the target mesh
2
Set the resolution and the two UV channels
3
Click Apply
Pins
Pin
Type
Description
Mesh
Mesh
The mesh the incoming texture belongs to.
Target
Mesh
The mesh you want the texture rebuilt for. Its UVs decide the output layout.
Texture
Asset
The source mesh's texture. If the mesh is laid out across several UDIM tiles this covers the lowest one, and a pin appears for each of the others.
Settings
Setting
Type
Description
Texture Resolution
Whole number
Size of each output tile, in pixels.
Source UV Channel
Whole number
Which UV channel on the source mesh the incoming texture is laid out in.
UV Channel
Whole number
Which UV channel on the target mesh the result is written into.
Max Distance
Number
How far a point on the target may sit from the source surface and still pick up colour, in world units. Too low and whole regions come out empty. Too high and a texel reaches across a gap and grabs the colour off the wrong side of a fold.
Filter Quality
Choice
How the source texture is sampled.
Bicubic Sharpness
Number
Shapes the bicubic filter. Despite the name, low values are the sharp end and can ring along hard edges; high values are the soft end.
Fill Gaps
True/False
Bleeds colour outward into empty pixels so UV seams do not show a dark edge.
Projects a dense sculpt (High Poly) onto a game-resolution mesh through that mesh's UVs and produces tangent-space normal, ambient occlusion, curvature, height, position and material-ID textures, e...
The Bake Maps node
When to use it
Projects a dense sculpt (High Poly) onto a game-resolution mesh through that mesh's UVs and produces tangent-space normal, ambient occlusion, curvature, height, position and material-ID textures, each on its own output.
How to use it
1
Connect the low-poly (with UVs) to Mesh and the sculpt to High Poly
2
Tick the maps you want, set the resolution and the projection distance
3
Press Bake Maps - each map appears on its own texture output pin
Pins
Pin
Type
Description
Mesh
Mesh
The game-res mesh the maps are baked into. It needs UVs.
HighPoly
Mesh
The sculpt or scan carrying the detail. Leave it empty to bake the low-poly against itself.
Pin
Type
Description
Mesh
Mesh
The same low-poly, untouched. Baking never changes geometry.
NormalMap
Asset
The high poly's surface detail as a tangent-space normal map.
AOMap
Asset
Ambient occlusion, traced against the high poly.
CurvatureMap
Asset
How sharply the high poly bends. Feed it to a cavity or edge-wear mask.
HeightMap
Asset
How far the high poly floats above or sinks below the low-poly surface.
PositionMap
Asset
Where each point sits inside the high poly's bounding box, written as colour.
MaterialIDMap
Asset
A flat colour for each material ID on the high poly.
Settings
Setting
Type
Description
Normal (Tangent Space)
True/False
The normal map. If your low-poly has no tangents, they get worked out from its normals and UVs just for the bake; the mesh itself is left alone. Green reads above mid-grey where the high poly tilts towards increasing V, and red above mid-grey where it tilts towards increasing U. That is the same basis the engine's own bakers use and the same one the MikkTSpace tangents on import produce, so a map baked here shades correctly in the viewport as-is. Anything downstream that expects the opposite green direction needs that channel inverted on the way out.
Ambient Occlusion
True/False
Ambient occlusion, traced against the high poly. Much the slowest map here: it fires Occlusion Rays rays for every sample in every texel.
Bake Curvature
True/False
How sharply the high poly bends. This is what you feed a cavity or edge-wear mask.
Height / Displacement
True/False
How far the high poly floats above or sinks below the low-poly surface, remapped into the Inner and Outer range below. Also called displacement.
Position (Object Space)
True/False
Where each point sits inside the high poly's bounding box, written out as colour.
Material ID
True/False
A flat colour per material ID on the high poly. Handy as an ID mask when you assign materials later.
Resolution
Choice
Size of every map this run produces.
Samples Per Pixel
Choice
How many samples land inside each texel. More samples means smoother edges and a longer bake.
Filter
Choice
How the samples inside a texel get blended into the final pixel.
Gutter Size
Whole number
How many texels of bleed get painted outside each UV island. Set it to 0 and every seam shows a dark hairline as soon as the texture is filtered or mipped.
Target UV Channel
Whole number
Which UV channel on the low-poly the maps are laid out in.
Projection Distance (Cage Offset)
Number
How far above the low-poly surface each ray starts, in centimetres. It has to clear the widest gap between the two meshes. Too small and raised detail goes missing. Too large and rays shoot right through the model and pick up whatever is behind it, so the inside of an arm bakes the ribcage. There is no separate cage mesh to edit. Every ray starts this same distance out along the surface normal, so one number covers the whole model: where the gap varies a lot, set it by the widest part and expect skewed detail where the two meshes lean apart the most.
Fall Back To Nearest Point
True/False
When a ray hits nothing, take the closest point on the high poly instead of leaving the texel blank. On, a texel that missed takes the nearest high-poly point within the projection distance, in whatever direction that happens to be. It closes the small gaps a slightly tight distance leaves behind, and it can also quietly pull colour and detail in from the side. Off, only detail found along the ray counts. Anything the rays did not reach stays at the flat neutral value, so you can see exactly where your projection distance is too tight instead of getting a plausible answer from somewhere else.
Occlusion Rays
Whole number
Rays fired per sample. Cutting the grain in half costs four times as many rays, so this is where the bake time goes.
Occlusion Max Distance
Number
Anything further away than this stops casting shadow, in centimetres. 0 means no limit. Set a small value and you get contact shadows in the creases instead of the whole model darkening itself.
Occlusion Spread Angle
Number
How wide the rays fan out from the surface, in degrees. 180 is the full hemisphere.
Occlusion Bias Angle
Number
Rays that leave within this angle of the surface get thrown away. Drop it to 0 and a dense sculpt starts shadowing itself, so the map comes back speckled and dirty.
Curvature Type
Choice
Which measure of bending gets written into the map.
Color Mapping
Choice
How cavities and raised edges are turned into colours.
Clamping
Choice
Keep only the raised edges, only the cavities, or both.
Color Range Multiplier
Number
Scales the contrast range the node works out for itself. Above 1 flattens the map, below 1 pushes it harder.
Min Range Multiplier
Number
Anything weaker than this fraction of the range is flattened to neutral. Raise it to kill the fine speckle a scan leaves behind.
Height Range Mode
Choice
Whether the two distances below are read as centimetres or as a fraction of the mesh's size.
Inner Distance
Number
How far below the low-poly surface counts as black. Keep it negative.
Outer Distance
Number
How far above the low-poly surface counts as white. Keep it positive.
Turns a sculpt-on-a-plane into a vector displacement map any brush stamp can reuse at any size, on any surface. Overhangs are fine - that is the whole reason to reach for this over a height map.
The Bake VDM Brush node
When to use it
Turns a sculpt-on-a-plane into a vector displacement map any brush stamp can reuse at any size, on any surface. Overhangs are fine - that is the whole reason to reach for this over a height map.
There is no separate Rest input: the flat state is read straight off the canvas's own UV layout, fitted back out from the sculpt itself.
How to use it
1
Create a flat plane and sculpt a shape on it
Use Sculpt Mesh. Overhangs and undercuts are fine.
2
Wire the sculpted Mesh here and press Bake VDM Brush
3
Wire the Texture output into the Displace tool
Vector Displacement mode.
Pins
Pin
Type
Description
Mesh
Mesh
The sculpted canvas. There is no separate Rest input - the flat state is fitted straight out of this mesh's own UV layout.
Weights
Weight Map
Optional. Bakes only the weighted region, and a feathered selection feathers the stamp. Leave it unwired to bake the whole mesh.
Pin
Type
Description
Texture
Asset
The baked vector displacement map. Feed it to the Displace tool's Vector Displacement mode.
Mesh
Mesh
The mesh that was baked, passed through unchanged.
Settings
Setting
Type
Description
Resolution
Choice
Size of the baked map.
UV Channel
Whole number
Which UV channel on Mesh supplies the texel layout, and in Auto Frame Mode the stamp's U axis.
Gutter Size
Whole number
Texels of bleed painted outside the UV island, so bilinear sampling at the island edge does not pull in black from outside it.
Border Feather
Number
Radial falloff to zero at the inscribed circle of the canvas, so a square UV island bakes to a map a circular brush stamp can use without a hard seam at the corners.
Frame Mode
Choice
How the stamp's tangent frame is derived. Auto is correct for the overwhelming majority of canvases; Explicit exists for a plane whose UV layout does not run where you want the frame to.
Frame U
Vector
World-space direction that becomes the stamp's U (right) axis.
Frame Normal
Vector
World-space direction that becomes the stamp's outward normal.
Normalization Mode
Choice
How a world-space offset is scaled into the file's footprint-diameter units. Auto is correct unless Mesh is not the actual canvas - a tiny reference swatch cut from a larger sheet, for instance.
Footprint Size
Number
The stamp footprint diameter, in Mesh's own world units.
Save To Library
True/False
Also write the baked map as an EXR into your brush library, so it shows up in every project's Displace tool, not just this graph.
Library Name
Text
File name, without extension, that the library copy is written under. Existing files with the same name are overwritten.
Editor-only node. Runs only in Mesh Morpher Graph inside the Unreal Editor, because it reads or writes Unreal Engine assets. Not available in the standalone Mesh Morpher Studio app.
Editor-only node. Runs only in Mesh Morpher Graph inside the Unreal Editor, because it reads or writes Unreal Engine assets. Not available in the standalone Mesh Morpher Studio app.
The Load Texture from Asset node
When to use it
Exposes a project texture asset to the graph. For an image sitting on disk rather than in the project, Load Texture is the one, and it works in the standalone app too.
The asset is also published into the session's texture list, so tools like Displace offer it in their texture dropdown exactly like a file-loaded texture.
How to use it
1
Pick a texture asset in the details panel
2
Wire the Texture output into whatever consumes it
Pins
Pin
Type
Description
Texture
Asset
The texture you picked. Feeds Transfer Texture, Displace and the material nodes.
Projects a scan's surface colour into a texture laid out on a clean mesh's UVs. This closes the scan loop, when a retopologised or wrapped mesh has good UVs and no albedo.
The Project Texture node
When to use it
Projects a scan's surface colour into a texture laid out on a clean mesh's UVs. This closes the scan loop, when a retopologised or wrapped mesh has good UVs and no albedo.
Detail from a sculpt is Bake Maps. Texture to texture with UDIM is Transfer Texture.
How it samples sets the quality ceiling. From a source texture or embedded materials it is real texture projection, limited by the source image's own resolution. From vertex colours it is interpolated between scan vertices, so a 500k photogrammetry scan into a 2k map is faithful while a 5k mesh into a 2k map is a smooth blur no matter how large you make the output. Result Summary says which path ran.
Coverage says which texels are real: white where colour was projected, mid-grey where the nearest-valid fill invented it, black where neither happened. Mark Unfilled Texels paints what could not be reached at all. Single UV tile only.
How to use it
1
Connect the scan to Mesh (labelled Source) and the retopologised mesh (with UVs) to Target - the house donor/recipient shape every transfer node in the app uses
2
Press Project Texture
3
Albedo carries the colour; Coverage says which texels are real
Pins
Pin
Type
Description
Mesh
Mesh
The scan carrying the colour. It only needs UVs if that colour lives in a texture.
Target
Mesh
The clean mesh you want textured. It needs UVs.
SourceTexture
Asset
Optional colour map for the scan. Overrides whatever texture the scan arrived with. Its own sRGB setting is respected on the way in, but its alpha is not carried through to the Albedo.
Pin
Type
Description
Target
Mesh
The same mesh, untouched. Projecting never changes geometry.
Albedo
Asset
The projected colour, laid out in your target's UVs. It comes out as a colour texture (sRGB) and fully opaque - any see-through parts of the source are flattened out.
Coverage
Asset
Where the colour came from. White is real, taken straight off the scan. Mid-grey was filled in from neighbouring texels. Black got nothing. Use it as a mask when you paint over the invented parts.
NormalMap
Asset
The scan's fine detail as a normal map, when Also Project Normal Map is on.
Settings
Setting
Type
Description
Color Source
Choice
Where the colour is read from. Leave it on Auto unless the scan carries both a texture and vertex colours and you want the other one.
Source UV Channel
Whole number
Which UV channel the scan's texture is laid out in. Ignored when the colour comes from vertex colours.
Resolution
Choice
Size of every map this node produces.
Samples Per Pixel
Choice
How many samples land inside each texel. More samples means smoother edges and a longer run.
Filter
Choice
How the samples inside a texel get blended into the final pixel.
Target UV Channel
Whole number
Which UV channel on the target the colour is painted into.
Also Project Normal Map
True/False
Also produce a normal map of the scan's fine detail. It rides along on the same pass, so it costs far less than a separate Bake Maps run.
Setting
Type
Description
Projection Distance (Cage Offset)
Number
How far above the target surface each ray starts, in centimetres. It has to clear the widest gap between your retopo mesh and the scan. Too small and you get holes. Too large and rays pass clean through to the far side of the model and bring back the wrong colour, which is worse than a hole because nothing downstream can tell it is wrong.
Fall Back To Nearest Point
True/False
When a ray hits nothing, take the closest point on the scan instead, as long as it falls within Max Nearest Point Distance. Leave it on for production. It closes the small gaps a slightly tight projection distance leaves in creases and around the silhouette. Switch it off to see exactly where that distance is too tight, because those texels then show as holes on Coverage instead of being quietly rescued.
Max Nearest Point Distance (cm)
Number
How far the rescue may reach off the ray before the result stops counting as real data, in centimetres. Without a limit the rescue answers everything: a texel over a part of your mesh the scan never covered just takes the colour of the nearest scan geometry, however far away, and Coverage calls it real. The default of 1 cm is a third of the default projection distance, which is about right for closing the millimetre gaps between a retopo mesh and the scan it came from. Set it to 0 and only an exact ray hit counts.
Setting
Type
Description
Fill Radius (texels)
Whole number
How far, in texels, colour is smeared out of the regions that found the scan. Every empty texel takes the colour of the nearest projected one. That is right for the small holes you actually get in practice, UV seams and a few dropped samples, and it is a visible smear across anything large the scan never saw: under the chin, inside the nostrils, behind the ears. It also does the job of a bake gutter, so 0 leaves every UV island edge showing a seam once the texture is filtered.
Mark Unfilled Texels
True/False
Stamp the marker colour on any texel inside a UV island that got neither a projection nor a fill. Without it those texels come out black, which you cannot tell apart from a genuinely black surface. Turn it off only when something automated downstream is reading Coverage instead.
Unfilled Marker Color
Colour
Colour stamped on the texels that got nothing. Magenta by default, because the whole point is that it cannot be mistaken for skin.
Compares a rest-pose mesh to a deformed one and bakes the per-vertex strain into a texture. Stretch where the surface is pulled apart at an outer elbow, compression where it is squeezed at an inner...
The Tension Map Generator node
When to use it
Compares a rest-pose mesh to a deformed one and bakes the per-vertex strain into a texture. Stretch where the surface is pulled apart at an outer elbow, compression where it is squeezed at an inner elbow or a furrowed brow, and optionally the principal strain direction for anisotropic effects. Drive a material that wrinkles or flushes with the pose.
Both meshes need the same vertex count and order. Strain is measured per vertex against its rest counterpart.
Generate and Export PNG are two separate actions on purpose. Generate computes the map and publishes it on the TensionMap pin without touching the disk or asking a question. Export PNG writes whatever Generate last produced, all UDIM tiles. Press only Export and you have exported nothing new.
How to use it
1
Connect the rest-pose mesh and the deformed-pose mesh
2
Configure the output settings
3
Click Generate
The TensionMap pin now carries a live texture.
4
Optionally click Export PNG
Writes the map, all UDIM tiles, to disk.
Pins
Pin
Type
Description
RestPose
Mesh
The mesh at rest, before anything pulls on it.
DeformedPose
Mesh
The same mesh in a pose. Vertex count and order have to match the rest pose.
Pin
Type
Description
TensionMap
Asset
The finished tension map. Linear, not sRGB, because it is data rather than colour.
Strain
Weight Map
The same per-vertex strain as a 0 to 1 weight map instead of a texture: 0.5 is neutral, higher is stretched, lower is compressed. Handy for driving a shader parameter or another node directly off the mesh, no UVs required.
Settings
Setting
Type
Description
Resolution
Whole number
Size of the output map, per UDIM tile.
Format
Choice
Which channels the map uses.
UV Channel
Whole number
Which UV channel the strain gets painted through.
Enable UDIM
True/False
Handle UVs that run outside the 0-1 square by making one image per tile.
Max UDIM Tiles
Whole number
How many tiles across to look at. Anything past this gets folded back into the last tile, so set it high enough to cover your layout.
Texture File Base Name
Text
File name Export PNG writes under. The UDIM number is added for you.
Overwrite Existing
True/False
Let Export PNG replace a file that is already there.
Setting
Type
Description
Computation Method
Choice
How the stretching gets measured.
Sensitivity
Number
Multiplies whatever strain was measured. Raise it to make small movement register; push it too far and every pose reads as a full stretch.
Threshold
Number
Strain weaker than this counts as zero. Nudge it up when the map is speckled in places nothing is actually moving.
Max Stretch
Number
Stretch this strong reads as fully white. Lower it to make gentle stretching visible; raise it if the map blows out to solid white.
Max Compression
Number
Compression this strong reads as fully white. Same trade as Max Stretch, for the bunching side.
Setting
Type
Description
Fill Gaps
True/False
Bleeds colour into pixels no triangle covered. Without it, dense areas leave pinholes where a triangle was too small to land on a pixel.
Gap Fill Iterations
Whole number
How far the bleed reaches, in pixels.
Use Gaussian Blur
True/False
Blur with a Gaussian instead of a box. Softer falloff, no boxy edges.
Blur Passes
Whole number
How many times the blur runs over the finished map.
Blur Radius
Whole number
How wide each blur pass reaches, in pixels.
Vertex Smoothing Method
Choice
How the strain is smoothed across the mesh before anything gets drawn.
Vertex Smoothing Iterations
Whole number
How many smoothing passes run on the mesh. One or two calms noisy strain. Too many and the sharp crease at an inner elbow spreads into a soft wash.
Reads a ZBrush .zbp brush and publishes baked Native VDMs and non-alpha 2D slots (texture, optional icon) into this graph's texture registry so tools like Displace can pick them from a dropdown. Br...
The Load ZBrush Brush node
When to use it
Reads a ZBrush .zbp brush and publishes baked Native VDMs and non-alpha 2D slots (texture, optional icon) into this graph's texture registry so tools like Displace can pick them from a dropdown. Brush alpha is the stamp mask for the VDM bake, not a dropdown texture, unless the file has no bakeable canvas. If the alpha is a regular grid of stamps matching the mesh-part count, each tile masks the matching bake. It has no texture pin: nothing is wired, the images show up as named entries the same way a Load Texture From File image does in that dropdown. Dropdown names come from the brush file's named parts (and the .zbp basename).
Settings
Setting
Type
Description
File
File path
ZBrush brush file to read.
Texture Name Suffix
Text
Tacked onto the basename in tool dropdowns when several brushes share a name.
Include Icon
True/False
Also publish the 96x96 Icon preview. Off by default: it is not a stamp.
Bake Meshes
True/False
Bake plane-canvas meshes (subdiv planes or parts with quads/UVs) to Native VDMs.