Studio and Graph › Skeleton
Paint Skin Weights
Paints per-vertex skin weights onto a skeletal mesh by hand, one bone at a time. Select the node to get the brush; deselect it and the tool goes away.
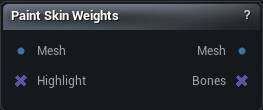
The Paint Skin Weights node
When to use it
Paints per-vertex skin weights onto a skeletal mesh by hand, one bone at a time. Select the node to get the brush; deselect it and the tool goes away.
This is the fix for the places an automatic bind gets wrong - a shoulder that collapses, a jaw that drags the neck with it. For a first pass across the whole character, Auto-Skin or Transfer Weights get you most of the way there first.
The mesh has to arrive with a skeleton and skin weights already on it. A static mesh or a plain file import has nothing to paint into.
How to use it
- 1
Connect a skinned mesh
- 2
Pick a bone in the tool and paint its weights in the viewport
- 3
The output is the mesh with the updated weights
Pins
| Pin | Type | Description |
|---|---|---|
Mesh |
Mesh | The mesh to paint on. It needs a skeleton and skin weights already. |
Highlight |
Bone Selection | The bone, or bones, to have active when the tool opens. |
| Pin | Type | Description |
|---|---|---|
Mesh |
Mesh | The mesh carrying the weights you painted. |
Bones |
Bone Selection | The bone you were painting, plus any you locked. |
Learn more
| Morph full body MetaHumans and skeletons | Read the walkthrough on meshmorpher.com | https://meshmorpher.com/blog/morph-full-body-meta-humans-and-skeletons |
Available in Mesh Morpher Graph and Mesh Morpher Studio.