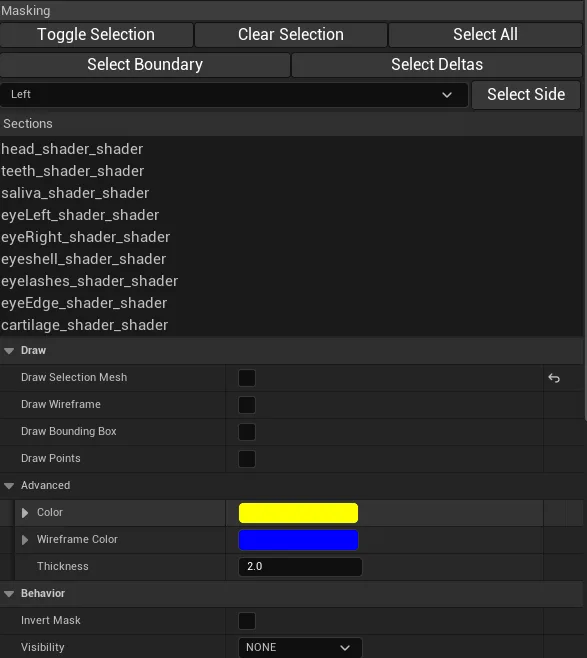
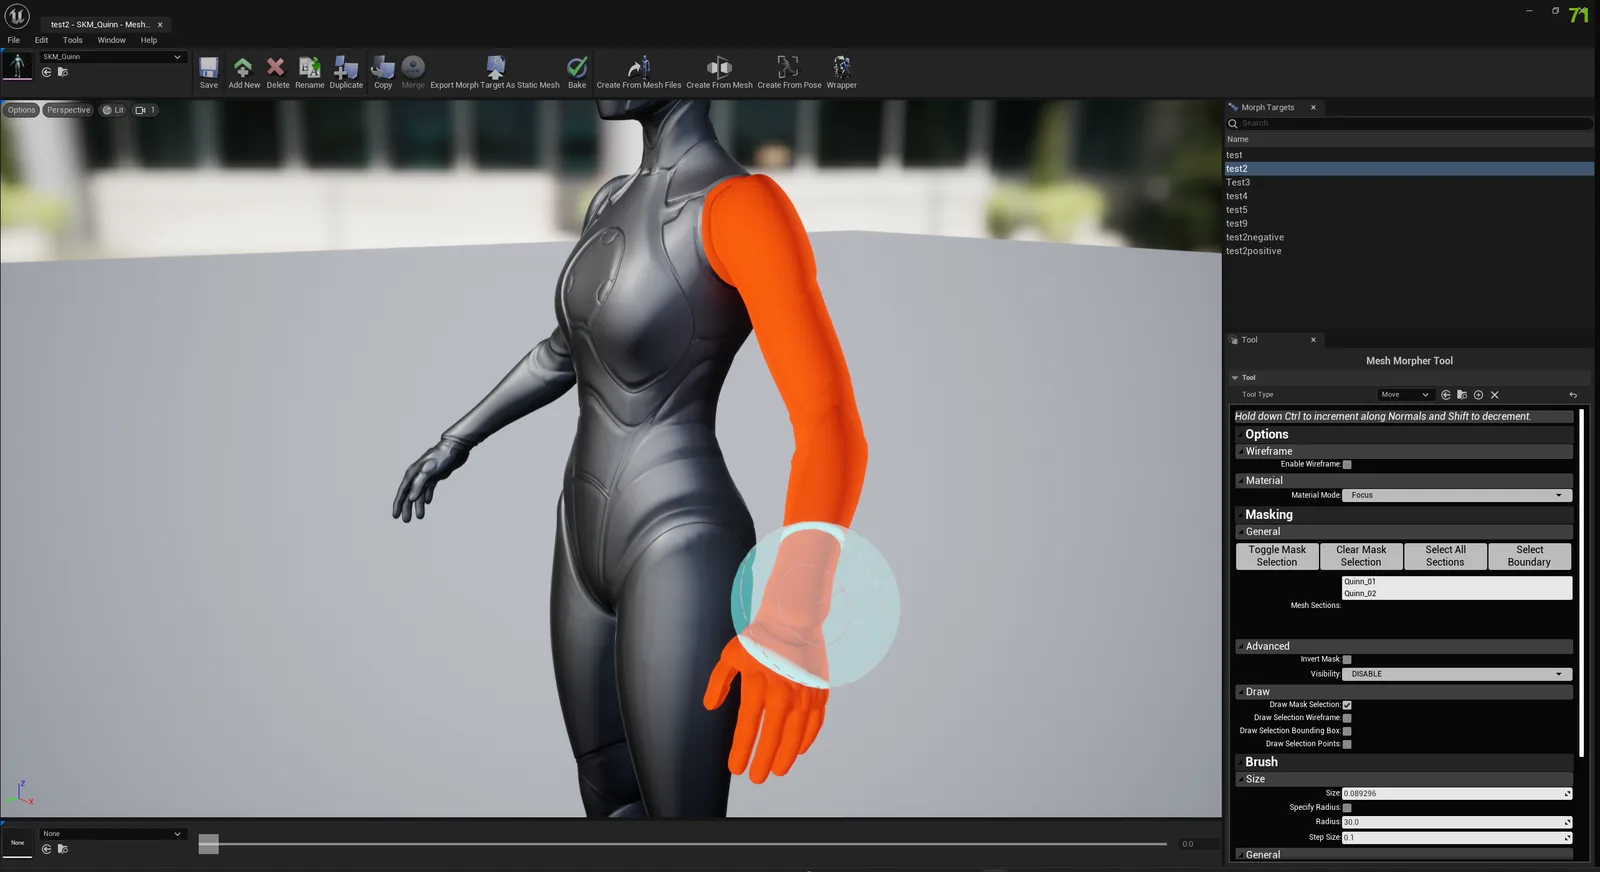
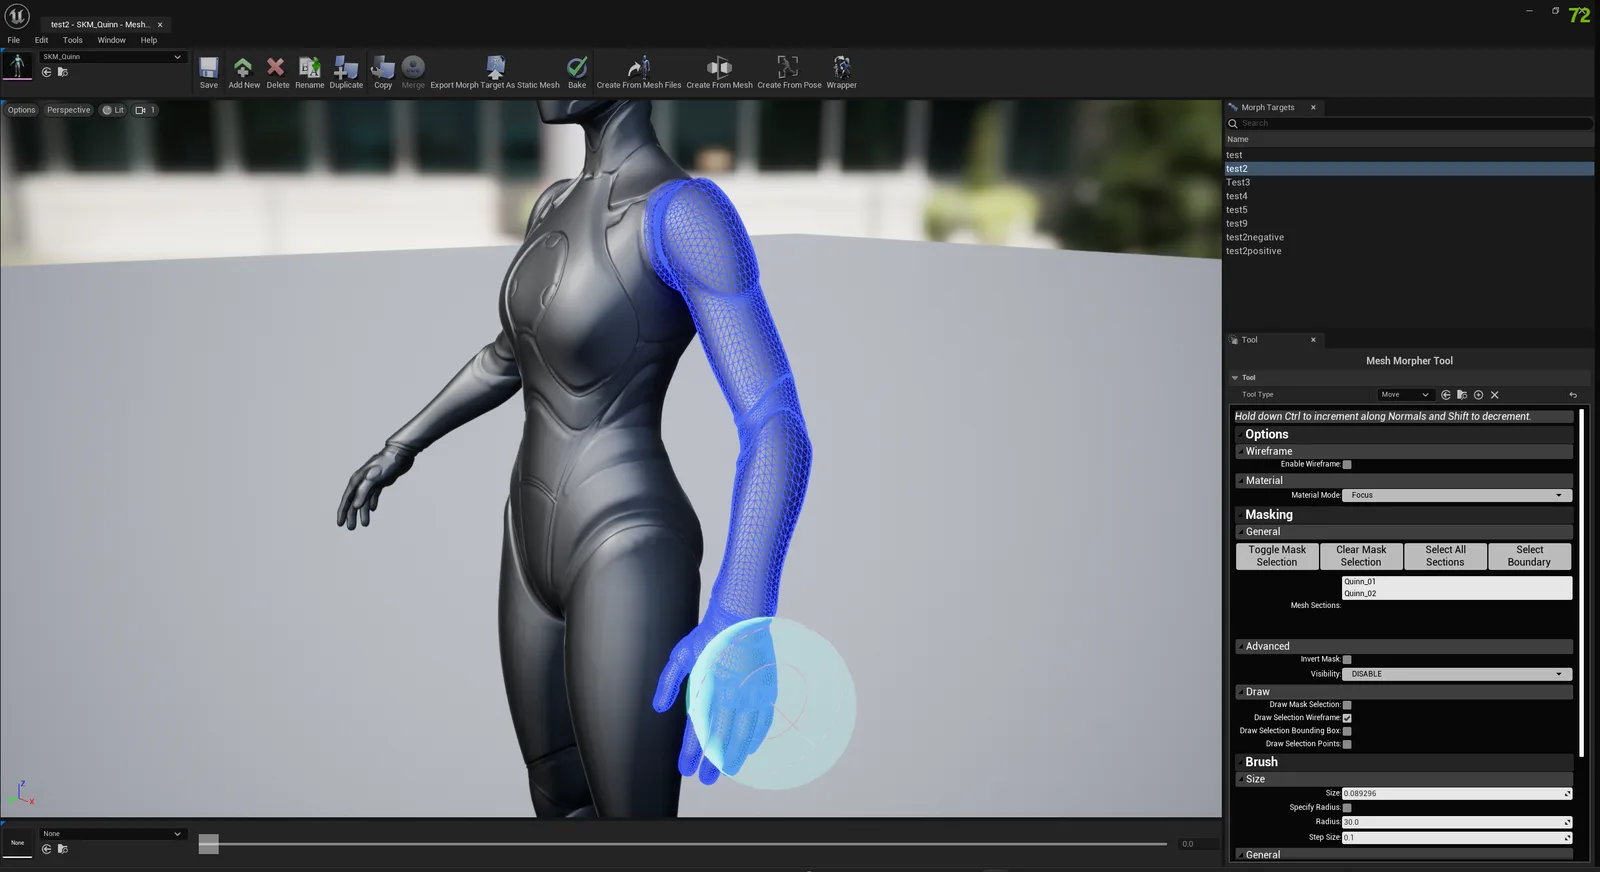
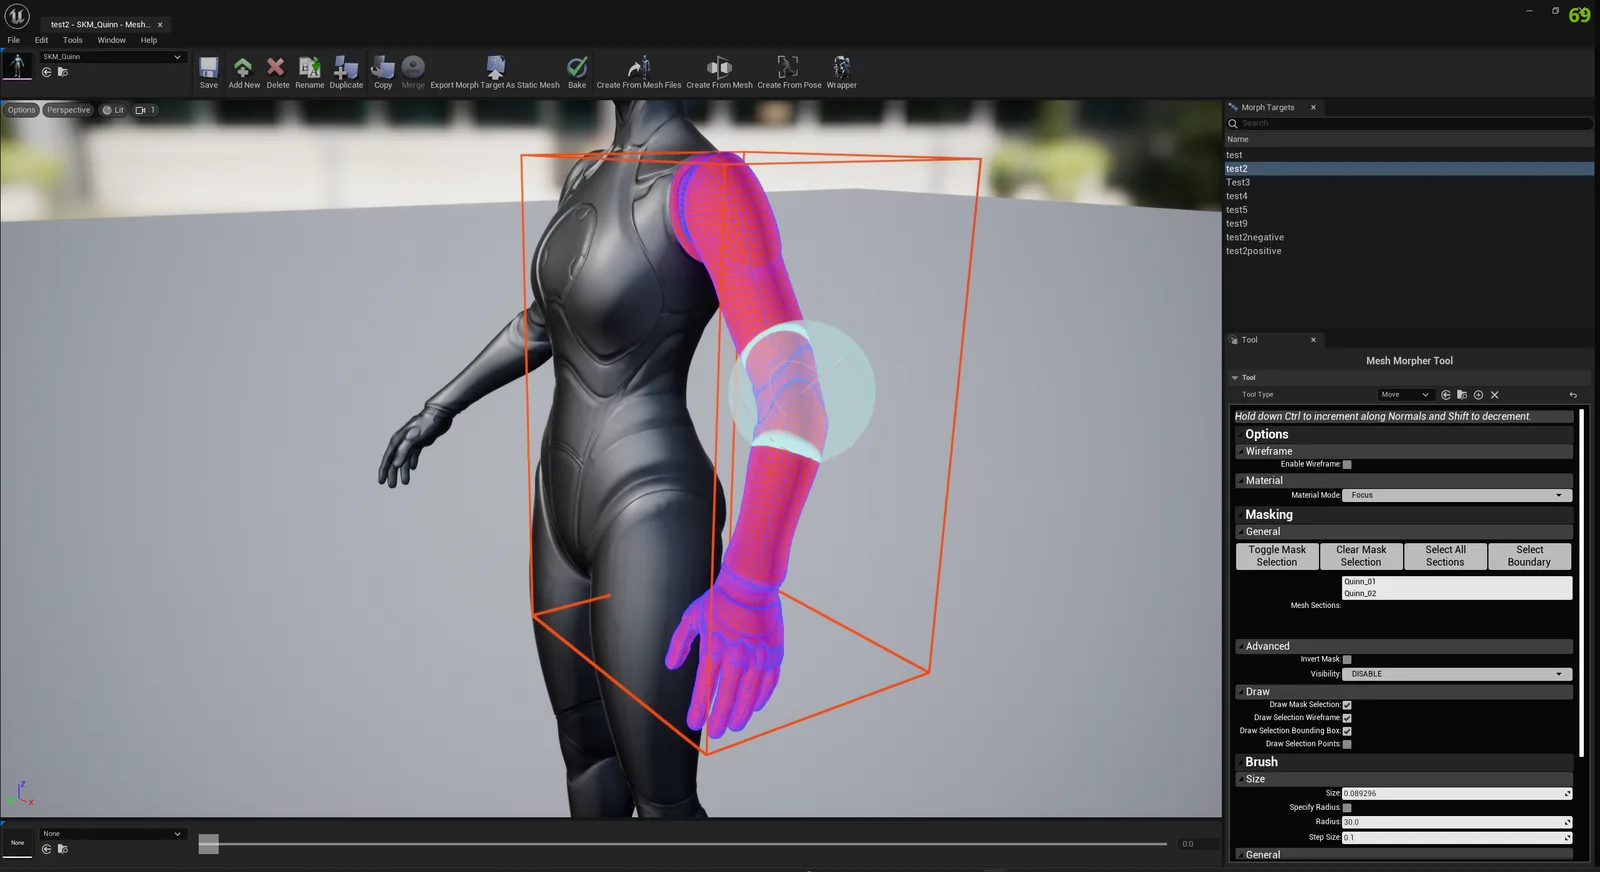
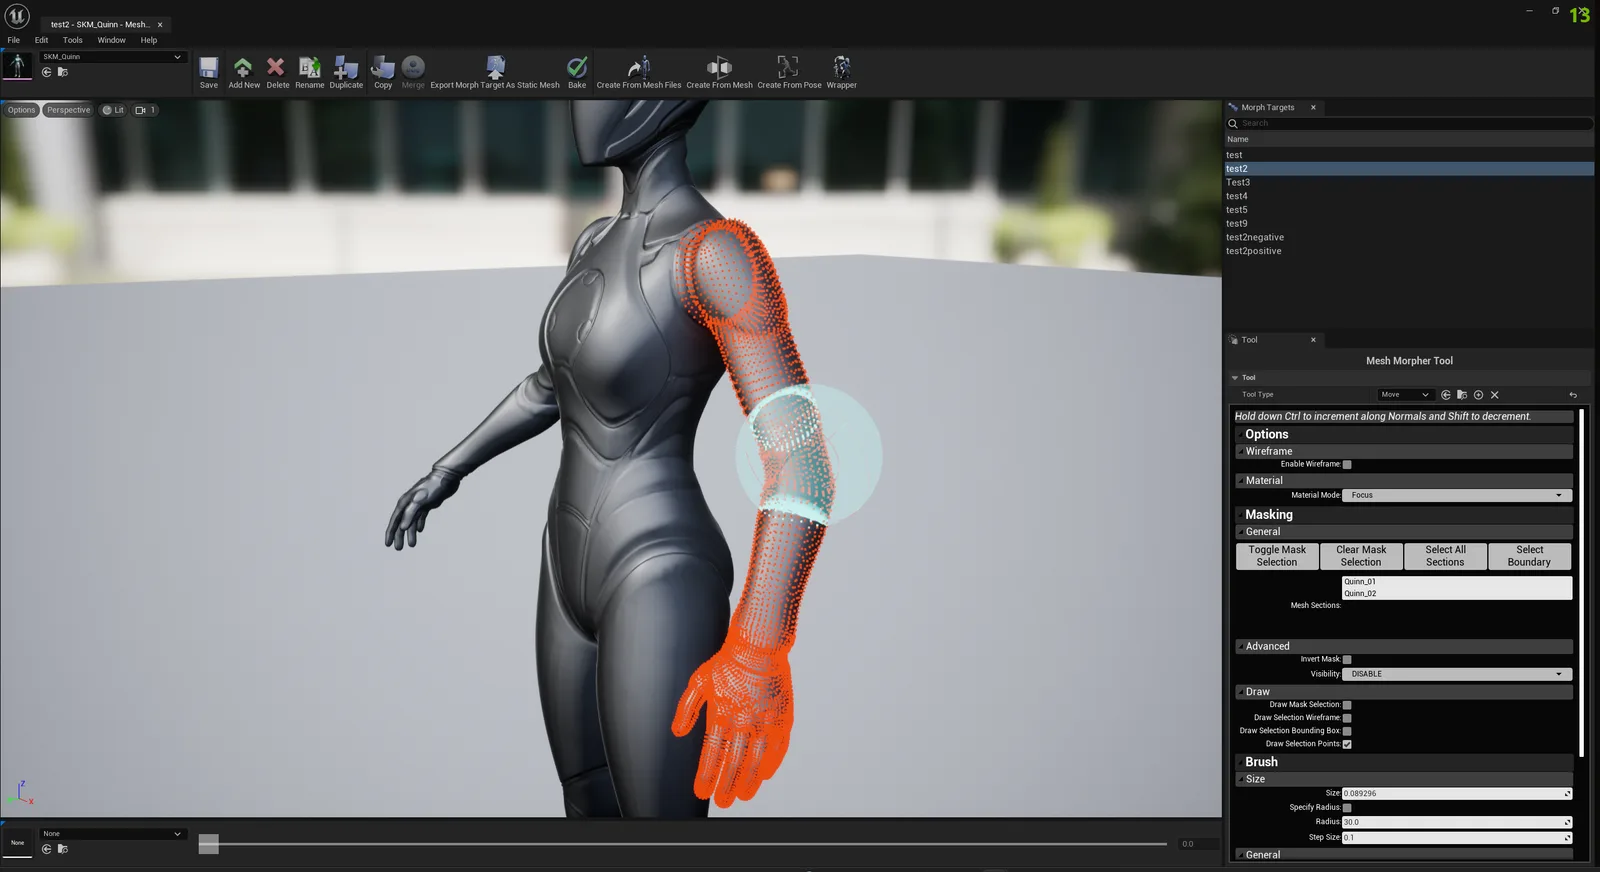
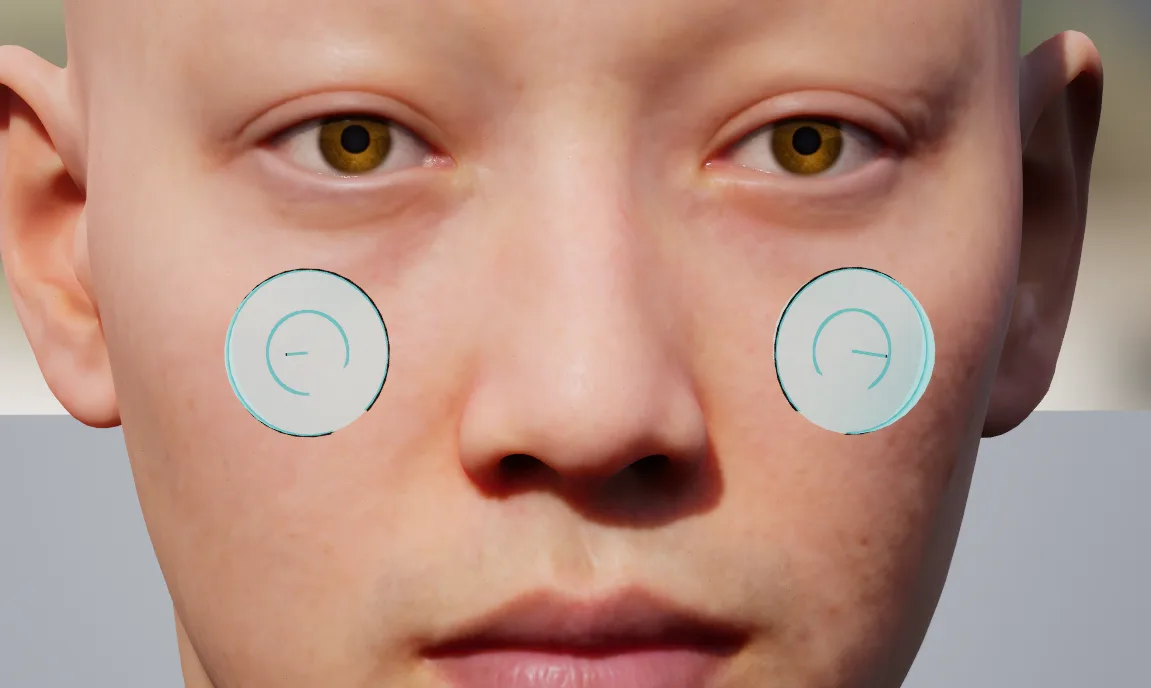



Allows users to toggle drawing selection on/off. When the Mask Selection Drawing is enabled, the notification area will display the following message
Clear Selection
Clears the current mask selection
Select All
Selects all sections in Mesh Sections
Select Boundary
Selects the boundary vertices of the mesh
Select Deltas
Selects affected vertices
Select Side
Allows users to select vertices located in the picked side.
Sections
Displays the current Sections available in the mesh data and allows users to select them. When selecting a section, previous masked vertices are cleared. Once a section is selected, toggling masking allows users to add additional masked vertices to the selection
Draw
Options
Description
Draw Selection Mesh
If enabled, the selection will be drawn as a mesh on top of the existing Mesh
Draw Wireframe
If enabled, draws the wireframe of the selection
Draw Bounding Box
If enabled, draws a bounding box around the selection
Draw Points
If enabled, draws the vertices points of the mask selection
Color
Set the color of the selection mesh
Wireframe Color
Set the color of the selection wireframe
Thickness
Set the thickness of the selection drawing elements
Behavior
Options
Description
Invert Mask
Inverts the behavior of the selection. If enabled, only the vertices that are not part of the selection can be modified. If disabled, users can only modify the vertices that are part of the selection.
Render Unselected
Whether to render unselected vertices
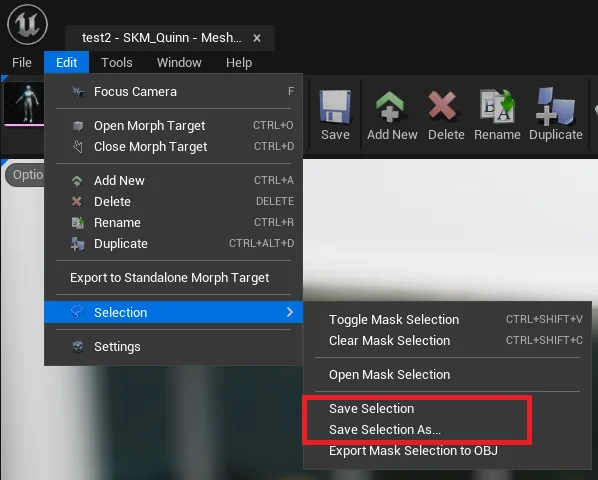
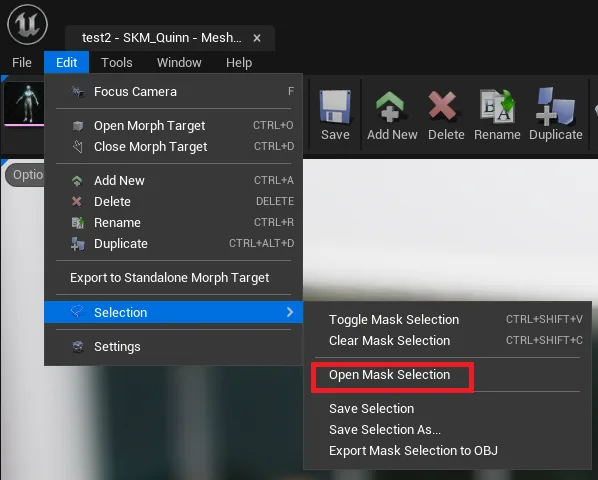
Users can save a mask selection to a UStandaloneMaskSelection asset to use it later whenever they want. To save a selection, users need to go to Edit->Selection and select Save Selection(enabled only if a selection is already open) or Save Selection As...
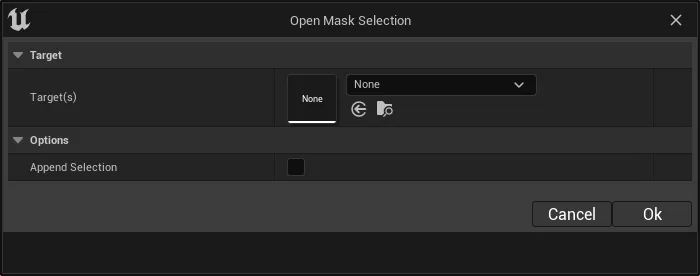
Users can also open a previously saved UStandaloneMaskSelection asset by going to Edit->Selection and clicking on Open Mask Selection which will open a asset browser.
Enabling Append Selection, will add the Mask Selection to the existing selection in Tools.
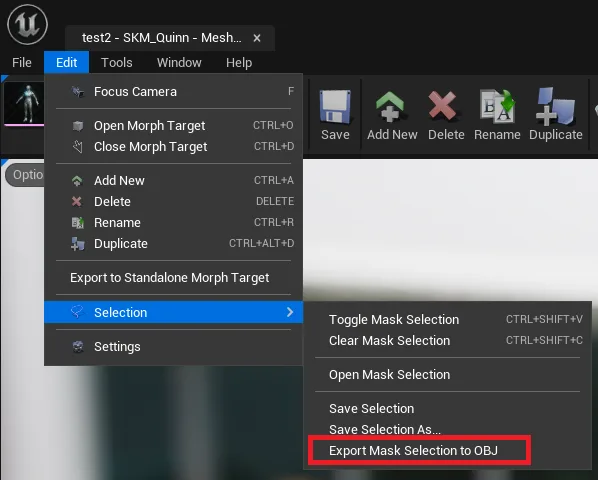
Users can also export a selection to an OBJ file by going to Edit->Selection and clicking on Export Mask Selection to OBJ...
When Masking is toggled on, the Tool is disabled, users can only draw mask selection.
Classic › Editor › Tools › General
Brush
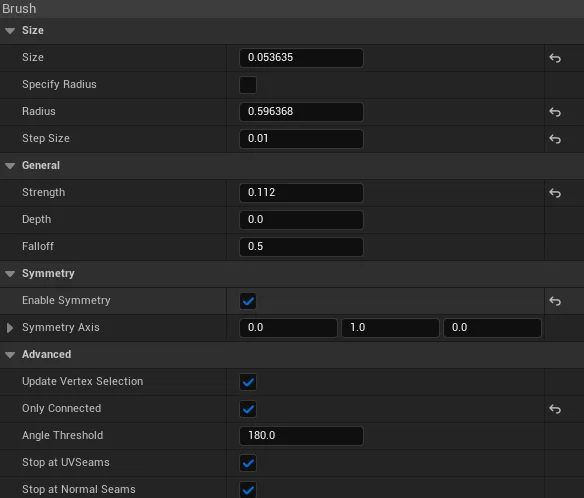
Mesh Morpher allows users to configure the Brush parameters to help them achieve wanted results with the Tools.
Options
Description
Size
Size of the brush indicator relative to the mesh size
Specify Radius
Users can also manually specify a brush radius by enabling this option
Radius
Radius of the brush
Step Size
By pressing [ and ] users can increase/decrease the brush size by the Step Size amount
Strength
Strength of the brush. Changes how impactful the brush actions are
Depth
Depth allow to change how deep the Brush gets placed on the Drag Plane, the initial brush positioning.
Falloff
Allows to change how impactful the brush can be on the outskirts.
Falloff Type
Falloff type applied on the outskirts of the brush.
Enable Symmetry
If enabled, a second brush indicator will appear that will be placed at 180 rotation to the Symmetry Axis.
Symmetry Axis
Mesh Morpher uses Y forward so the symmetric brush will be placed accordingly
Update Vertex Selection
Whether to update the vertex selection on brush move
Only Facing Camera
Whether to only hit and select vertices only facing camera.
Only Connected
Enabling this options disables Only Facing Camera option. This options allows users to select and use the brushes only on connected triangles.
Angle Threshold
The angle threshold at which the triangles are still marked as connected
Stop at UV Seams
Stops the iteration of connected triangles at UV seams
Stop at Normal Seams
Stops the iteration of connected triangles at Normal seams
Classic › Editor › Tools › General
Indicators
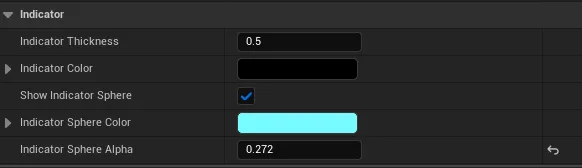
Mesh Morpher allows users to configure how Brush indicators are rendered. Changing thsese settings can increase visibility in certain cases and improve overall user experience.
Options
Description
Indicator Thickness
Set the Indicator thickness
Indicator Color
Set the Indicator color
Show Indicator Sphere
Whether to display Sphere Indicators
Indicator Sphere Color
Set the color of Sphere Indicators
Indicator Sphere Alpha
Set the opacity of Sphere Indicators
Classic › Editor › Tools › General
Shortcuts
Hold key (B) to dynamically change brush size moving mouse left and right 
Hold key (N) to dynamically change brush falloff moving mouse left and right
Hold key (T) to dynamically change brush strength moving mouse left and right
The values are increased by the Step Size value in Brush Settings.
Classic › Editor › Tools
Move Tool
Move Tool allows users to move around vertices using the brush.
Users can press Ctrl + Z to Undo and Ctrl + Y to Redo the operation.
Move tool has two additional modes that allow further functionality:
Holding Ctrl while moving the brush left and right will Move the vertices along the normal
Classic › Editor › Tools

Grab Tool
Grab Tool allows users to grab vertices using the brush.
Grab is an elastic deformation tool.
There are several options that affect how Grab Tool works.
Option
Description
Type
Grab Type
Stiffness
How much the mesh resists shear
Incompressiblity
How compressible the spatial region is: 1 - 2 x Poisson ratio
IntegrationTime
Integration Time for elasticity
BrushSteps
Integration steps
Users can press Ctrl + Z to Undo and Ctrl + Y to Redo the operation.
Classic › Editor › Tools


Sculpt Tool
Sculpt Tool allows users to Sculpt vertices using the sculpt brush.
Holding Ctrl will invert the Sculpt effect to the vertices.
Users can press Ctrl + Z to Undo and Ctrl + Y to Redo the operation.
Classic › Editor › Tools

Smooth Tool
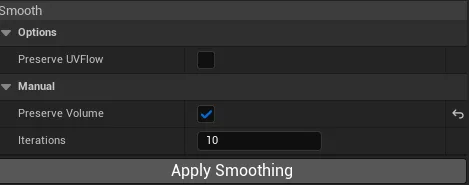
Smooth Tool allows users to Smooth vertices using the sculpt brush.
There are two types of Smoothing. by Preserving UV flow or if disabled then the smoothing is uniform.
Smooth can also be applied to the entire mesh or a mask selection by click on Apply Smoothing.
Options
Description
Preserve Volume
Reprojects the smoothed vertices maintaining volume.
Iterations
Iterations count performed by Apply Smoothing(not by brush sculpting)
Users can press Ctrl + Z to Undo and Ctrl + Y to Redo the operation.
Classic › Editor › Tools
Inflate Tool


Inflate Tool allows users to inflate vertices using the sculpt brush.
Holding Ctrl will deflate(inverted effect) the vertices.
Users can press Ctrl + Z to Undo and Ctrl + Y to Redo the operation.
Classic › Editor › Tools

Pinch Tool

Pinch Tool allows users to Pinch vertices using the sculpt brush.
Holding Ctrl will invert the pinch effect to the vertices.
Users can press Ctrl + Z to Undo and Ctrl + Y to Redo the operation.
Classic › Editor › Tools

Plane Tool
Plane Tool allows users to flatten vertices on the brush plane.
Users can press Ctrl + Z to Undo and Ctrl + Y to Redo the operation.
Classic › Editor › Tools

Flatten Tool
Flatten Tool allows users to flatten vertices using the sculpt brush.
Users can press Ctrl + Z to Undo and Ctrl + Y to Redo the operation.
Classic › Editor › Tools

Restore Tool
Restore Tool allows users to Restore vertices using the brush to their initial(original) position.
Restore is a very powerful tool in Mesh Morpher and it goes beyond using the brush to restore to original positions.
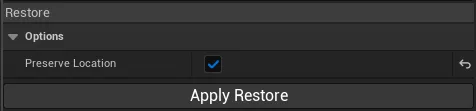
Users can also select a Mask and Apply Restore to the mask selection or the entire mesh. Preserve Location option restore the vertices while also keeping the bounding box centered at the same location. Preserve Location works with mask selections.
Users can also restore selected sides of the mesh.
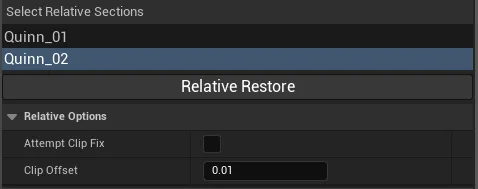
Relative Restore allows users to make a section selection and a relative section selection and restore relatively.
The options here are straight forward.
Option
Description
Attempt Clip Fix
Whether to attempt fixing vertex penetrations
Clip Offset
The maximum threshold value we move the vertices to prevent clipping.
Users can press Ctrl + Z to Undo and Ctrl + Y to Redo the operation.


Scale Tool allows users to scale vertices using the brush.
Scale is an elastic deformation tool.
Holding Ctrl will invert the Scale effect to the vertices.
There are several options that affect how Scale Tool works.
Option
Description
Stiffness
How much the mesh resists shear
Incompressiblity
How compressible the spatial region is: 1 - 2 x Poisson ratio
IntegrationTime
Integration Time for elasticity
BrushSteps
Integration steps
Users can press Ctrl + Z to Undo and Ctrl + Y to Redo the operation.
Classic › Editor › Tools
Twist Tool
Twist Tool allows users to twist vertices using the brush.
Twist is an elastic deformation tool.
There are several options that affect how Twist Tool works.
Option
Description
Type
Twist Type
Stiffness
How much the mesh resists shear
Incompressiblity
How compressible the spatial region is: 1 - 2 x Poisson ratio
IntegrationTime
Integration Time for elasticity
BrushSteps
Integration steps
Users can press Ctrl + Z to Undo and Ctrl + Y to Redo the operation.
Classic › Editor › Tools
Select Pose
Classic › Editor › Tools
Reference Skeletal Mesh
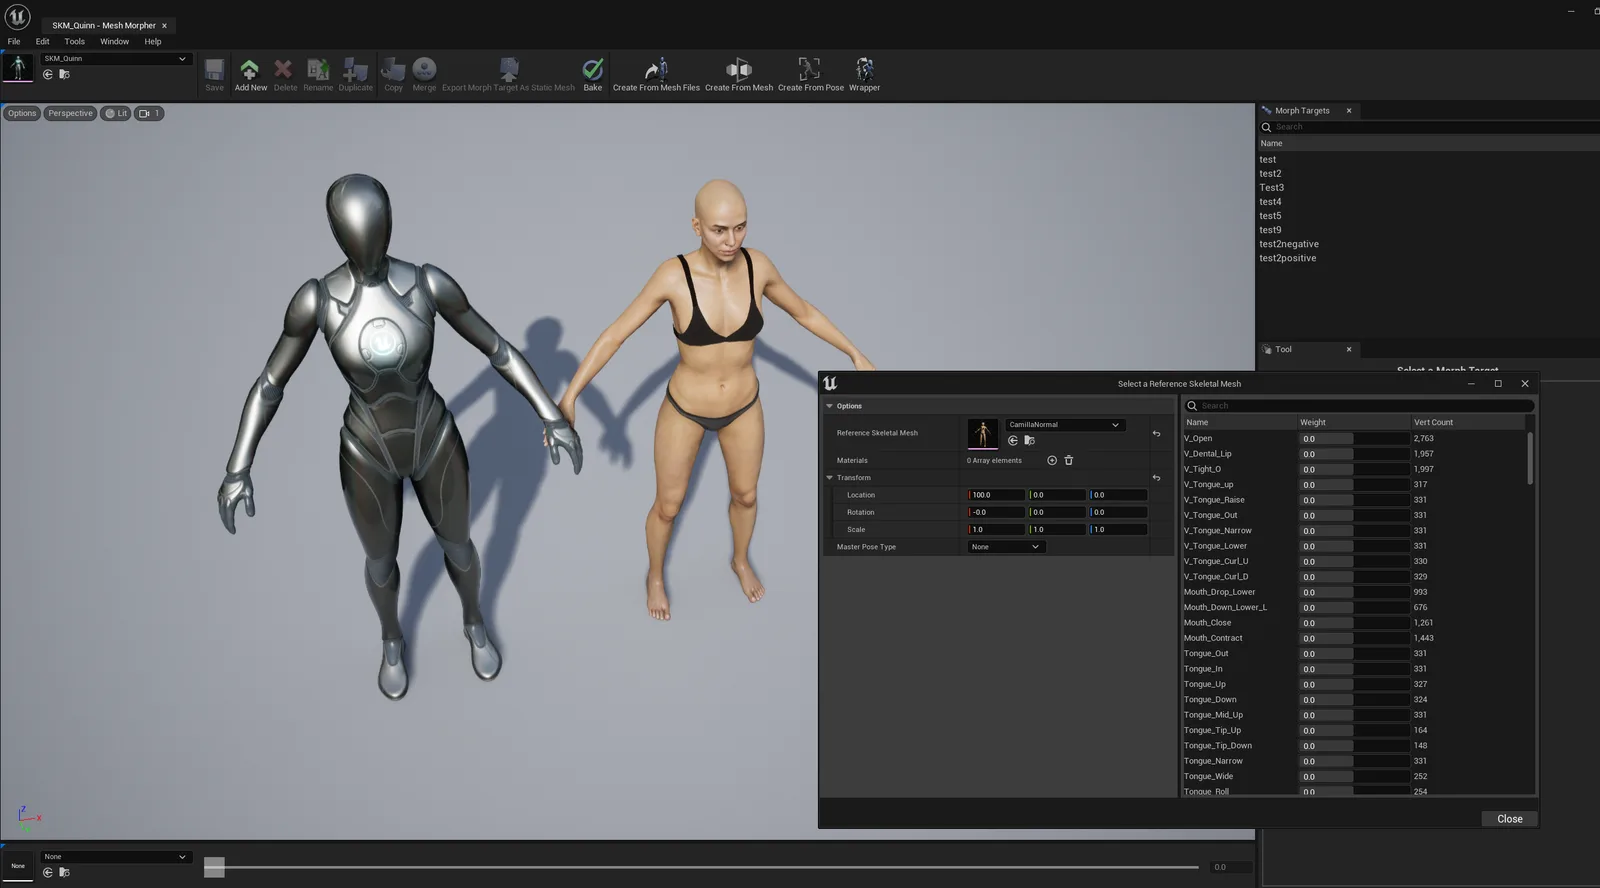
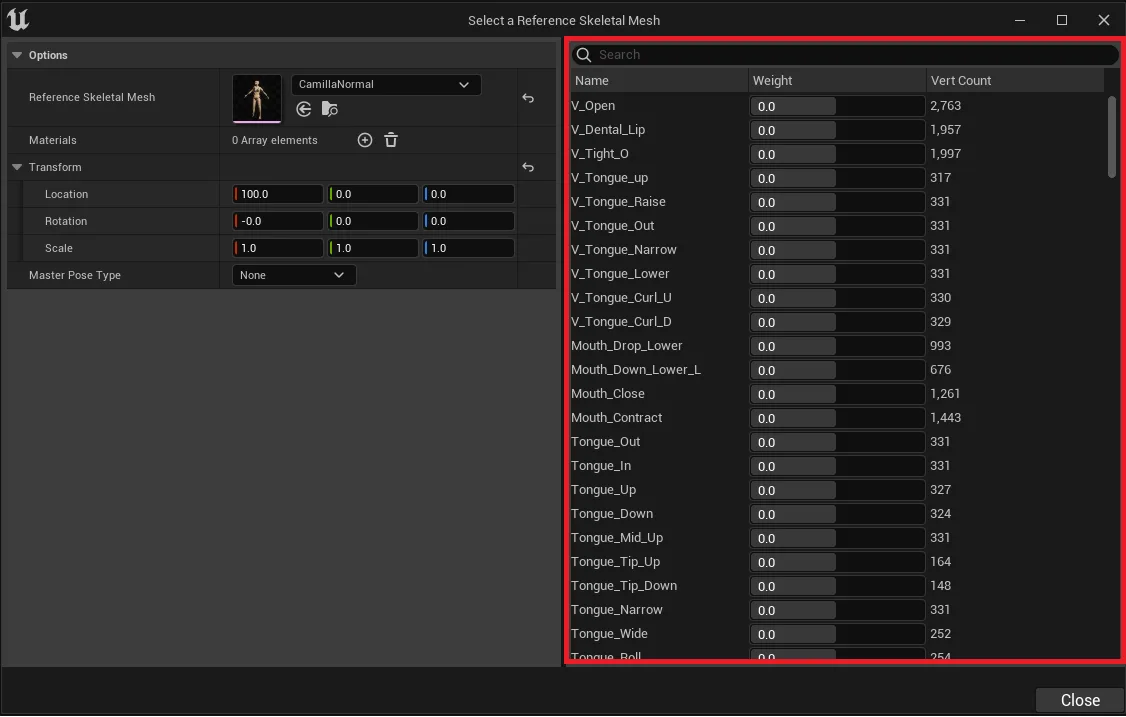
Mesh Morpher allows users to select a Reference Mesh in order to help them with Sculpting Tools.
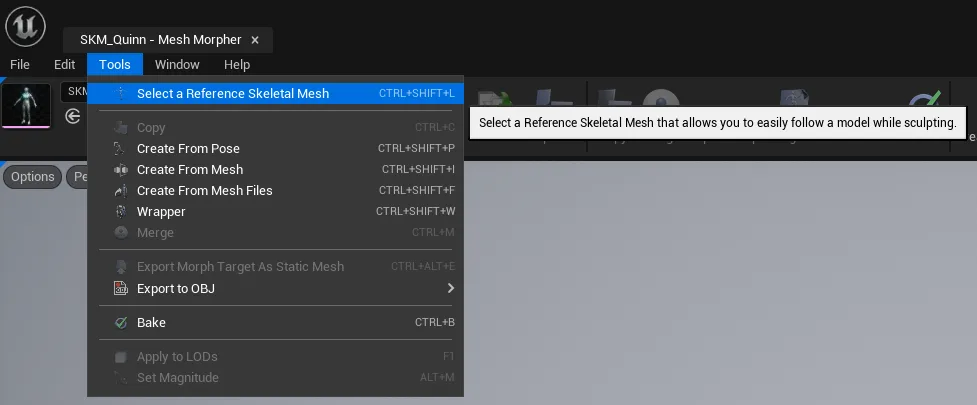
Reference Skeletal Mesh Window can be open by navigating to Tools drop down menu and clicking on Select a Reference Skeletal Mesh.
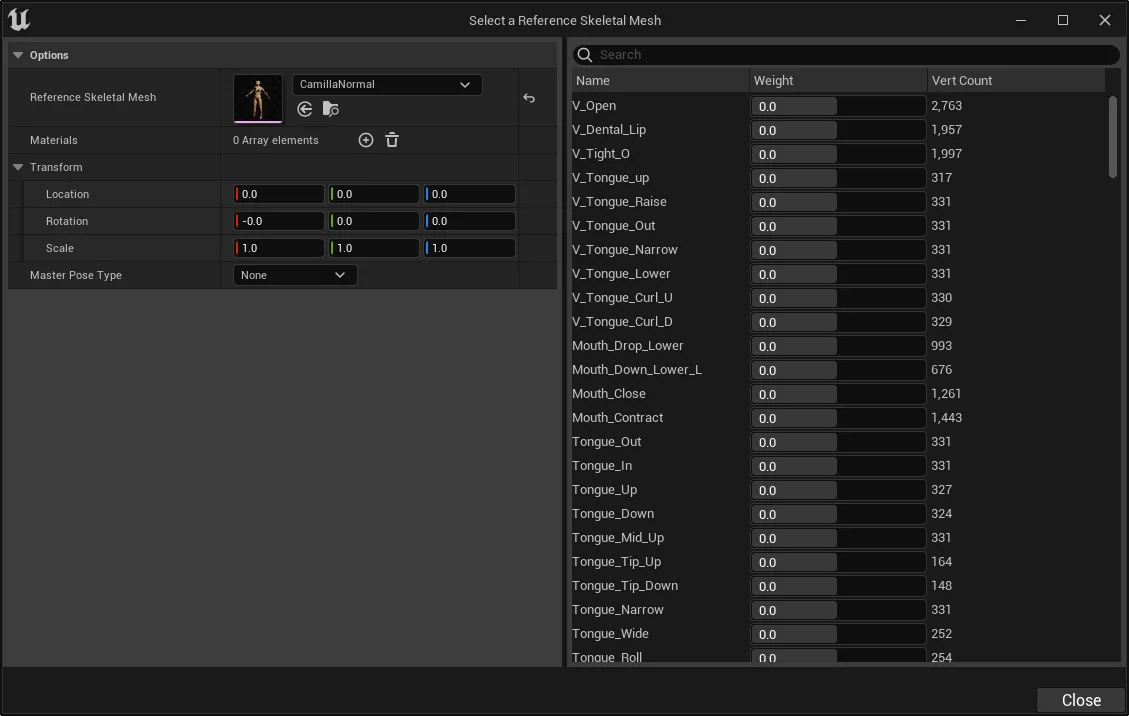
Once the Select a Reference Skeletal Mesh button is pressed, a dialog box will open where users can select several options.
Options
Description
Reference Skeletal Mesh
The selected Reference Skeletal Mesh
Materials
Materials can be manually assigned to the Reference Skeletal Mesh. If none, then the mesh's materials will be used.
Transform
Transformation that can be applied to the Reference Skeletal Mesh.
Master Pose Type
There are 3 types of Master Pose. None: No Master Pose Main: Reference Skeletal Mesh Component has the Main Skeletal Mesh Component as Master Pose Reference: Main Skeletal Mesh Component has the Reference Skeletal Mesh Component as Master Pose
Users can also enable Morph Targets on the Reference Skeletal Mesh from the right Morph Target List.
Setting the Master Pose component to "Reference" allows to create Corrective Morph Targets which can be used to achieve various things like fitting clothing to other body types.